
To use MsgClub’s WordPress integration, you must have an active online store powered by Woocomerce. If you don’t have one yet, please complete your store setup first.
Once your site is ready, follow the steps below to set up your MsgClub account and complete the integration.
Part 1: Create and Set Up Your MsgClub Account
Before you begin, ensure you have an active eCommerce website powered by Woocomerce. Without it, this integration cannot proceed.
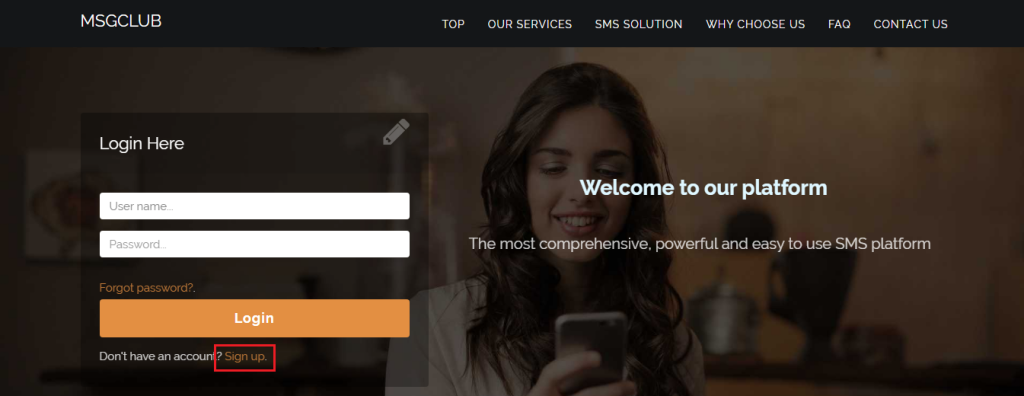
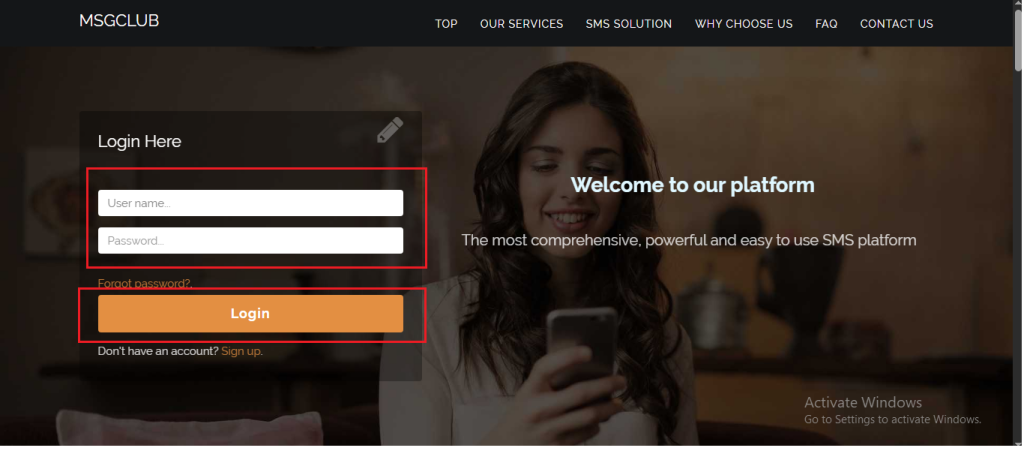
Step 1: Go to MsgClub Cloud Communication Platform and click on the Sign Up button.
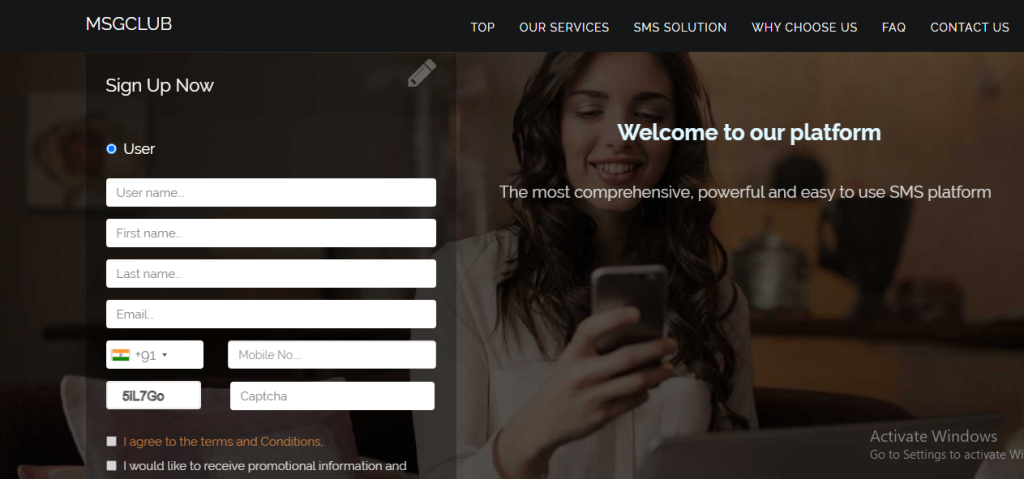
Step 2: On the Sign-Up page, fill in the following details:
- Username
- First Name
- Last Name
- Email ID
- Mobile Number
- Captcha
Accept the Terms and Conditions to proceed with the sign-up process.
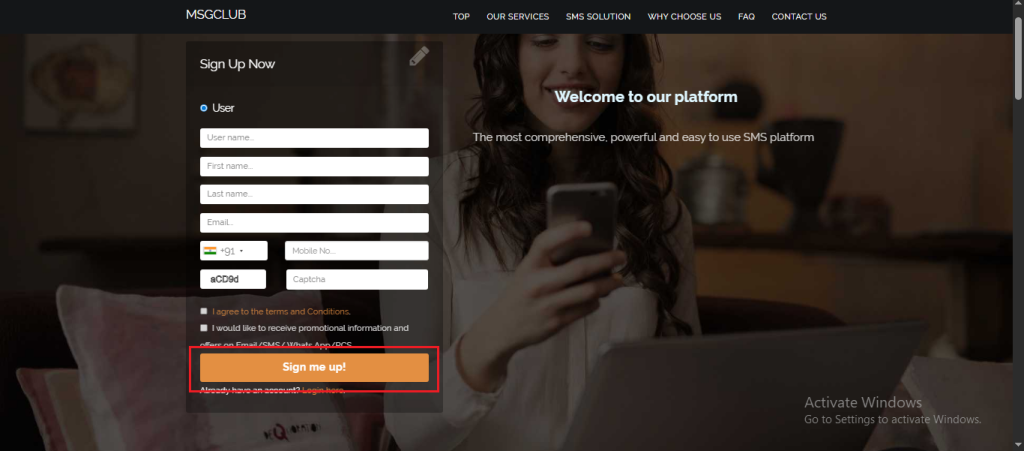
Step 3: Click the Sign Me Up button after filling out all required fields.
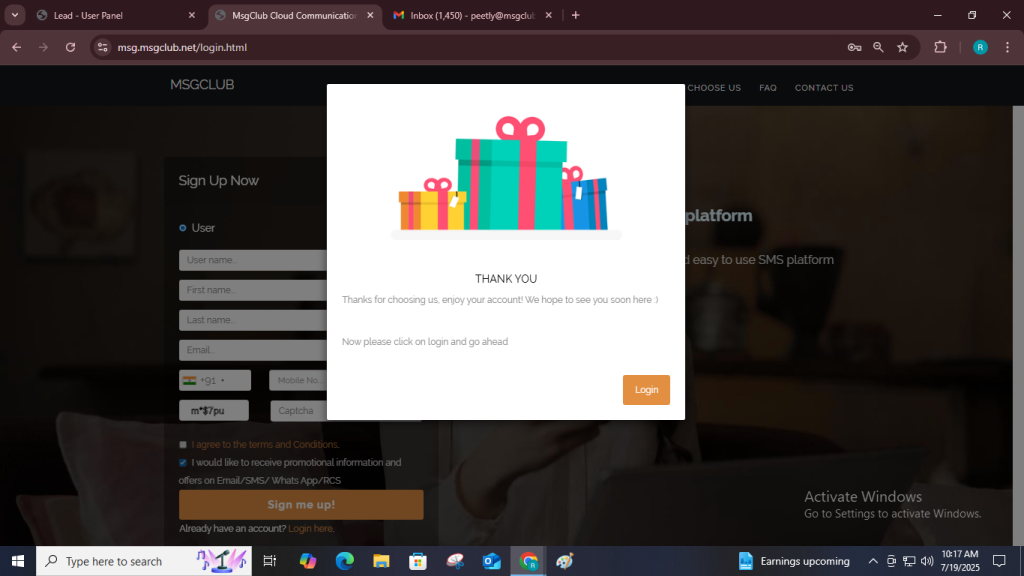
Step 4: After you sign up, you’ll be redirected to the login page Log in using your credentials.
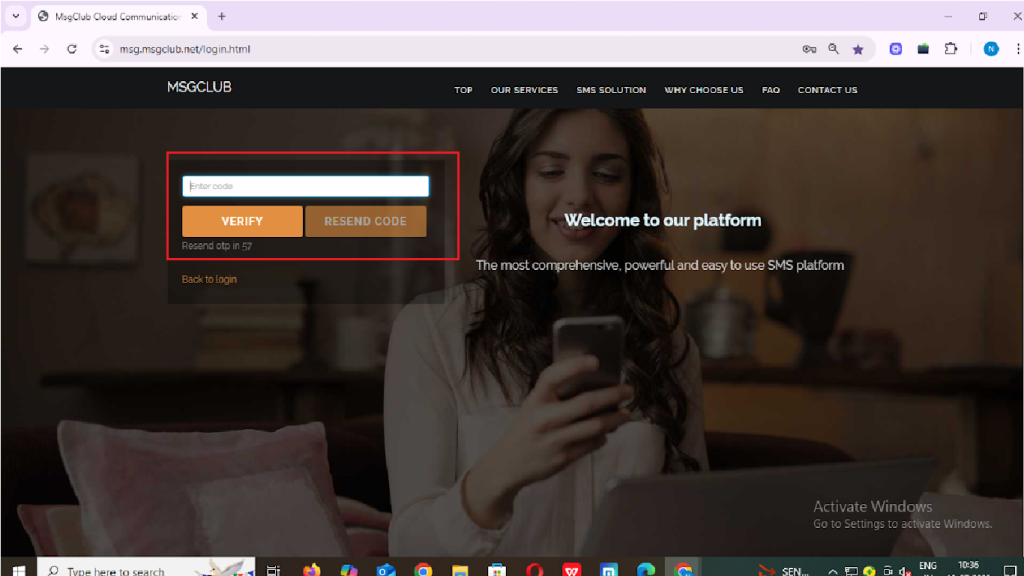
Step 5: You’ll receive an OTP on your registered mobile number. Enter the OTP and click Verify.
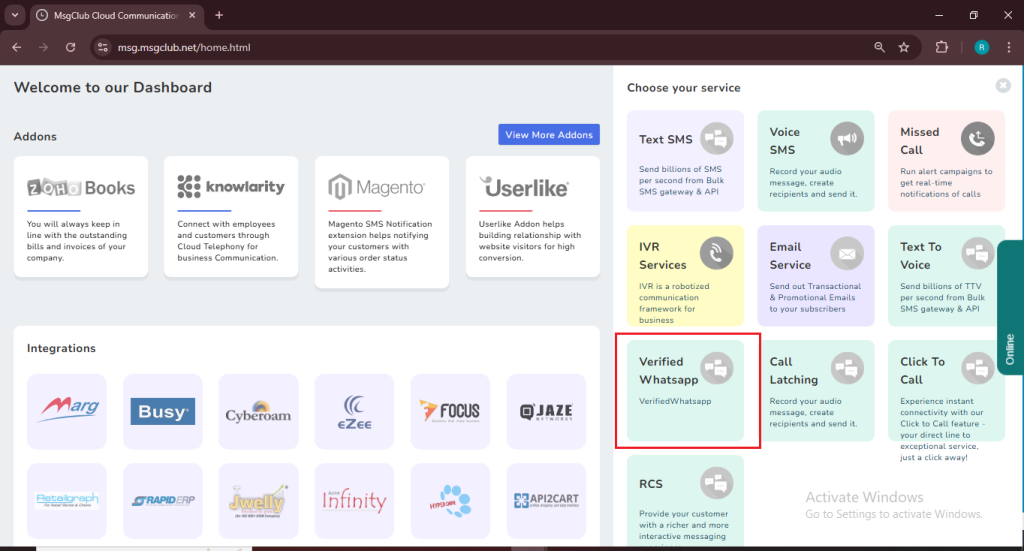
Step 6 : Once verified, you’ll be redirected to the MsgClub dashboard, where you can select the Verified WhatsApp Service.
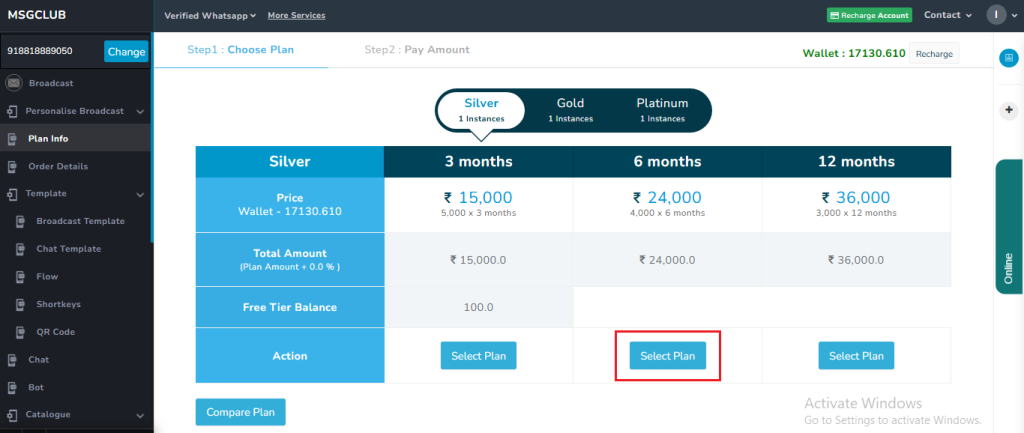
Step 7: MsgClub notifies you with a pop-up that no plan is selected and then redirects you to the “Plan Info” page to choose and purchase one.
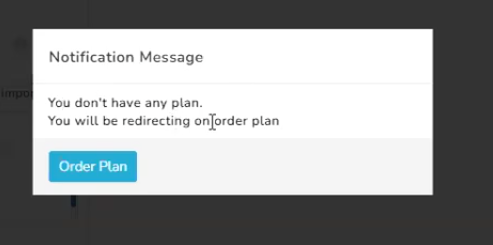
Note: You must purchase a plan before proceeding with the integration, as you cannot send any messages without a license.
Step 8: After ordering your plan, you need to configure your WhatsApp number — the number from which you’ll send WhatsApp messages. To do this, you must also complete the Embedded Signup process and add a payment card in Meta Business Manager.
Step 9: Once you’ve completed all the setup, you can proceed with the WordPress integration.
Part 2: WordPress Integration Steps in MsgClub
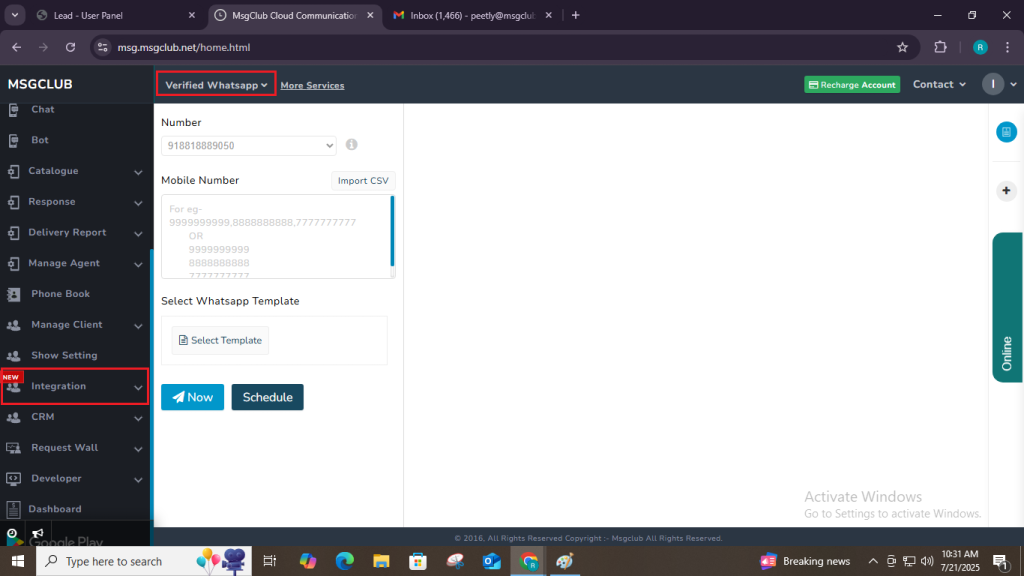
Step 1: In the Verified WhatsApp Service section of your MsgClub dashboard, go to Integration from the left-hand menu, then select WordPress.
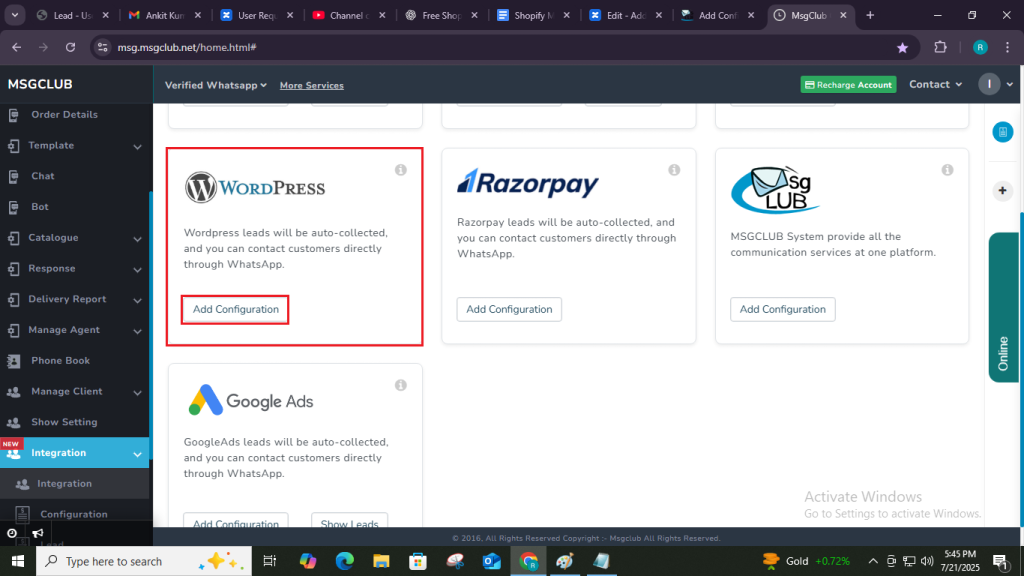
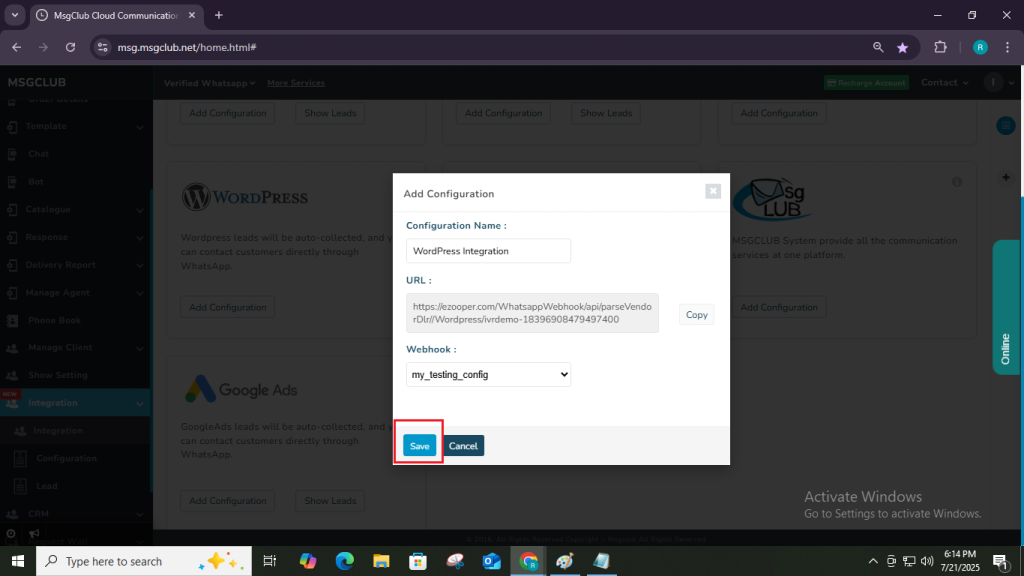
Step 2: Click the Add Configuration button to open the configuration form.

Step 3: In the Add Configuration popup, you need to fill in the following:
- Configuration Name: Write your setup name and make it unique.
- URL: MsgClub will automatically generate a unique URL for your WooCommerce store, which connects MsgClub with your WordPress account. You need to paste this URL into your WooCommerce panel to complete the integration process.
- Webhook (Select One API): You need to select this API which is created by the MsgClub. It automatically sends messages to customers when predefined events are triggered.
For example – when a customer’s order is fulfilled, the API will send them an order fulfillment WhatsApp message.
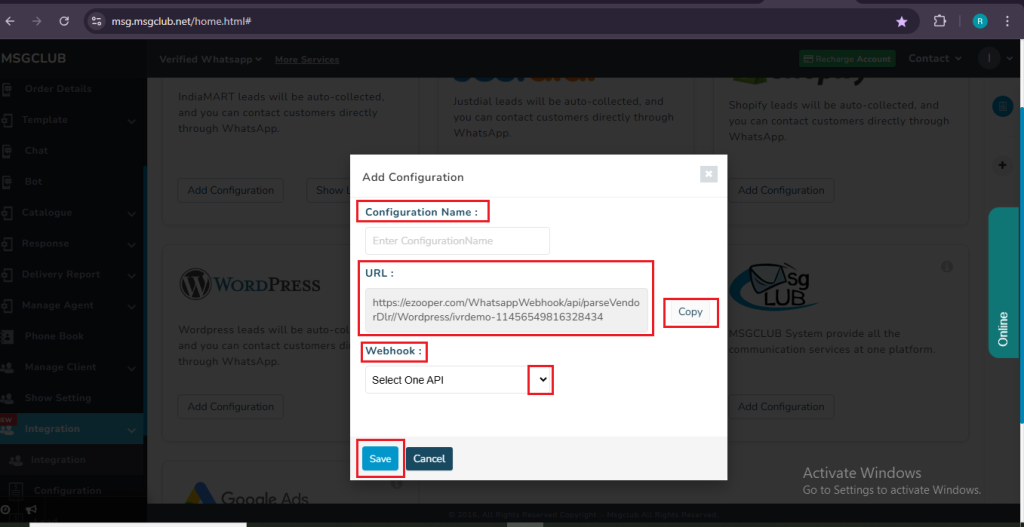
Note: MsgClub provides a pre-configured One API that automatically triggers your WhatsApp message templates on order event after setup.
Step 4: Click Save to activate your integration setup.
Part 3: What to Do with the Webhook URL
Once the above step is complete then : –
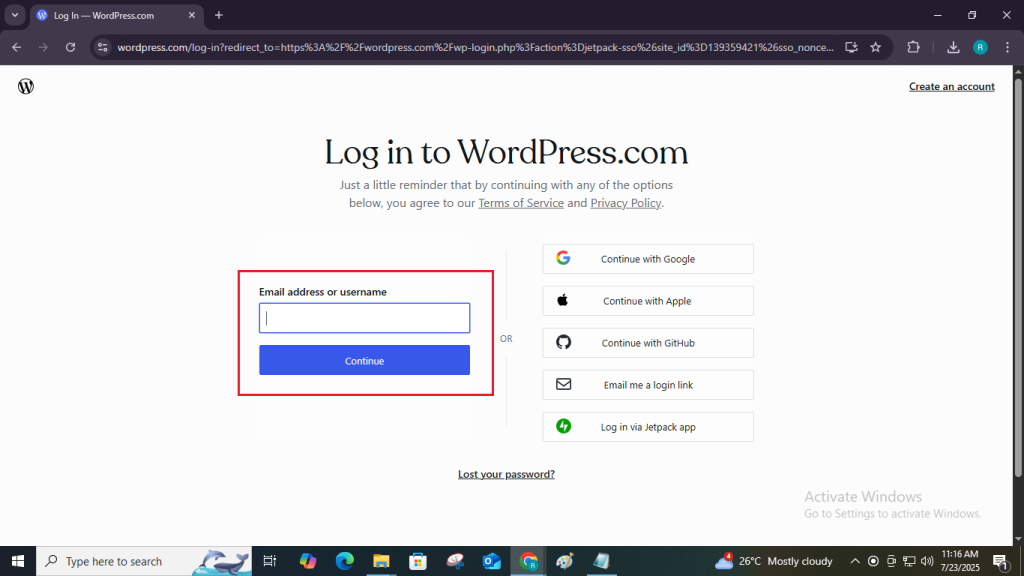
Step 1: Log in to your WordPress account
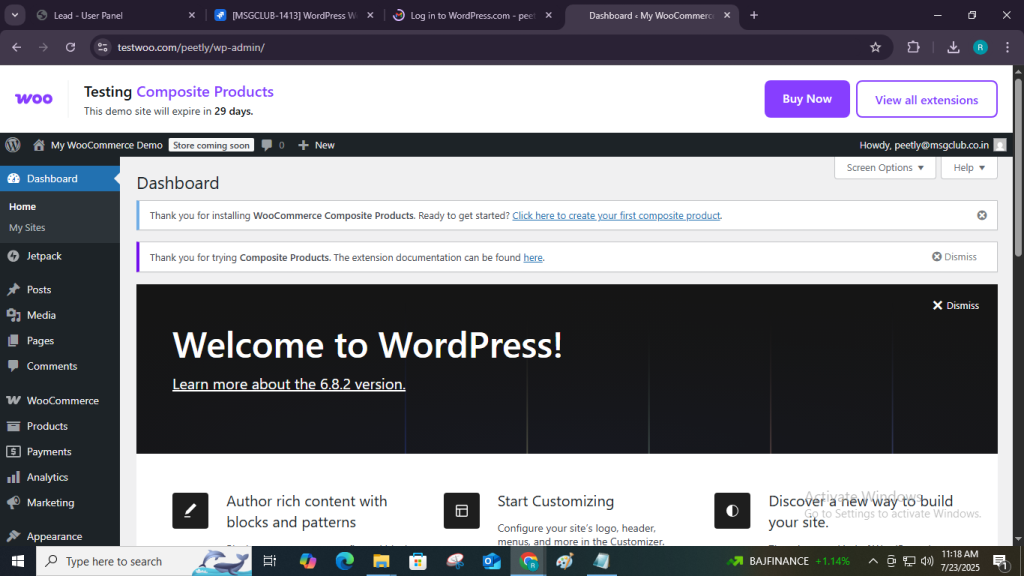
Step 2: Once you log in to the website, the following page will open.
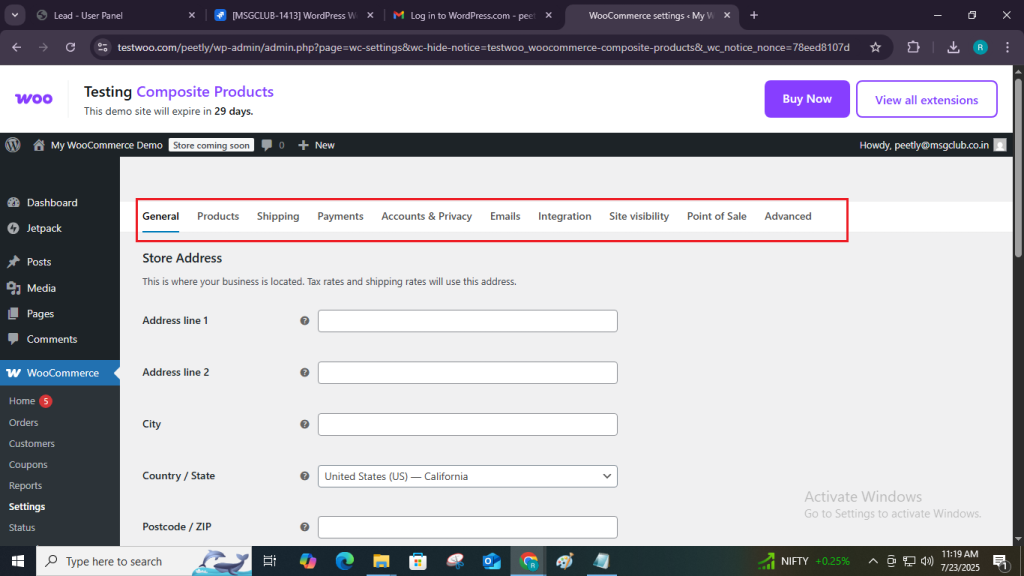
Step 3: From the left sidebar, click on the “WooCommerce” option.
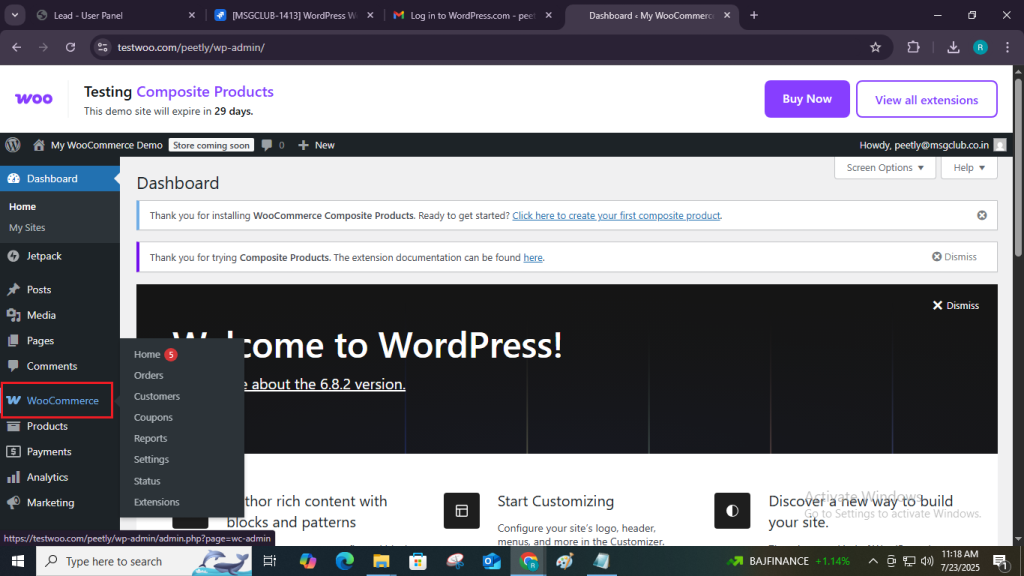
Step 4: Inside the WooCommerce section, select the “Settings” option.

Step 5: Once you click on the “Settings” option, a page will open with multiple tabs.
Step 6: From the available tabs, click on the “Advanced” tab option.
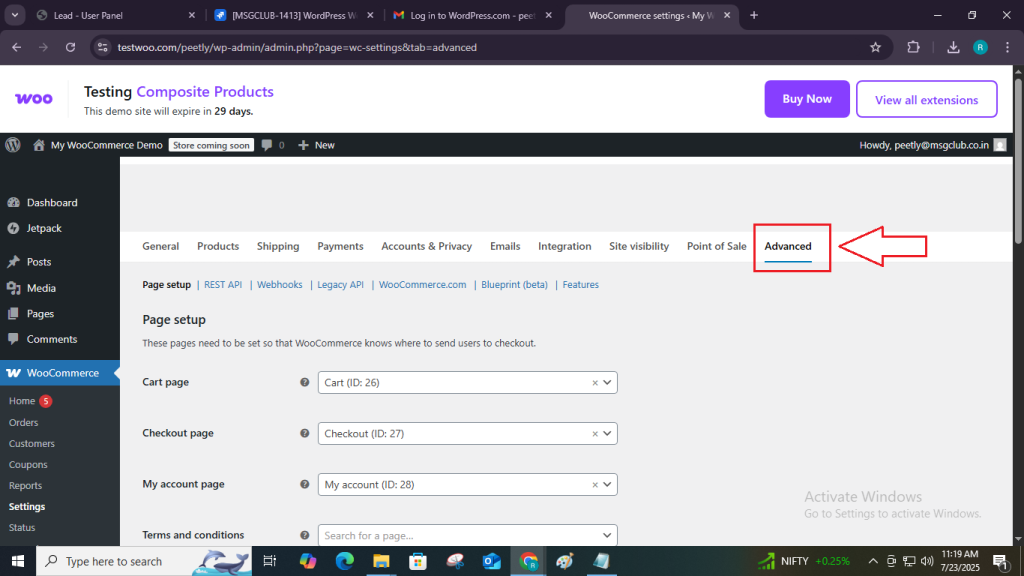
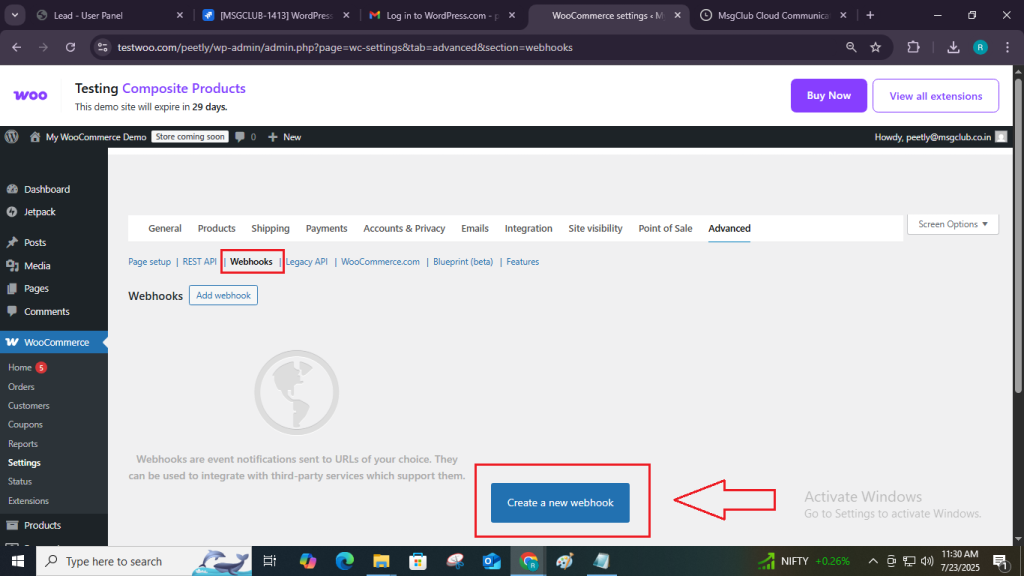
Step 7: In the Advanced tab, you will see multiple options. Click on the “Webhooks” option.
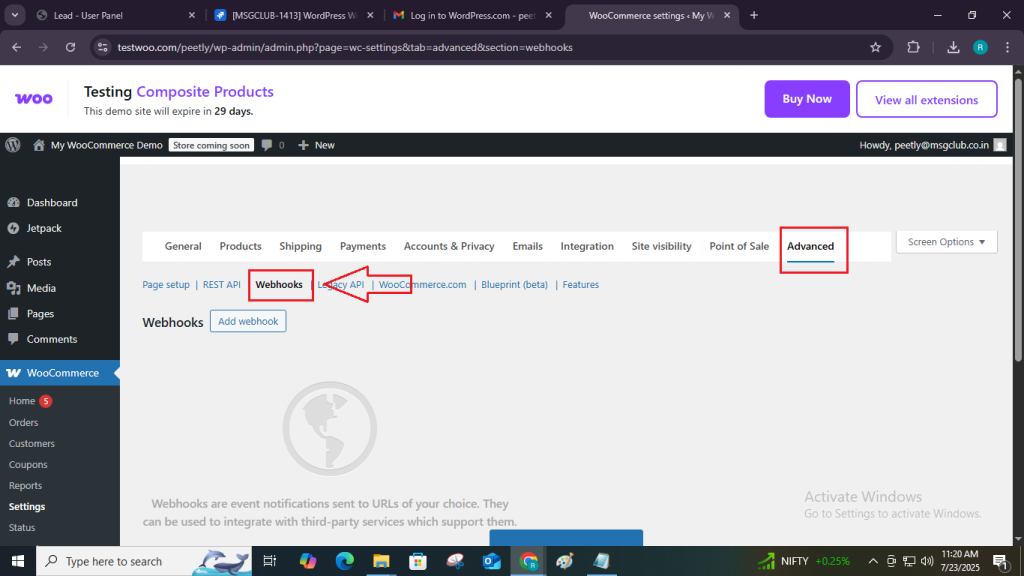
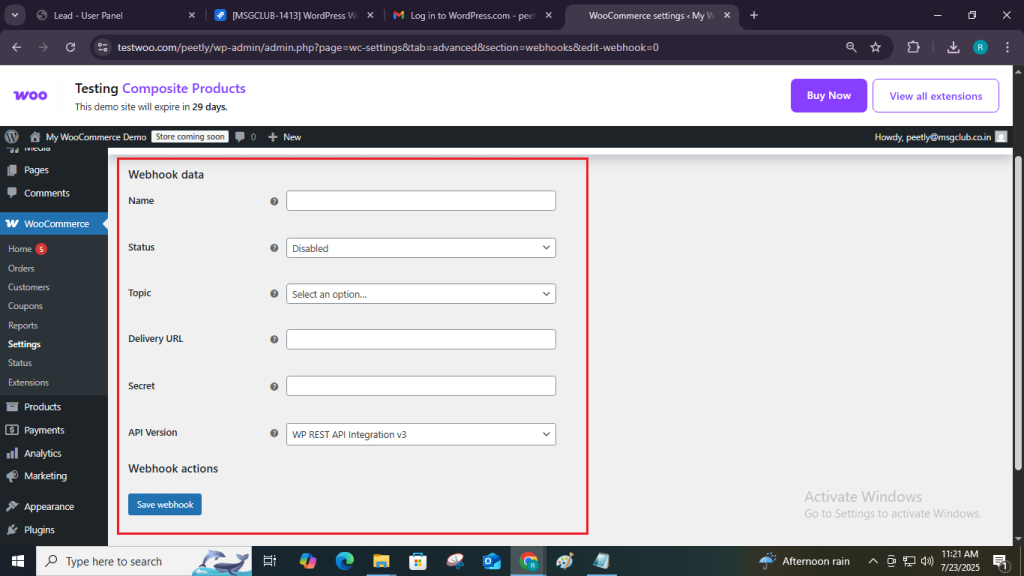
Step 8: On the Webhooks page, click the “Create Webhook” button in the center.
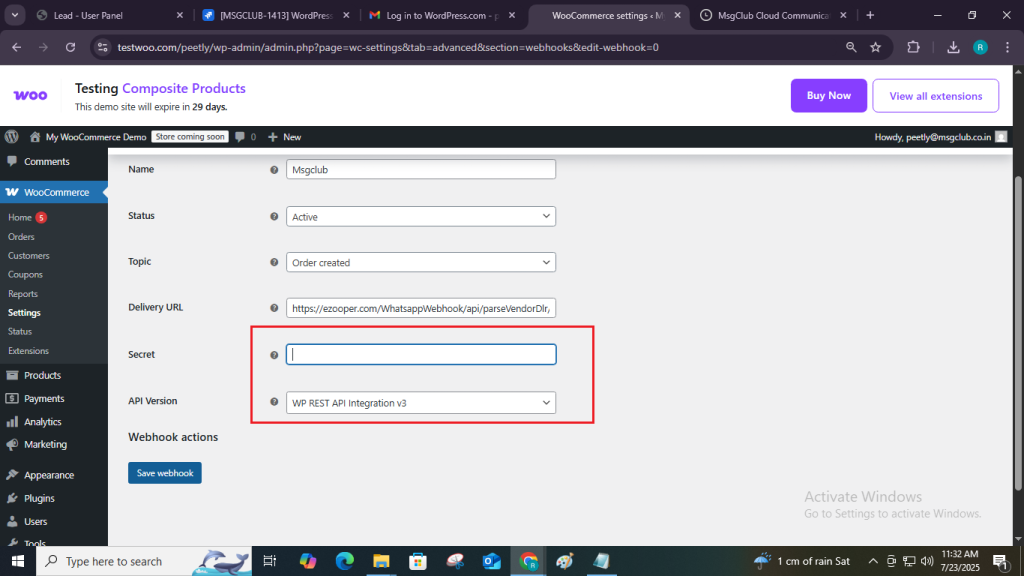
Step 9: On the Create Webhook page, fill in the required details to set up your webhook.
- Name: Choose a name (e.g., MsgClub).
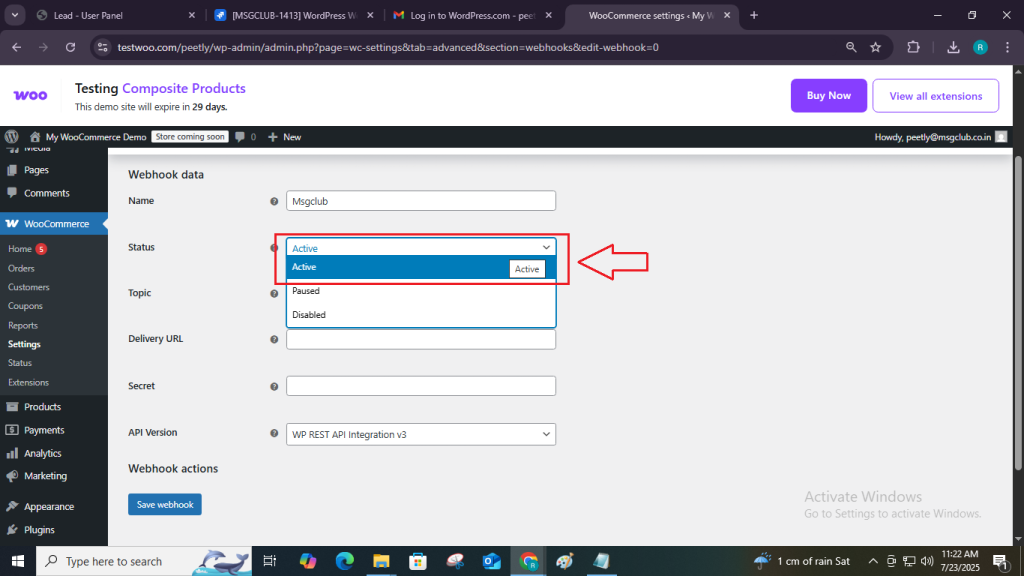
- Status: Active.
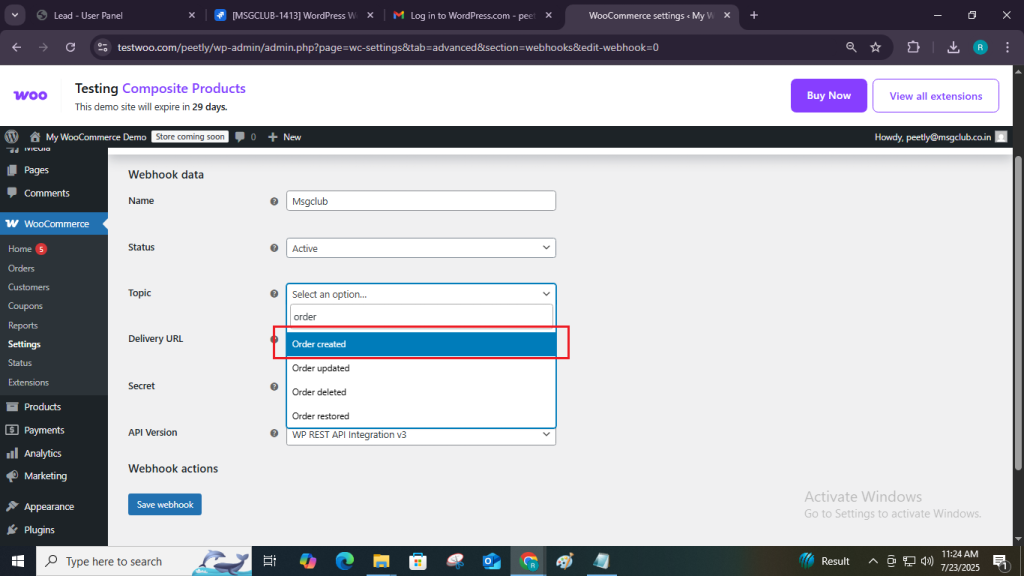
- Topic: Choose the correct event you want to trigger (e.g., Order Create).
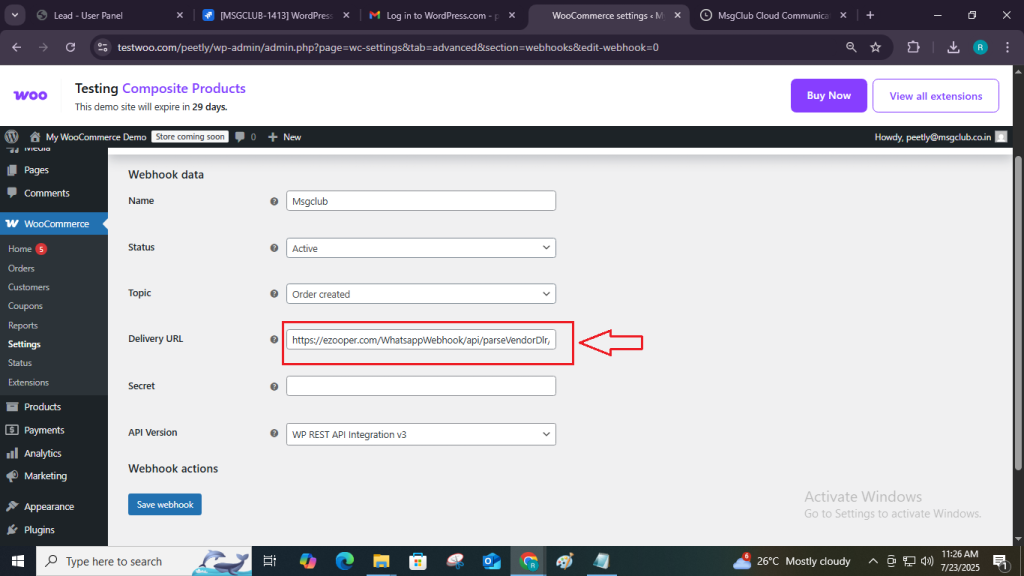
- Delivery URL: Paste the Webhook URL that you copy from MsgClub
- Secret: (Optional) Leave blank unless you want to secure the webhook with a secret key.
- API Version:This option can be left as is, as WooCommerce sends JSON by default. However, if needed, you can select the latest version manually.
Select Active in Status
Select Order Create in Topic:-
Paste the URL
Secret and API Version fields are optional — you can leave them as they are.
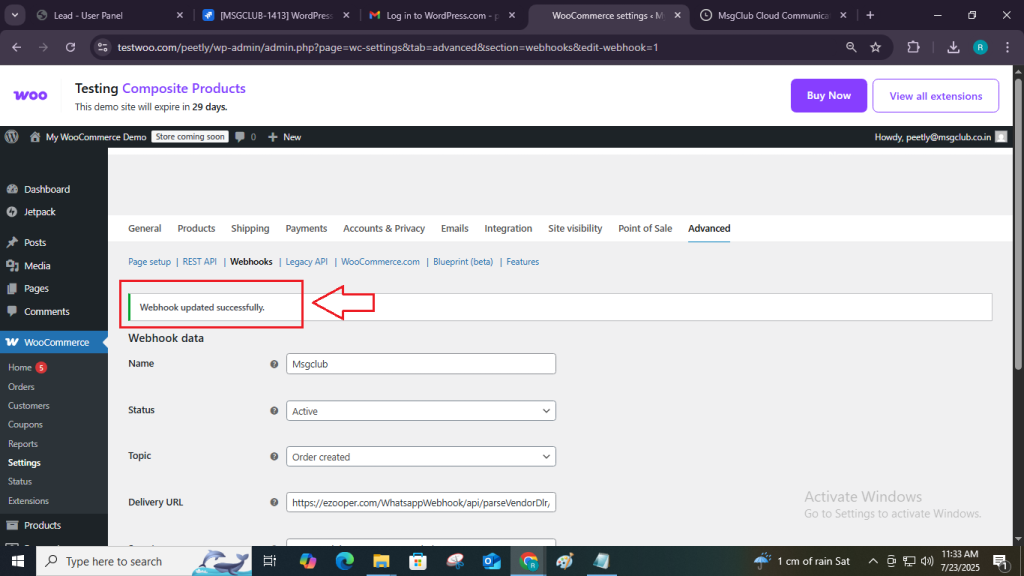
Step 10: After filling in all the details then click on the Save Webhook button.

Step 11: After you click the Save button, a message will appear at the top saying “Webhook updated successfully.”
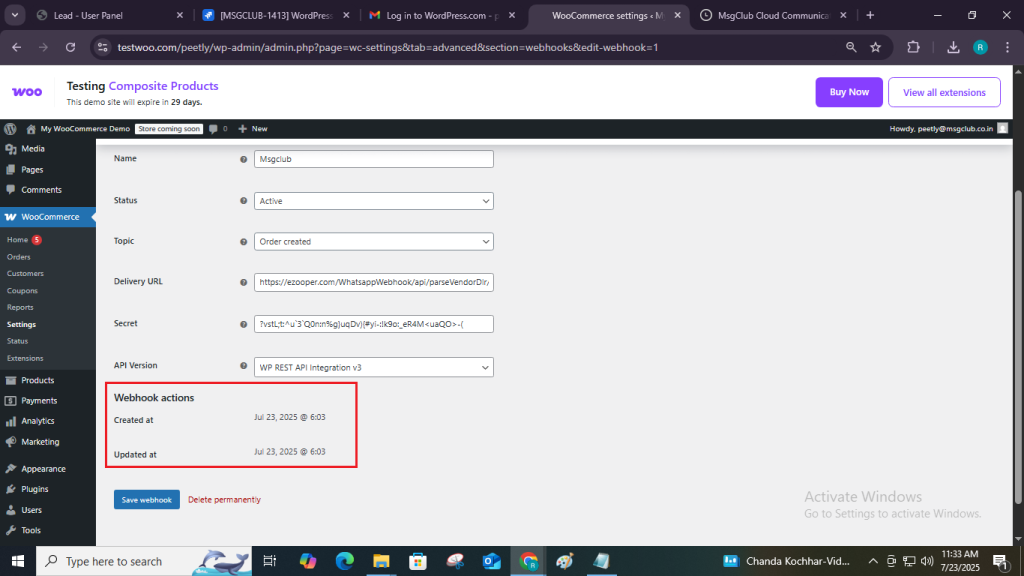
You will see the webhook’s creation and update date below.
Note: To make any changes to the webhook, follow the same steps above and click the Save button to apply updates. If you wish to delete the webhook, click the Delete Permanently button to remove it.
You’re All Set!
Your MsgClub–WordPress integration is now complete. If you need help at any point, feel free to contact our support team — we’re here to assist you every step of the way.
Learn More about MsgClub WhatsApp Business API features :-
- Verified WhatsApp Team Inbox
- Grow your Business Using WhatsApp Flow
- Boost Sales with WhatsApp Multi-Agent Team Inbox by MsgClub
Other Services
- Rich Communication Services (RCS)
- What is interactive voice response (IVR) Service? A complete guide
- Best text messaging services for business in 2023
Contact us at The Basic Digital Solution today to learn how our MSGCLUB can help you achieve your goals—reach out at Sales@msgclub.net, call us at 91-9981122255, 91-8818889050 or visit Msgclub.net !