
MsgClub Connect for Zoho Desk — Admin Guide
Install, authorize and configure the extension — a one‐time setup (about 10 minutes).
MsgClub Connect lets your team message a ticket’s contact over Email, WhatsApp or SMS without leaving Zoho Desk. The steps below install the extension, authorize its connections, and enter your MsgClub details once. After that, everyone on the team can send.
STEP 1 – CREATE YOUR ZOHO DESK ACCOUNT
If you do not already have a Zoho Desk account, create one first — it is free. Go to https://www.zoho.com/desk/, click
Sign Up, create your account, then log in. If you already have an account, skip to the next step.
STEP 2 – OPEN THE INSTALL PAGE
Open the MsgClub Connect Desk install link (from the Marketplace listing, or the link shared with you). It opens the install page inside your Zoho Desk, showing the extension details and the permissions it needs.
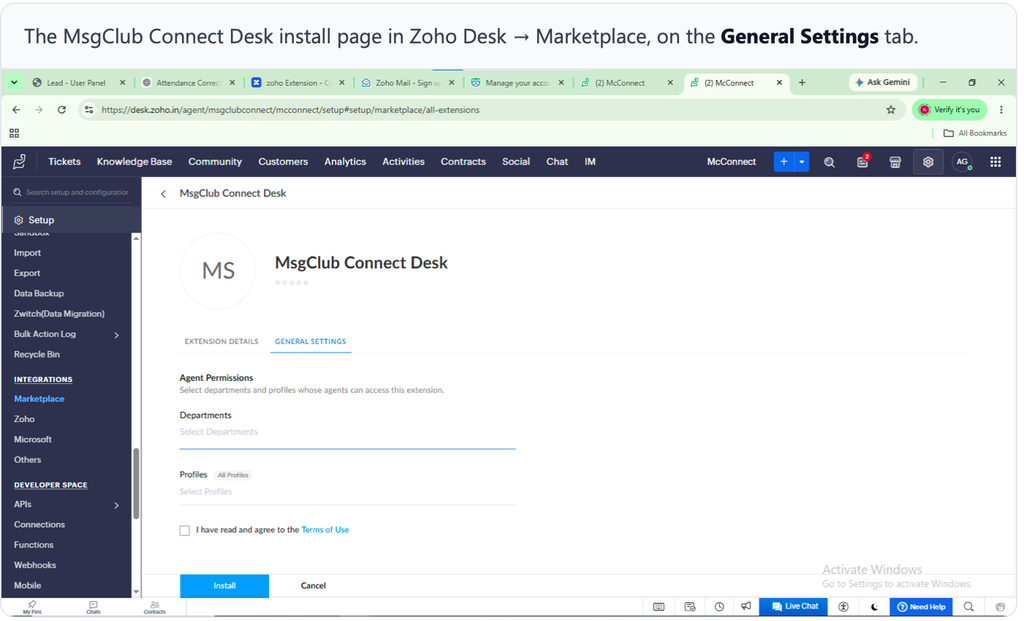
The MsgClub Connect Desk install page in Zoho Desk → Marketplace, on the General Settings tab.
STEP 3 – CHOOSE ACCESS AND INSTALL
On the General Settings tab, under Agent Permissions:
- Select your Department(s) (for example, your support department).
- Select the Profiles that should use the extension (Administrator, Agent, Supervisor, etc.).
- Tick “I have read and agree to the Terms of Use.”
- Click Install.
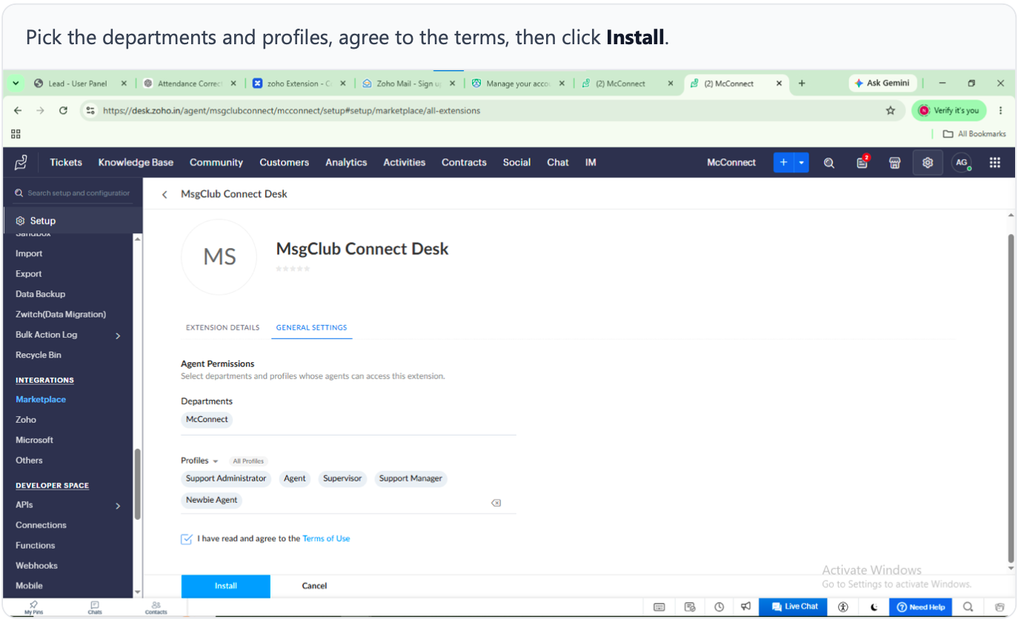
Pick the departments and profiles, agree to the terms, then click Install.
STEP 4 – AUTHORIZE THE EXTENSION
After it installs you’ll see “Successfully Installed.” The extension needs its connections authorized — click Authorize at the top‐right.
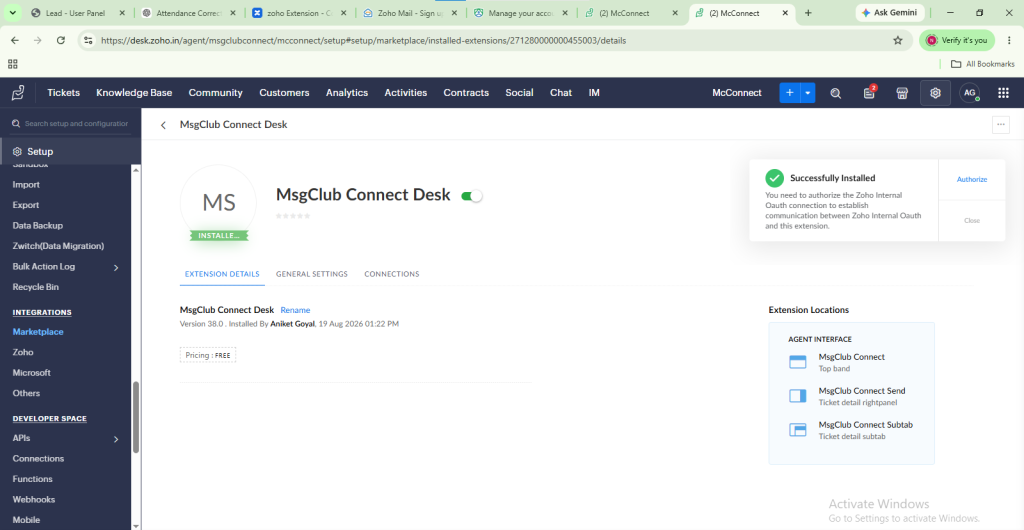
STEP 5 – CONNECT ZOHO DESK
A window appears for the Zoho connection. This lets the extension read your tickets.
Click Connect, sign in with your own
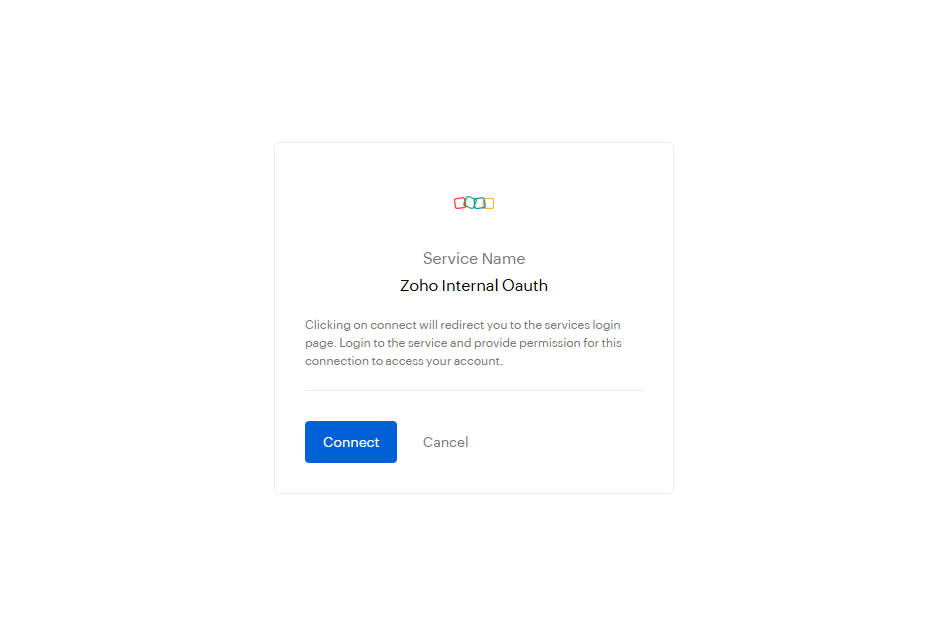
Zoho login, and allow access.
This uses your own account — you only ever see your own portal’s data.
Click Authorize at the top‐right to set up the connections.
STEP 6 – CONNECT MSGCLUB
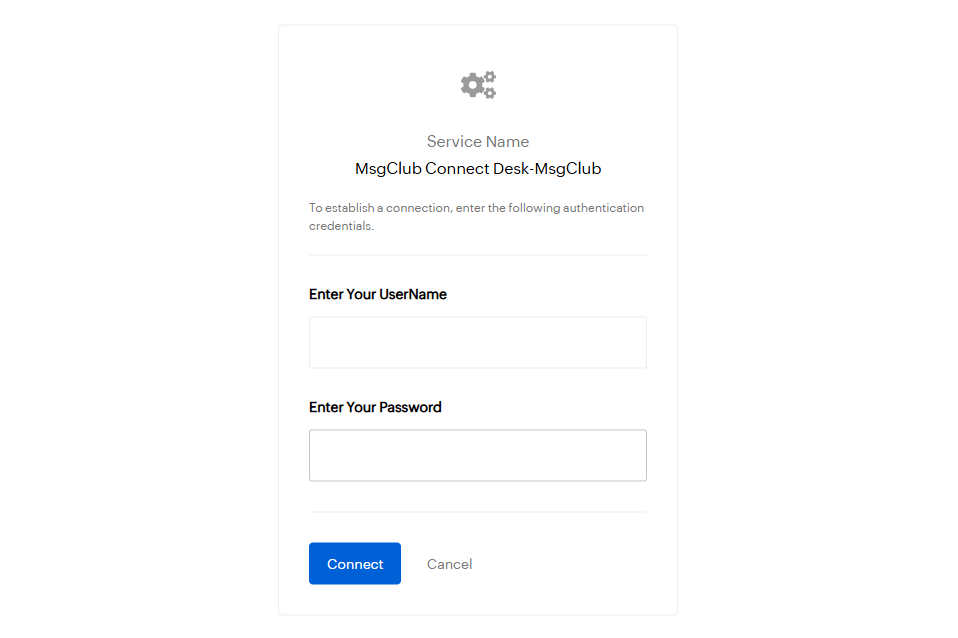
Next, a window for MsgClub appears asking for a Username and Password. Enter them, then click Connect.
The real login happens through your Auth Key in the next step — these are only to set up the connection.
Click Connect, then log in and grant permission.
STEP 7 – OPEN THE MSGCLUB CONNECT TAB
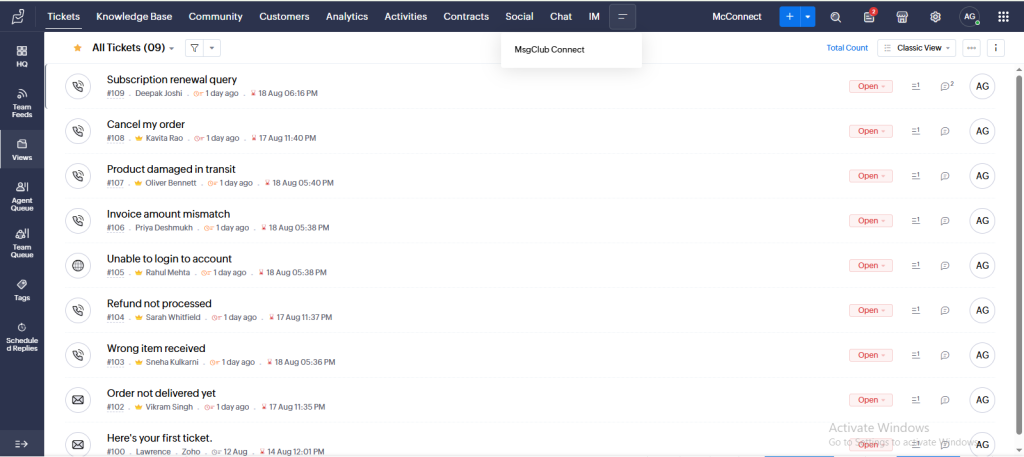
At the top of Zoho Desk, open the MsgClub Connect tab (it may be under the “more” menu ≡ next to the other tabs).
Open MsgClub Connect from the top menu.
Enter the username and password, then click Connect.
STEP 8 – ENTER YOUR MSGCLUB SETTINGS (CONFIGURATION)
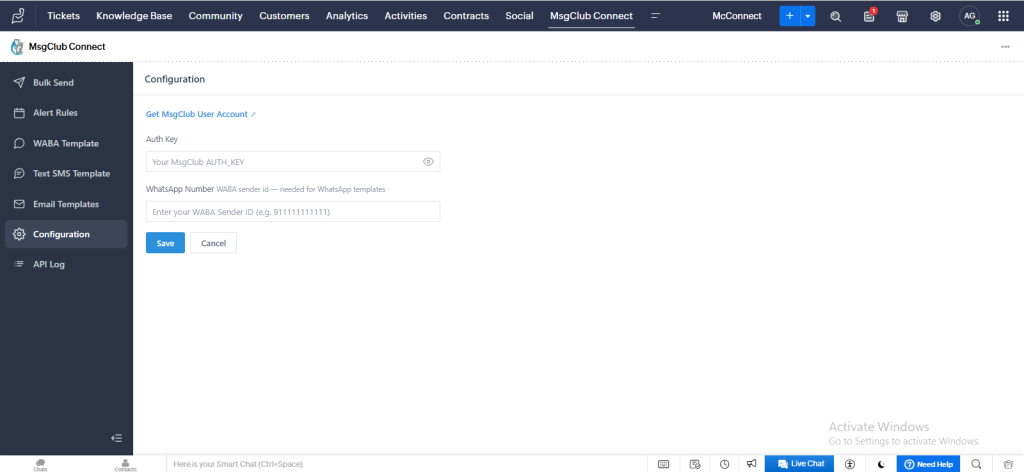
In the MsgClub Connect app, open Configuration from the left menu and fill in:
Auth Key — your MsgClub AUTH_KEY .
WhatsApp Number — your WABA Sender ID (for example 911111111111 ) — needed for WhatsApp templates.
Then click Save.
To get your Auth Key and SMS Sender ID, you must sign up / log in at MsgClub (https://msg.msgclub.net/signup.html). More guidance is in the Help Document, or write to support@msgclub.net.
The Configuration screen. Enter your Auth Key and WhatsApp number, then click Save.
Your Auth Key is stored only in your own installation. It is never shared, never shown to us, and never written to the API Log.
STEP 9 – SEND YOUR FIRST MESSAGE
Setup is done. Open any ticket, open the MsgClub Connect Send panel on the right, choose Email, WhatsApp or SMS, pick
a template (or type a message) and click Send.
This guide is for the admin who sets up the extension. To learn how to use it day to day — sending from tickets, bulk send, alert rules and templates — see the User Guide.
That completes setup. For anything else, see the Help Document or contact support@msgclub.net (support) ( 9406811130 ). For sales, contact sales@msgclub.net ( 8818889050 ).