The Email Service offers powerful additional features designed to improve the effectiveness of your email campaigns — especially when sending bulk emails to customers. Whether you’re running a promotional campaign or delivering important transactional messages, these tools can help you personalize, automate, and track your emails more efficiently.
Learn more below and discover how to make the most of every email you send.
| Name | Description |
|---|---|
| Unique Contacts | Unique Contact refers to specific email addresses that you can save as unique contacts. |
| Previous Contacts | The Previous Contacts section displays all the email addresses that were saved as unique contacts under your earlier plans. |
| Personalise Email | A personalise text message or broadcast is an SMS created using customers data: name, email address, date of birth, gender etc for the sake of providing them with messages that feel directly addressed to them. |
Unique Contacts
Unique Contact refers to specific email addresses that you can save as unique contacts. It depends on your plan—when you purchase a plan, you can check your unique contact limit, such as 500, 5,000, etc.
When you start sending emails, the first 5,000 unique email addresses (if your plan allows 5,000) will be saved to the Unique Contact Wall. After that, you can only send emails to these saved contacts. If you try to send an email to a new address that isn’t in the list, it will fail to deliver because you have exceeded your limit. To send emails to additional addresses, you need to upgrade your plan and increase your unique contact limit.
For example:
If your plan includes 500 unique contacts, you can save up to 500 email addresses as unique contacts. Emails sent to these contacts will be delivered successfully. However, if you try to send an email to an address that is not part of your saved unique contacts, the delivery will fail.
When you click on the Unique Contacts option, a page will open (as shown in the image above).
Here, you will see a list of all your unique contacts along with the following details:
- Email ID: Displays the registered email address of the contact.
- Insertion Time: Shows the date and time when the unique contact was added.
- Route Name: Indicates the email route (Transactional or Promotional) selected for that contact.
- Request ID: Displays the system-generated ID associated with the contact entry.
- Status: Shows the current status of the contact — whether it is Active, Inactive, or Blocked
Once you click or select a unique contact email, two buttons will appear: Send To and Add to Group. When you click on Send To, you will be redirected to the Send Email page, as shown in the image below.
Previous Contacts
The Previous Contacts section displays all the email addresses that were saved as unique contacts under your earlier plans.
For example: If you initially purchased a plan with 500 unique contacts and added those contacts, then later upgraded to a new plan with additional unique contacts, the original 500 contacts will now appear in the Previous Contacts list. These can still be used for sending emails, even under your new plan.
When you click on the Previous Contacts option, a page will open (as shown in the image above).
Here, you will see a list of all your unique contacts along with the following details:
- Email ID: Displays the registered email address of the contact.
- Insertion Time: Shows the date and time when the previous contact was added.
- Request ID: Displays the system-generated ID associated with the contact entry.
- Month: Display the month when previous contact was added
- Status: Shows the current status of the contact — whether it is Active, Inactive, or Blocked
Once you click or select a previous contact email, two buttons will appear: Send To and Add to Group. When you click on Send To, you will be redirected to the Send Email page, as shown in the image below.
Personalise Email
A personalise text message or broadcast is an SMS created using customers data: name, email address, date of birth, gender etc for the sake of providing them with messages that feel directly addressed to them. In Personalise there are three options that you can use to send personalise email
- Draft Upload File: Use a previously uploaded file to send personalized emails.
- Upload File: Upload a CSV file containing client information to send personalized emails.
- Phonebook Group: Use a Phonebook Group from MsgClub to send personalized emails.
Step by Step Guide
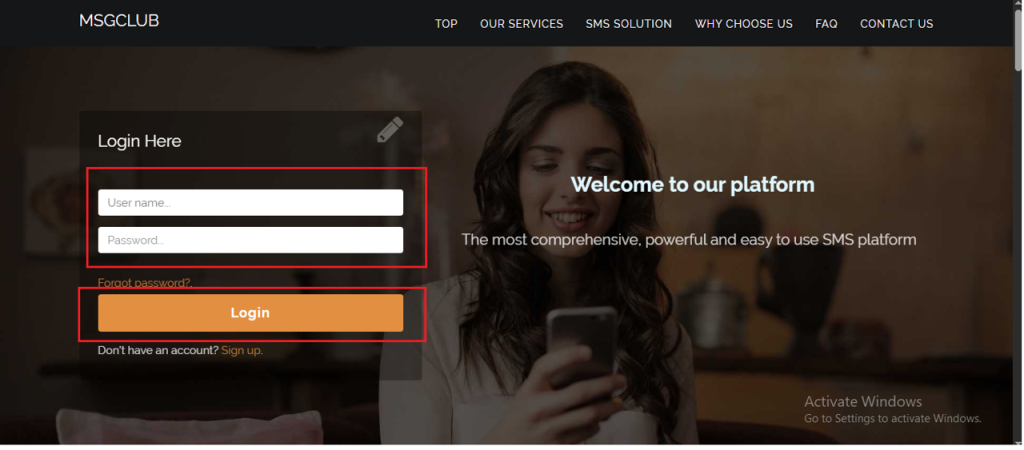
Step 1: Log in using your credentials.
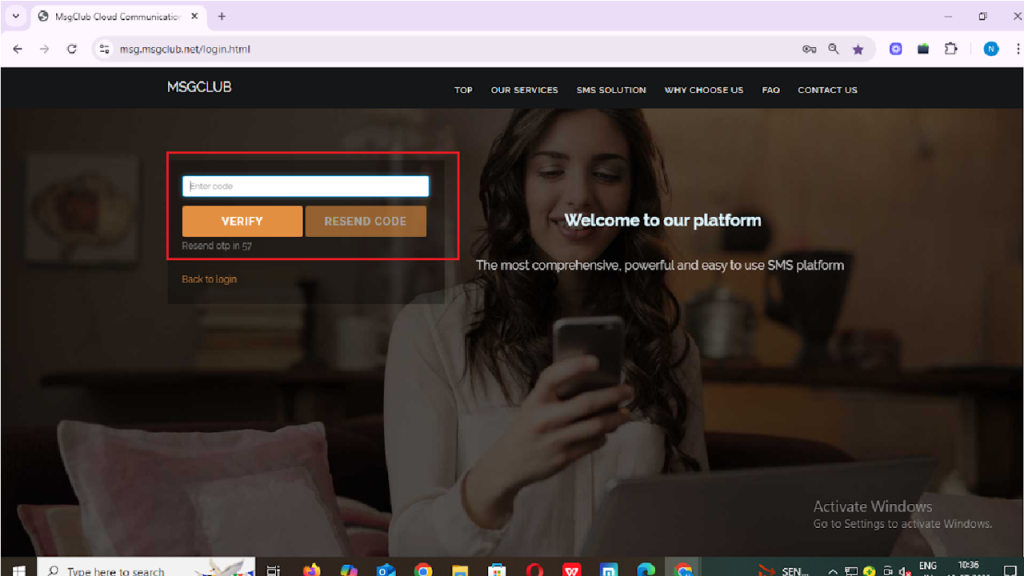
Step 2: You’ll receive an OTP on your registered mobile number. Enter the OTP and click Verify.
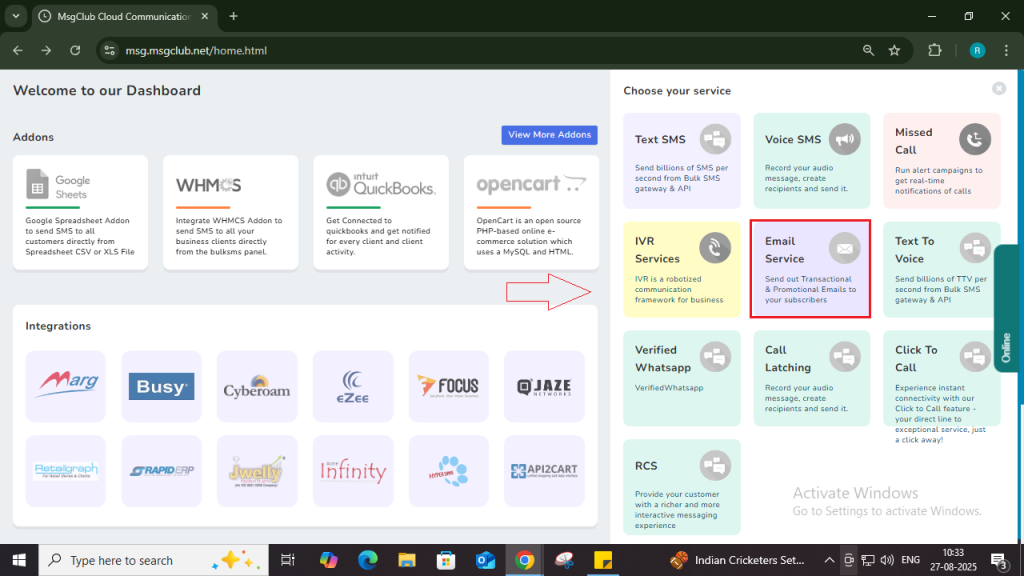
Step 3: Once OTP is verified, you’ll be redirected to the MsgClub dashboard, where you can select Email service.
Step 4: In the Email service, go to the left-hand panel and select the Personalise Email option.
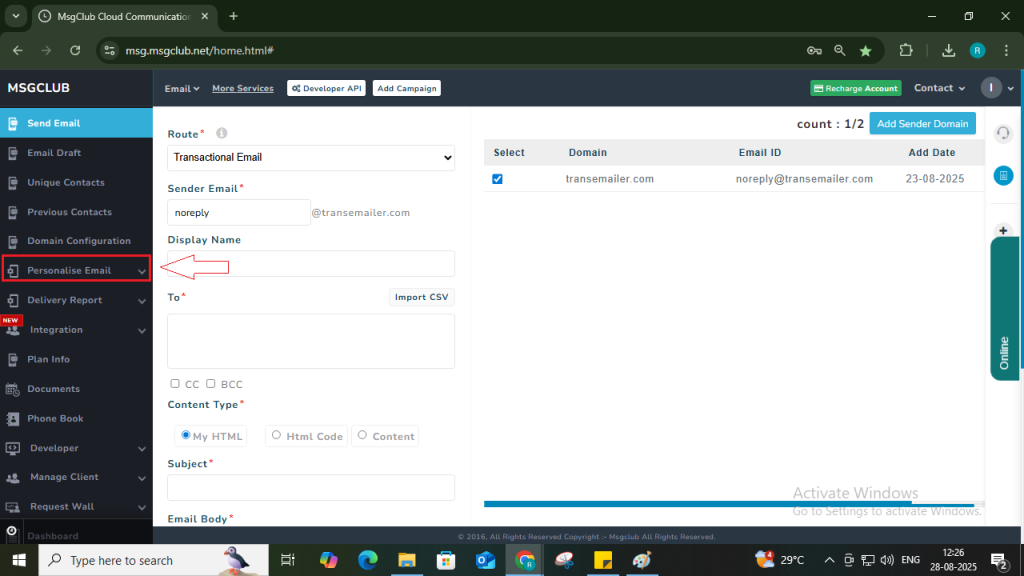
Draft Upload File
- Inside the Personalize Email section, select the Draft Upload File option.

- On the Draft Upload File page, locate the draft file you want to use to send the personalized email. In the Actions column of that file, click the Send SMS icon to begin sending personalized emails using the selected draft.
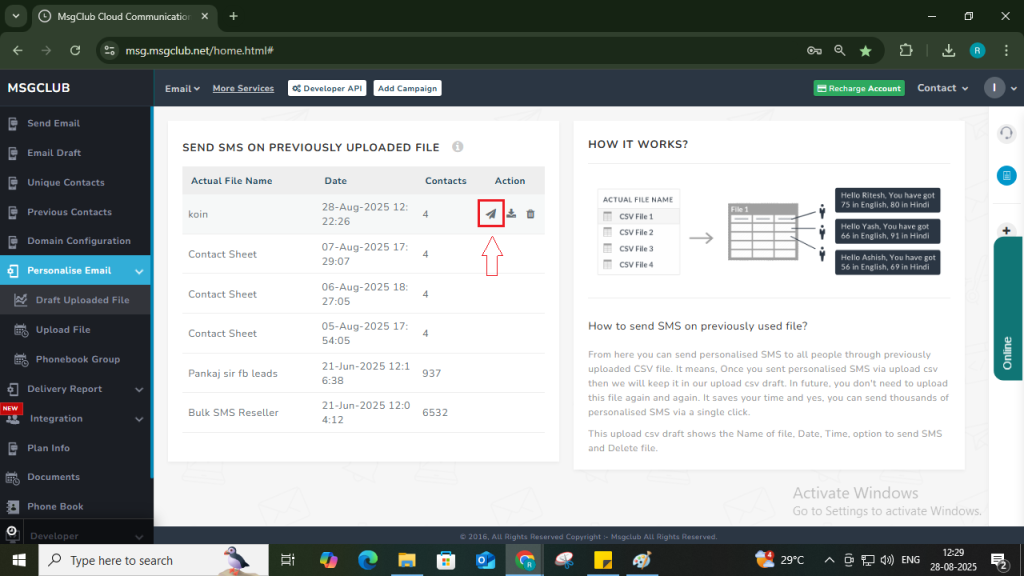
Note- From Action column CSV file can be downloaded and deleted.
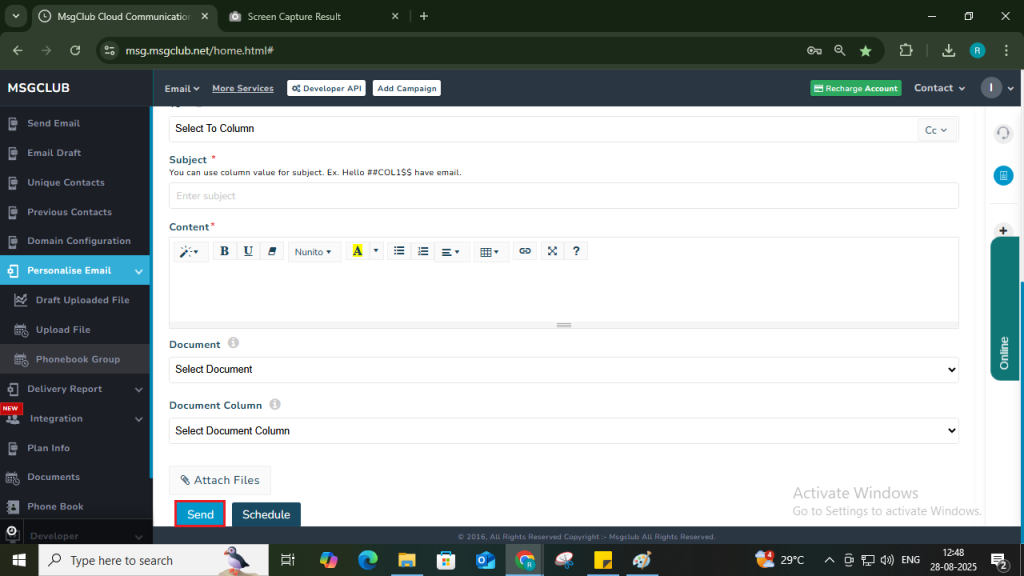
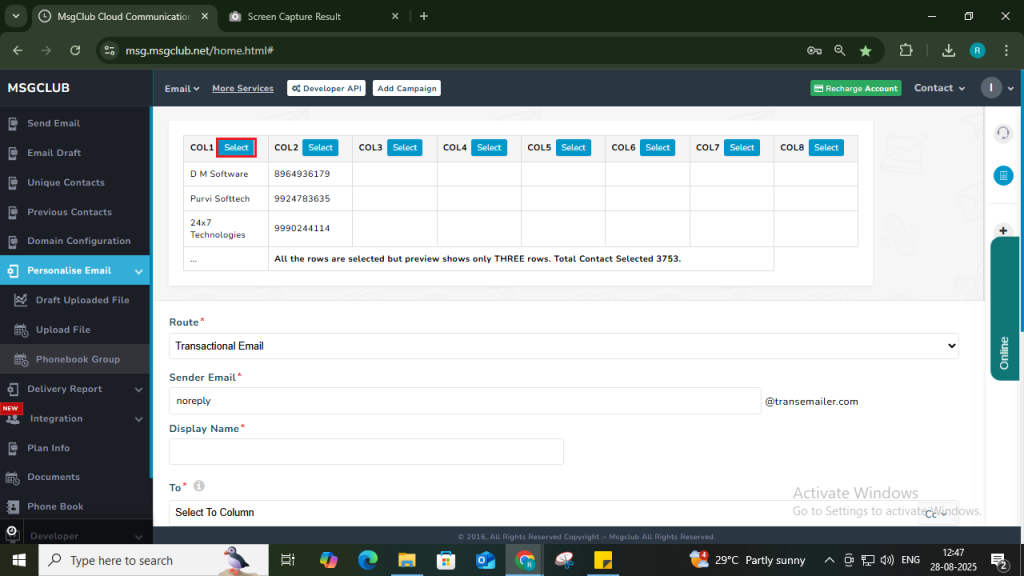
- On the Email Send screen, the first option is Route, which determines how your email will be sent.
Select the route you’ve purchased from the dropdown — either Transactional or Verify and Send (Promotional). - Enter the Sender’s Information
- Sender Email or Domain: Enter the email address or domain you want to send from.
- Display Name: This name will appear as the sender when customers receive the email.

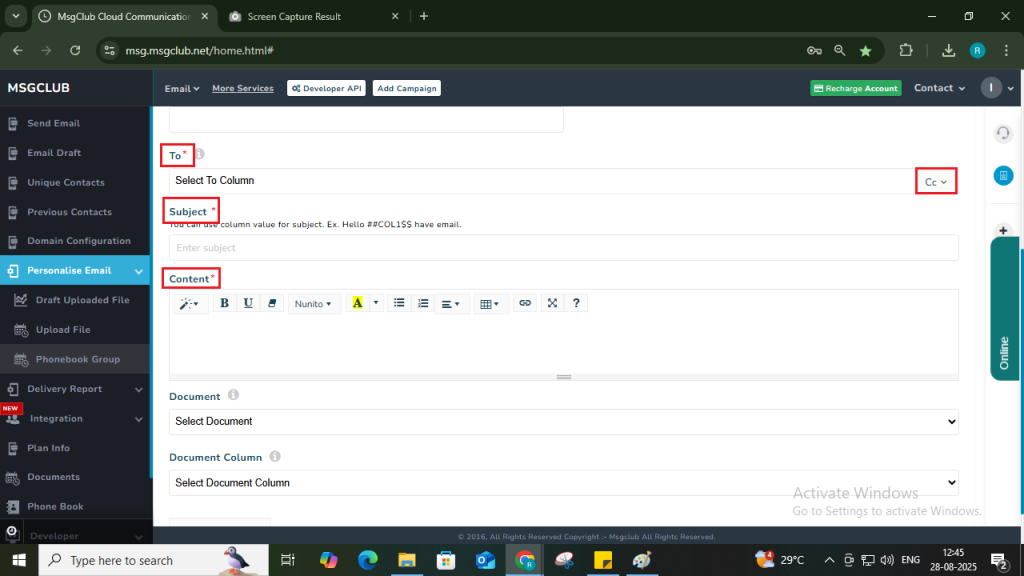
- In the To field, select the column from your uploaded sheet that contains the recipients’ email addresses.
Note: You can add CC recipients by clicking the CC button.
- Type the subject line you want your recipients to see.
- Enter or paste the email content in the content field.
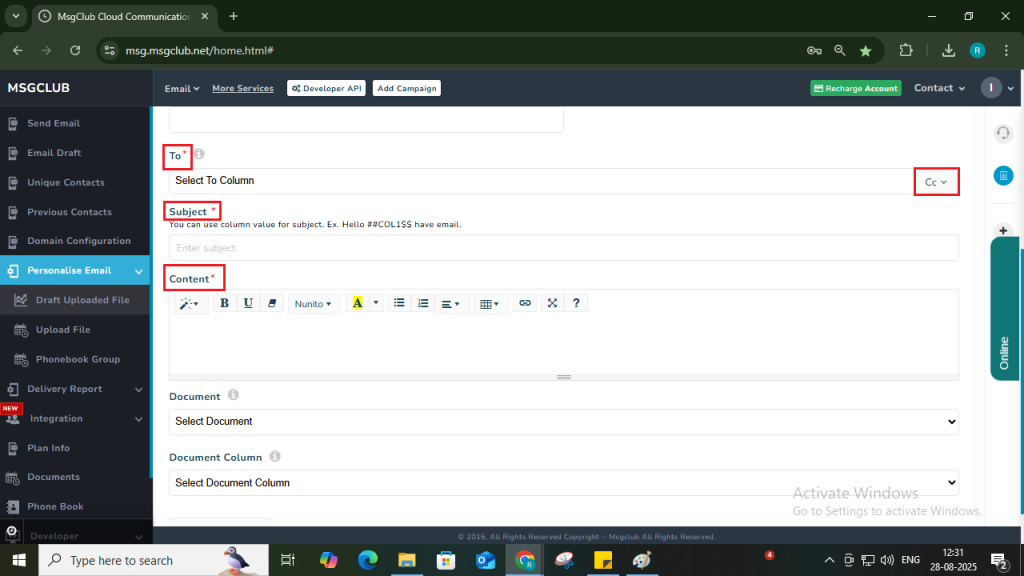
Tip: If you want to include information from your uploaded sheet (like customer names or other details), simply click on the relevant column header above the sheet to insert that data into your email.

- Click the Attach File button if you need to include any attachments.
- Once everything is ready, click the Send button. Your email will be sent immediately.

Upload File
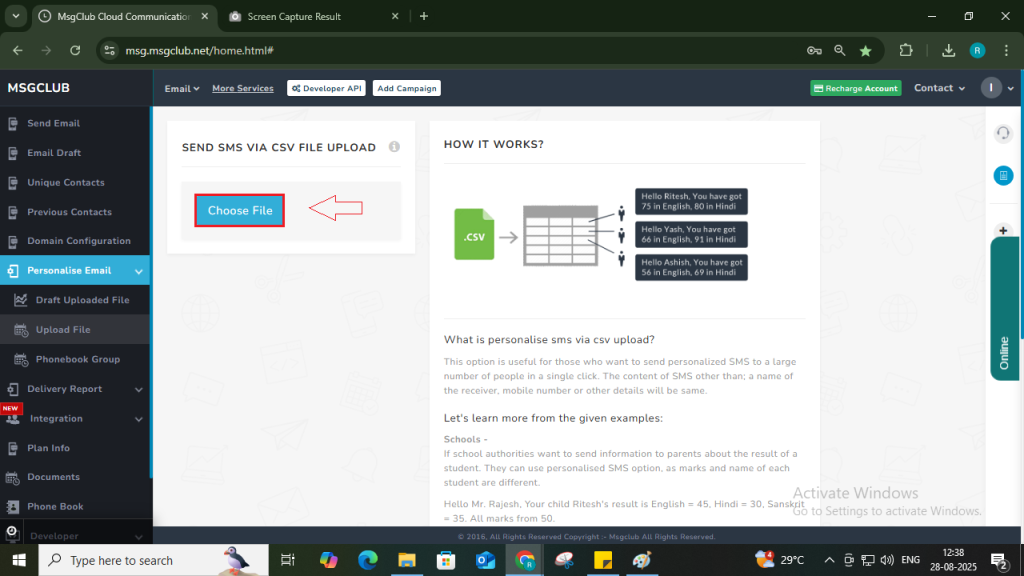
- Inside the Personalize Email section, select the Upload File option.
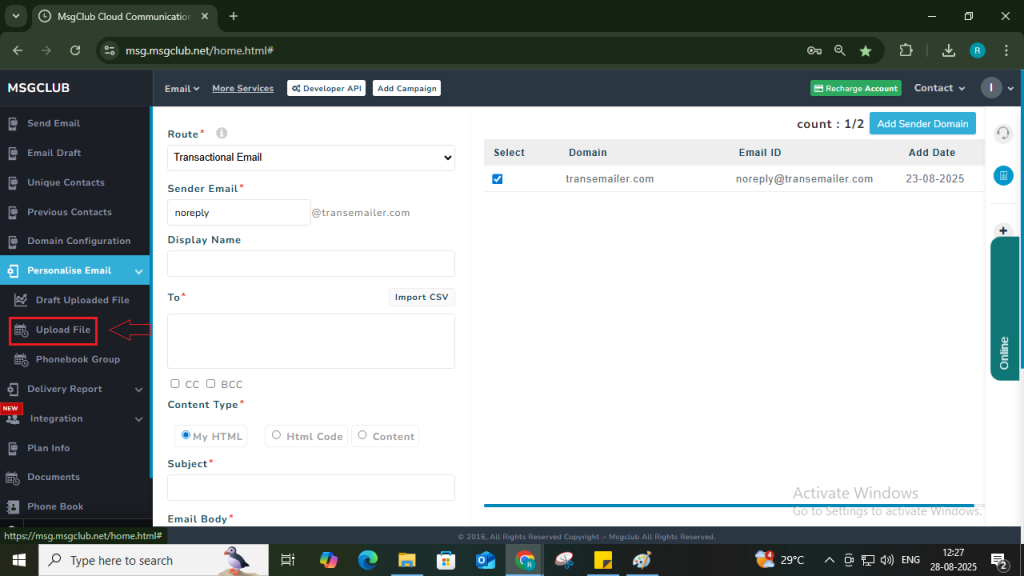
- On the Upload File page, click on the Choose File button.
- On the Email Send screen, the first option is Route, which determines how your email will be sent.
Select the route you’ve purchased from the dropdown — either Transactional or Verify and Send (Promotional). - Enter the Sender’s Information
- Sender Email or Domain: Enter the email address or domain you want to send from.
- Display Name: This name will appear as the sender when customers receive the email.
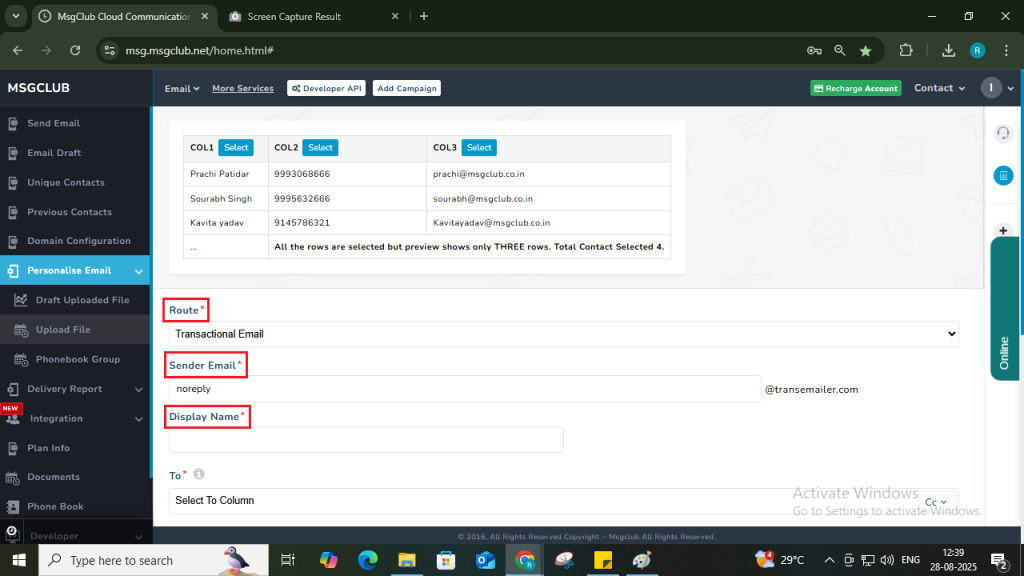
- In the To field, select the column from your uploaded sheet that contains the recipients’ email addresses.
Note: You can add CC recipients by clicking the CC button.
- Type the subject line you want your recipients to see.
- Enter or paste the email content in the content field.Tip: If you want to include information from your uploaded sheet (like customer names or other details), simply click on the relevant column header above the sheet to insert that data into your email.

- Click the Attach File button if you need to include any attachments.
- Once everything is ready, click the Send button. Your email will be sent immediately.

Phonebook Group
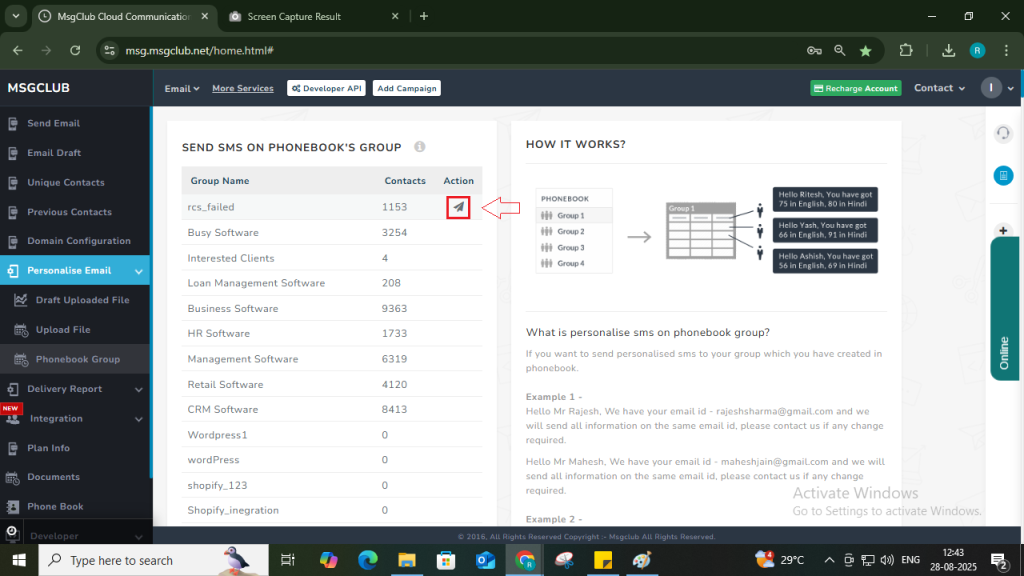
- Inside the Personalize Email section, select the Phonebook Group option.

- On the Phonebook Group page, locate the phonebook group you want to use to send the personalized email. In the Actions column of that file, click the Send SMS icon to begin sending personalized emails using the selected draft.
- On the Email Send screen, the first option is Route, which determines how your email will be sent.
Select the route you’ve purchased from the dropdown — either Transactional or Verify and Send (Promotional). - Enter the Sender’s Information
- Sender Email or Domain: Enter the email address or domain you want to send from.
- Display Name: This name will appear as the sender when customers receive the email.
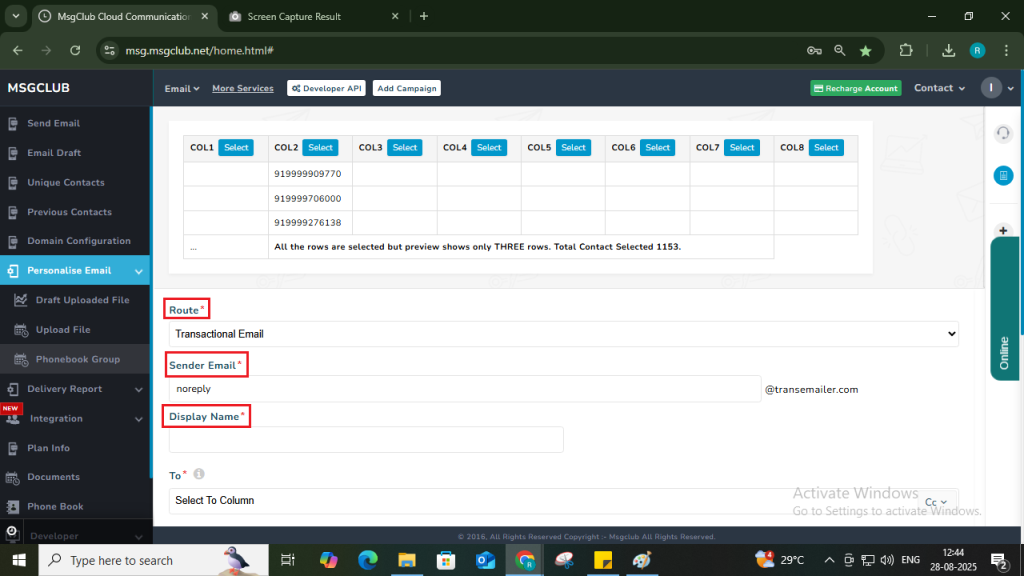
- In the To field, select the column from your uploaded sheet that contains the recipients’ email addresses.
Note: You can add CC recipients by clicking the CC button.
- Type the subject line you want your recipients to see.
- Enter or paste the email content in the content field.
- Tip: If you want to include information from your uploaded sheet (like customer names or other details), simply click on the relevant column header above the sheet to insert that data into your email.
- Click the Attach File button if you need to include any attachments.
- Once everything is ready, click the Send button. Your email will be sent immediately.