
We have added an option that lets our clients create their own website and use the MsgClub panel with their own branding.
This means you can show the panel to your customers with your company’s name, logo, and identity. You can even resell the panel as your own platform. To set up your website, just follow the steps below.
Learn More
Process Video
Step by Step Guide
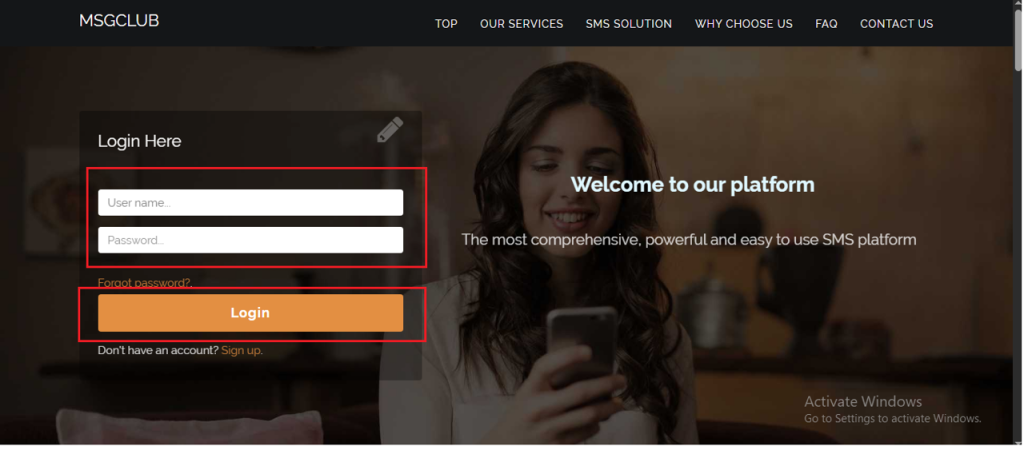
Step 1: Go to https://msg.msgclub.net/login.html Log in using your credentials.
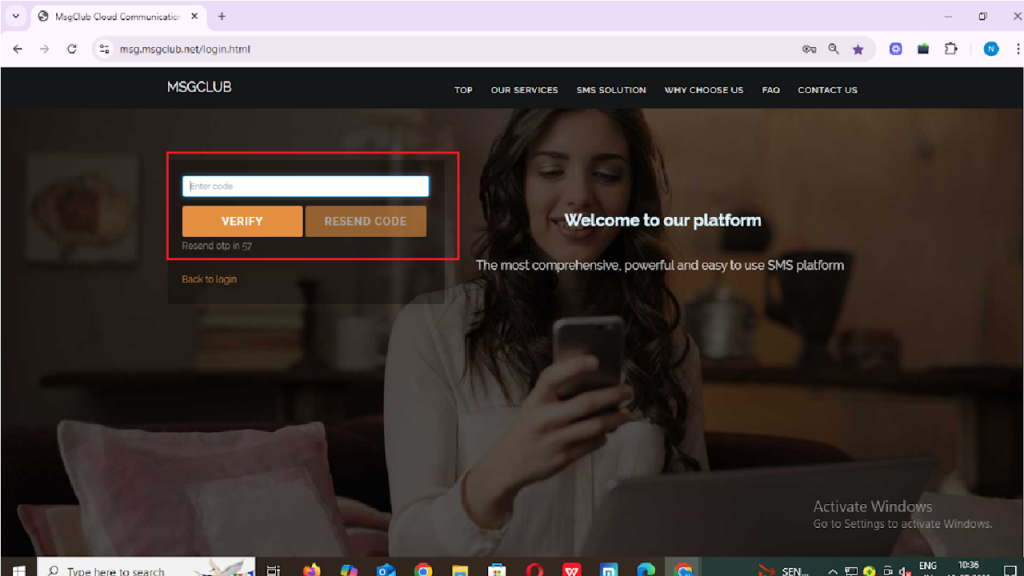
Step 2: You’ll receive an OTP on your registered mobile number. Enter the OTP and click Verify.
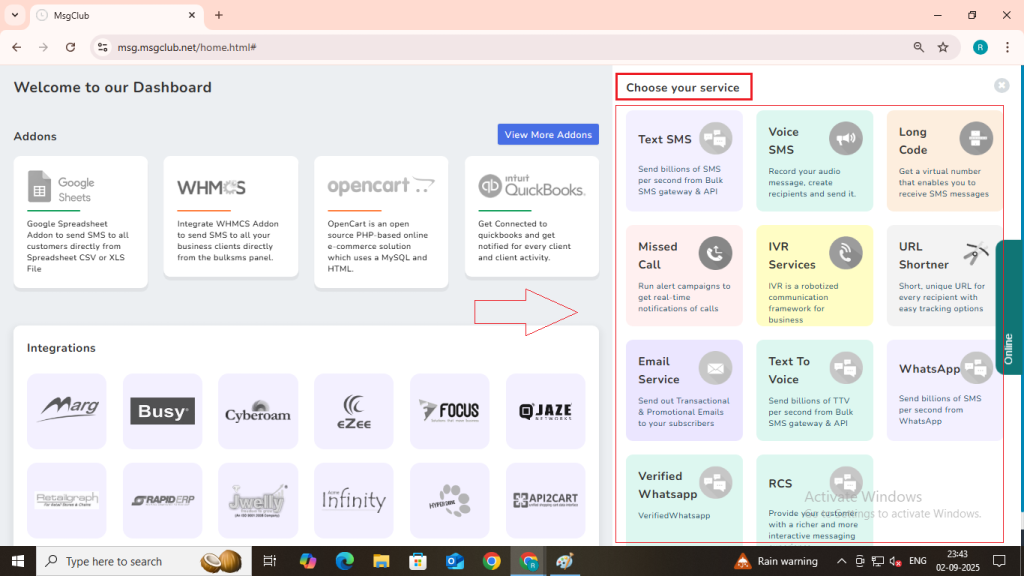
Step 3: Once verified, you’ll be redirected to the MsgClub dashboard, where you can select any Service.
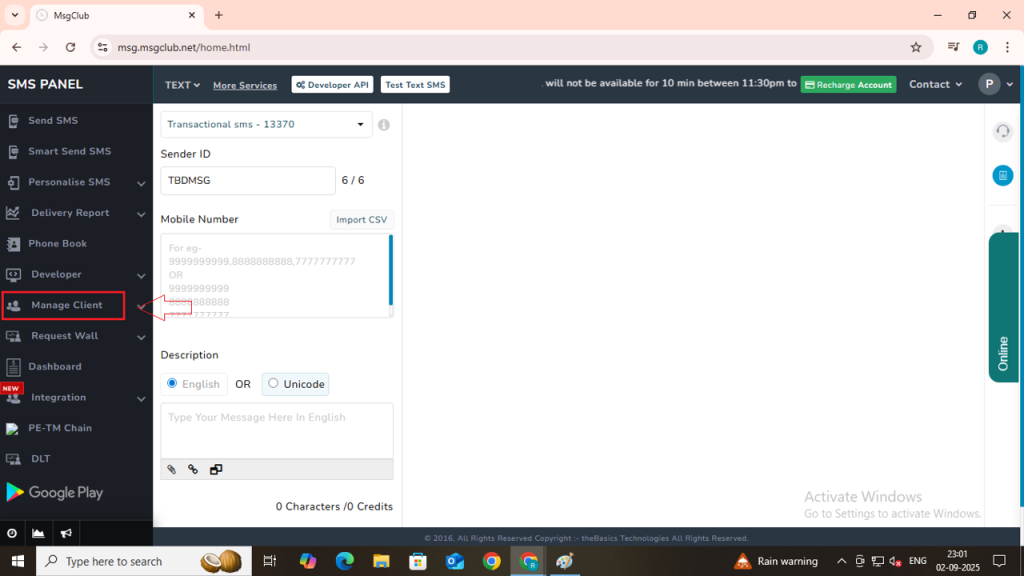
Step 4: On the left side of the screen, find and click on the “Manage Client” option and in that Manage Website.
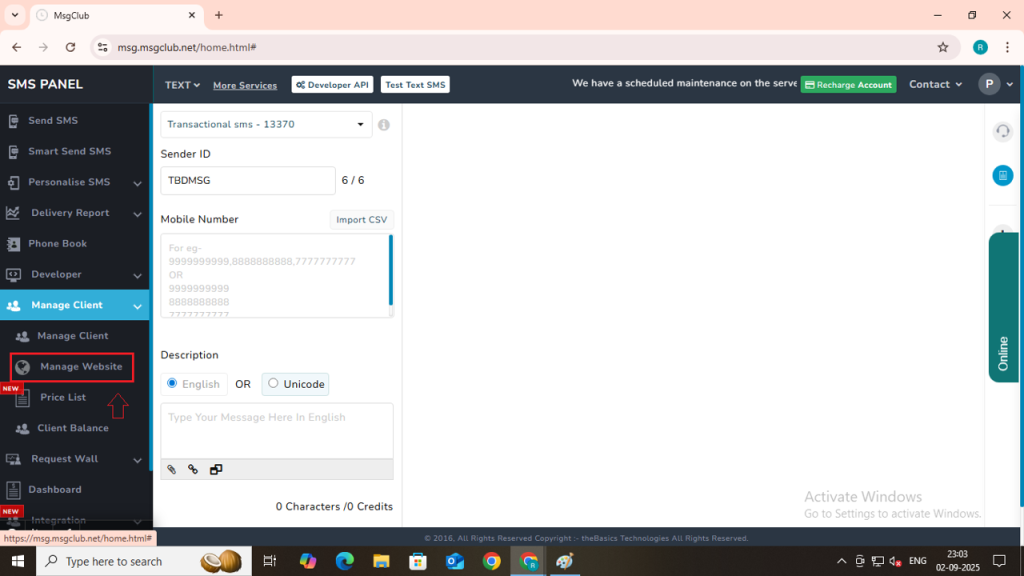
Step 5: On the Manage Website page, click the “Add Website” button located on the right side of the screen.

Step 6: After clicking the “Add Website” button, a new window will open where you can set up and create your own website for the MsgClub panel.
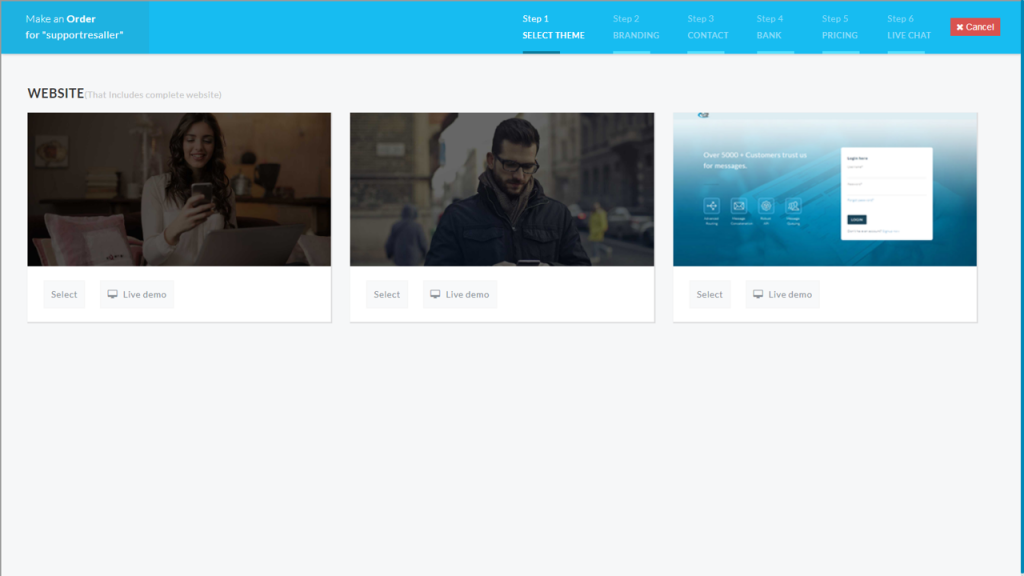
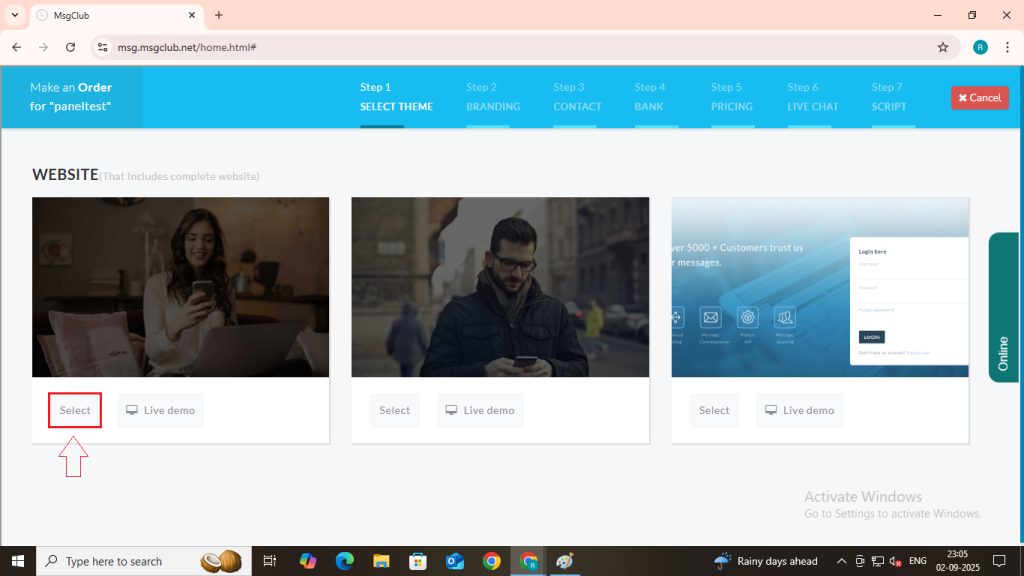
Step 7: In the “Select Theme” section, you will see different themes available for your website. Each theme has two options:
- Live Demo – Click this to preview how the theme will look.
- Select – Click this to choose and apply the theme you want for your website.
Step 8: After you click on the Select button, a side panel will open. Here, you need to enter some details that will appear in the footer of your website, such as:
- Mobile Number – Enter your mobile number.
- Email ID – Enter your email address.
- Skype ID – If you use Skype, add your Skype ID here.
- Social Media Links – Click on the social media icons you want to display in the footer and paste the respective links.
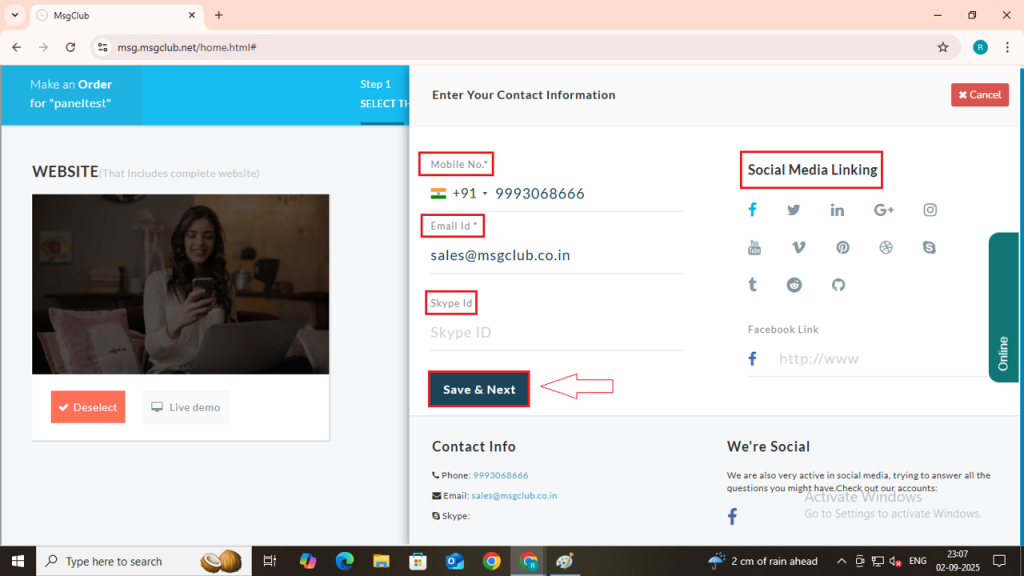
Step 9: After entering all the required information, click on the Save & Next button. This will take you to the Branding page.
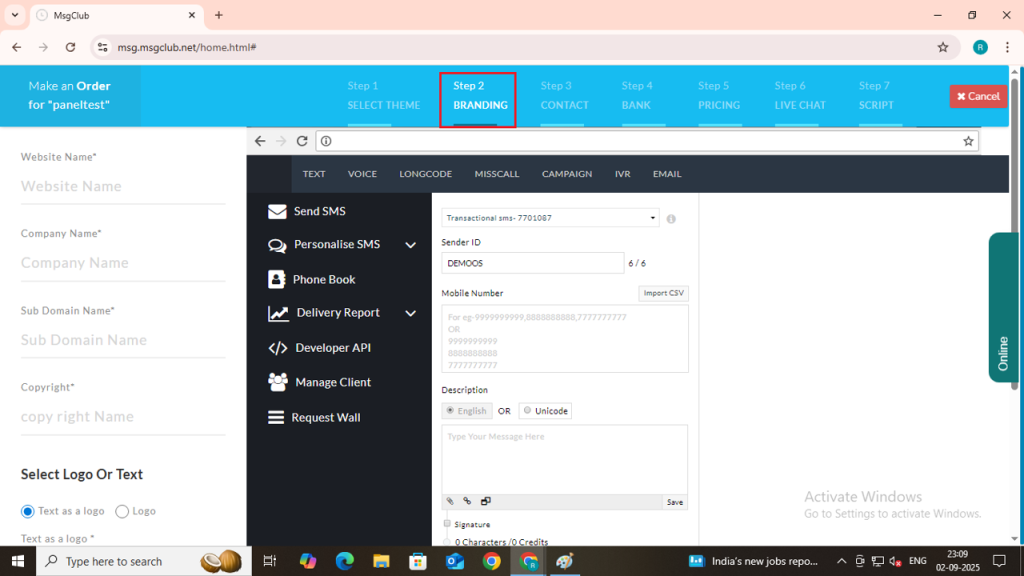
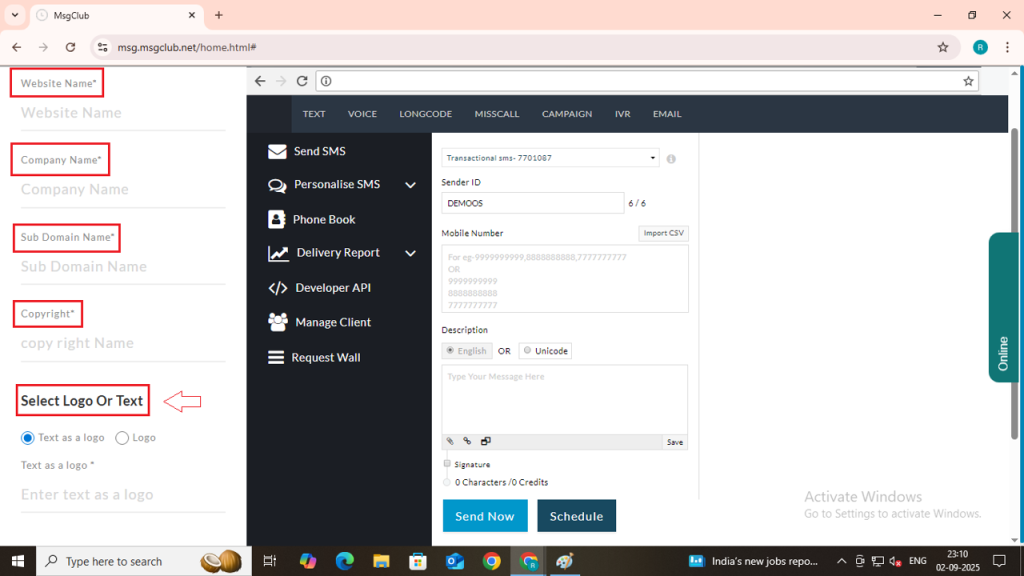
Step 10: On the Branding page, fill in the details that will help you customise and showcase your branding:
- Website Name – Enter your website’s name.
- Company Name – Enter your company’s name.
- Domain Name – If you have your own domain, link it with our domain using CNAME records (for white labeling).
- Copyright – Enter your copyright text. It will be displayed in the footer of your panel.
- Select Logo or Text – Choose whether you want to display your company logo image or a text-based logo.
- Text Logo – If you select this option, type your logo text (e.g., your company name).
- Logo Image – If you choose this option, click on Upload Logo to upload your logo image (max size: 10 MB).
- Change Color Theme – Select how you want to set your panel’s color theme:
- Default Color – Use predefined color settings.
- Custom Color – Personalize your theme by choosing page color, text color, logo colors, and button color.
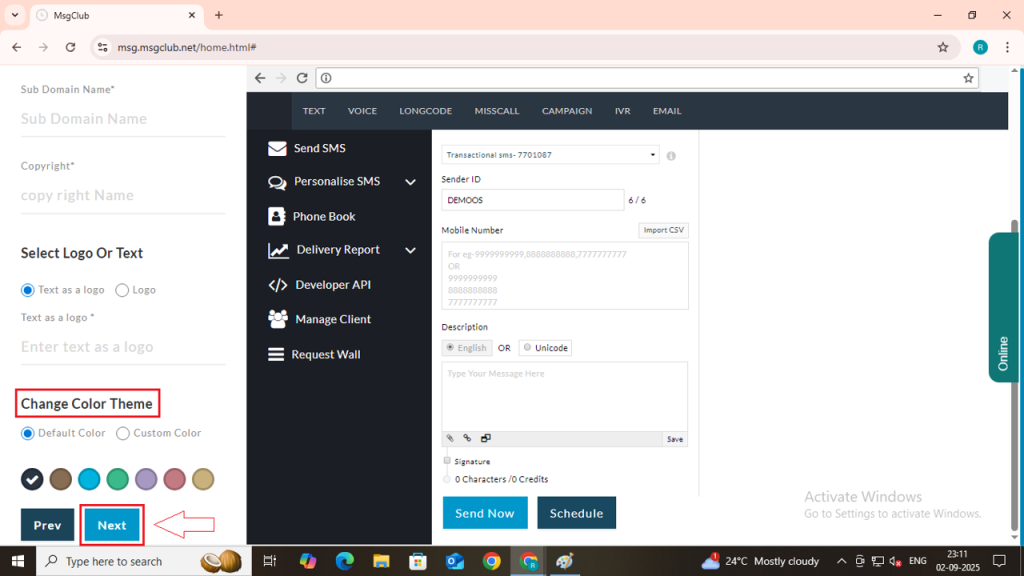
Step 11: After filling in the branding details, click on the Save & Next button. You will then be redirected to the Contact page.
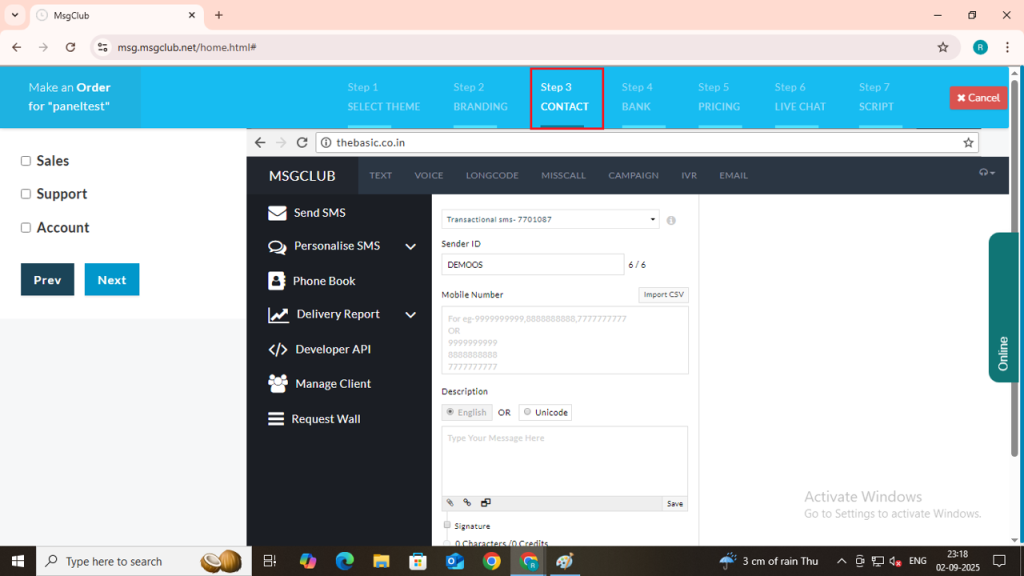
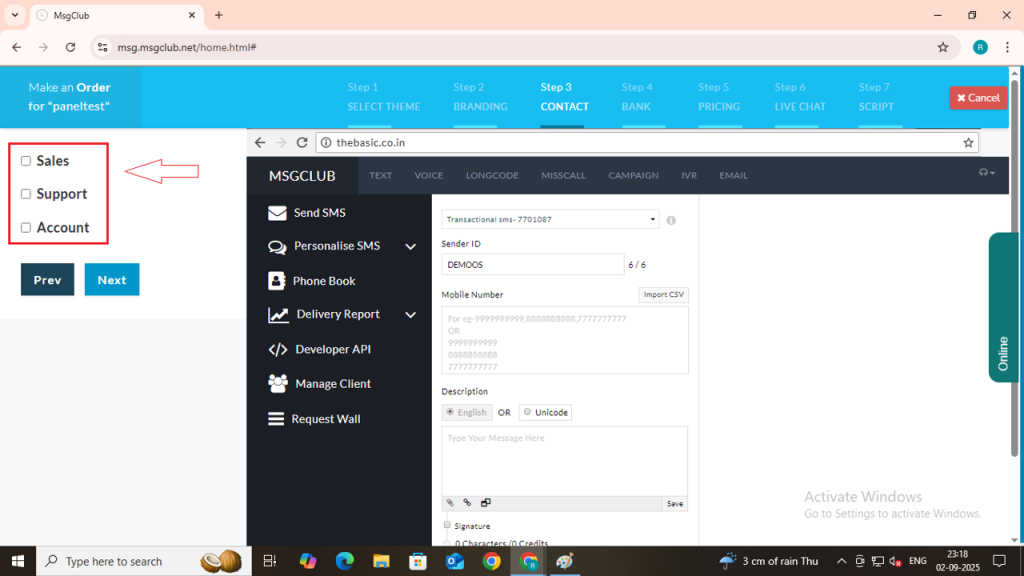
Step 12: On the Contact page, you need to enter your contact details, which will appear in the website footer and can be used by clients to reach you. Fill in the contact form with the required information.
We provide three options, which you can customize as needed:
- Sales – You can edit/rename this (e.g., Technical, Marketing, etc.).
- Support – You can edit/rename this as well.
- Account – This option is fixed. It will only be shown once you check the checkbox. Here, you need to provide your mobile number and email ID.
Note: If any payment transaction of your users fails, the failure notification will be sent to the email ID you provide under the Account section.
Step 13: Click on the Sales checkbox, and a few fields will appear that you need to fill in:
- Heading – Enter the title name (e.g., Sales, Support, Technical Team).
- A/C Manager – Enter the account manager’s name.
- Mobile No. – Enter the mobile number.
- Email ID – Enter the email address.
- Social Media Link – Select the social media platform you want to display and paste the corresponding link.

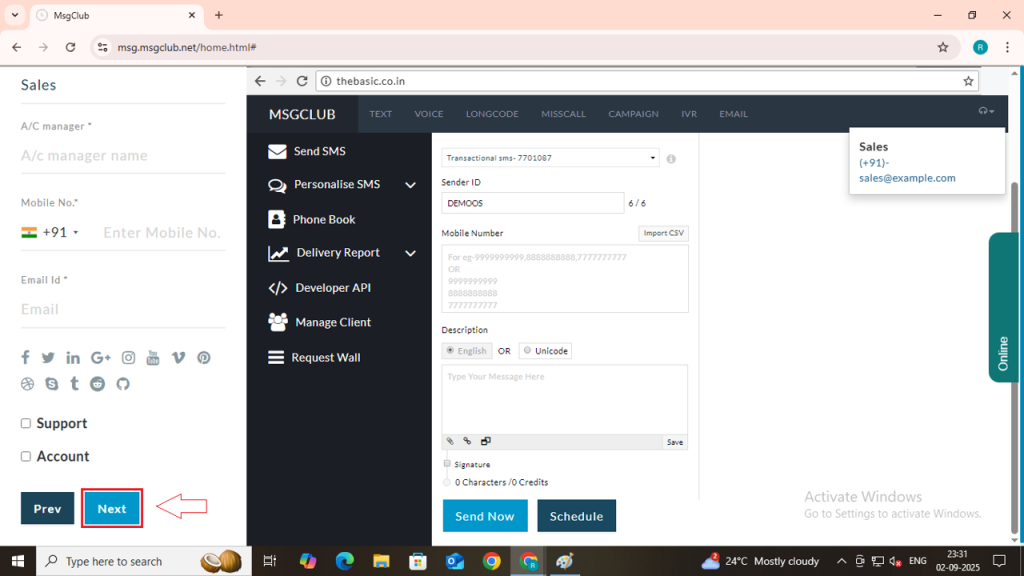
Step 14: After filling in the contact details, click on the Save & Next button. You will then be directed to the Bank page.
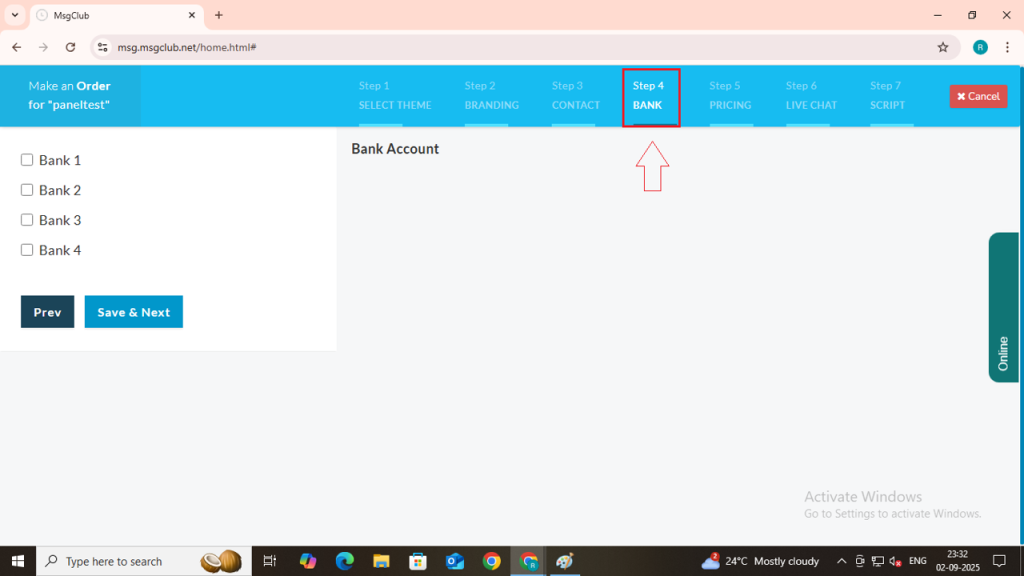
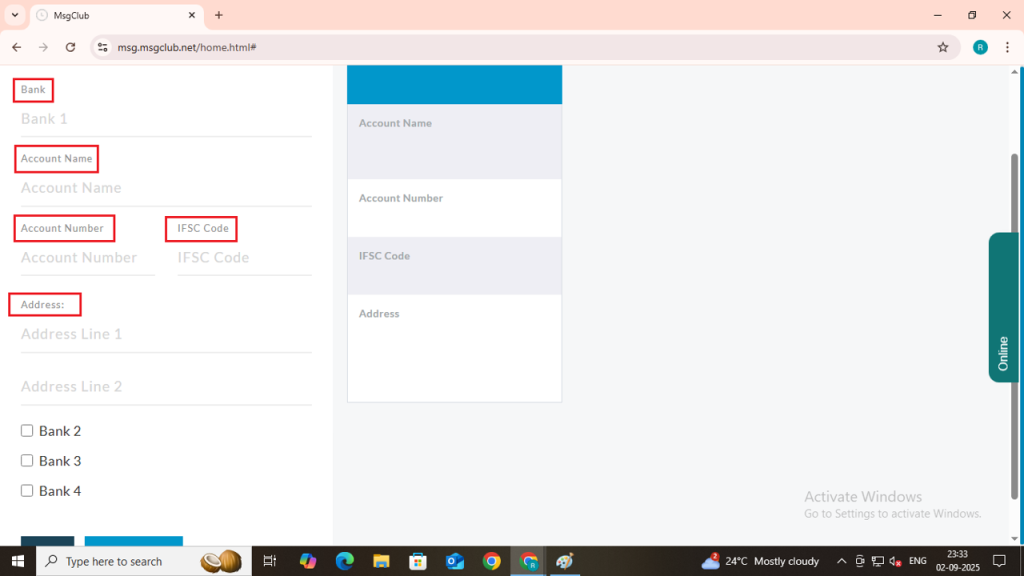
Step 15: On the Bank Details page, you can save your bank account information, which will be displayed on your website. You need to fill in the following details:
- Bank – Enter your bank name.
- Account Name – Type your account holder name.
- Account Number – Enter your account number.
- IFSC Code – Enter your bank IFSC code.
- Address – Enter your bank branch address.
Note: You can add up to a maximum of 4 bank accounts here.
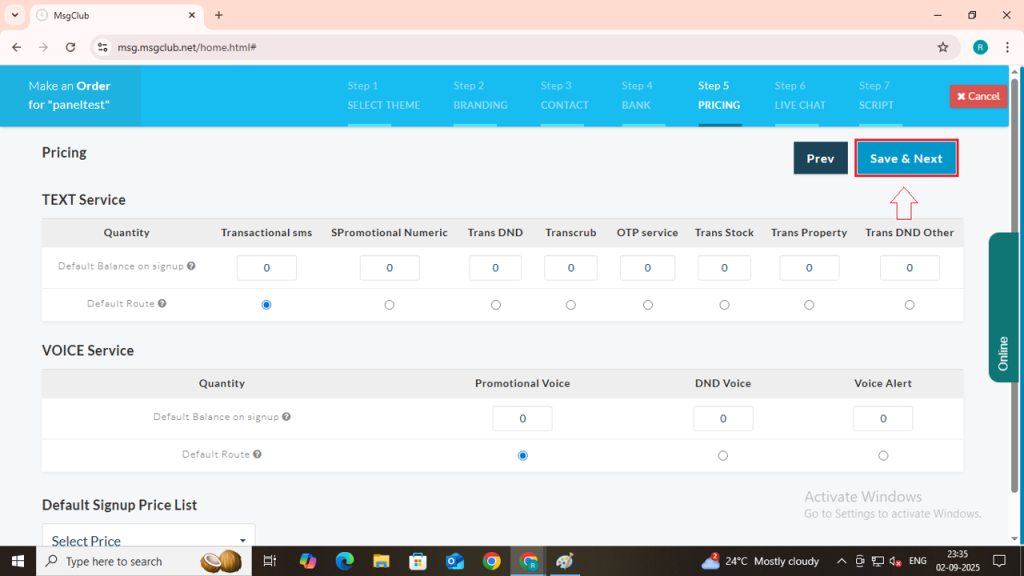
Step 16: Once you have filled in all the bank details, click on the Save & Next button. You will then be redirected to the Pricing page.
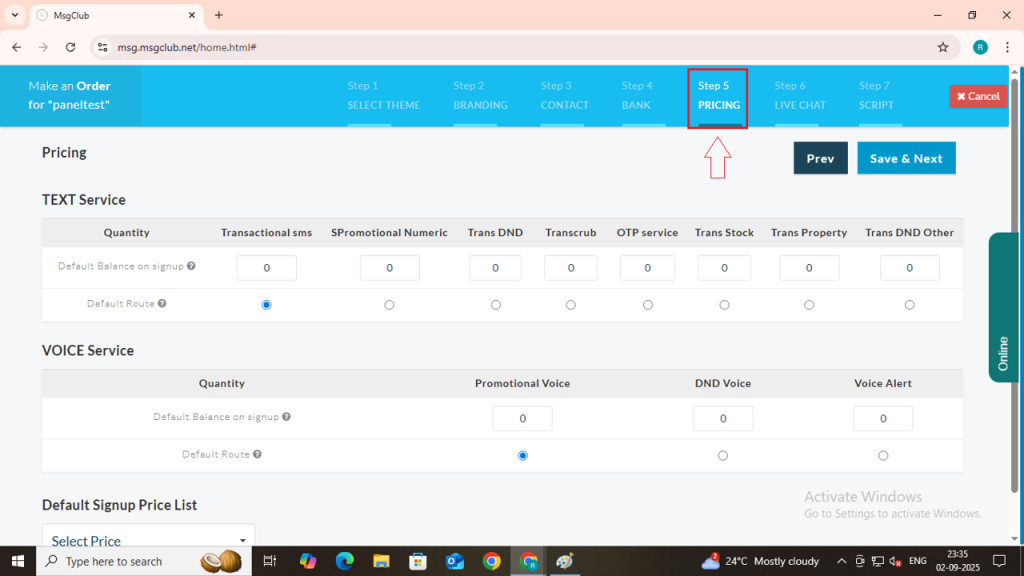
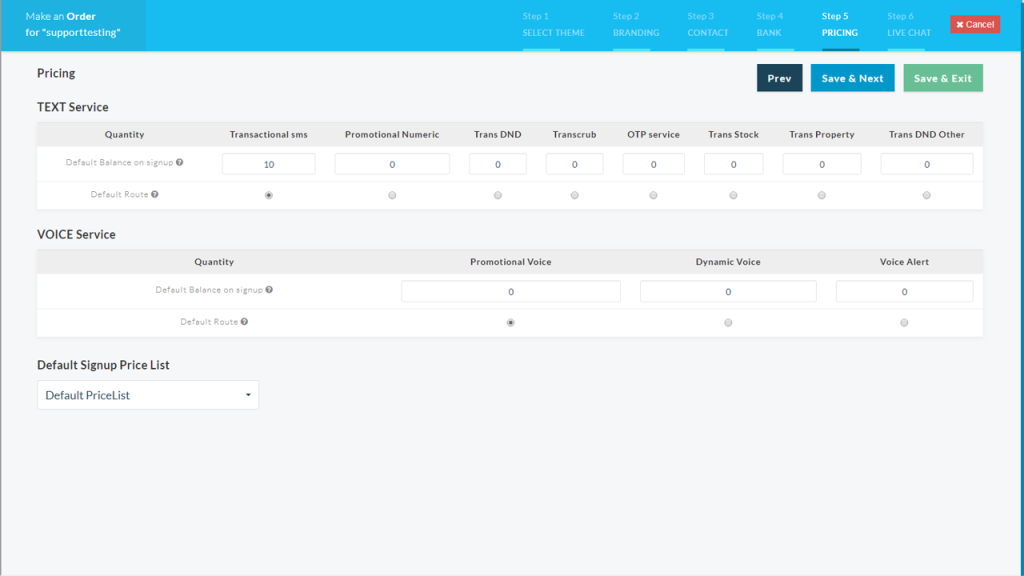
Step 17: On the Pricing page, you can define your service pricing and demo balance:
- Demo Balance – Set the demo balance for services like Text and Voice. When a new user signs up, this demo balance will be automatically added to their account.
- Default Signup List – Select the default price list that will apply to new users.
Note: You can create separate price lists for individual users and set different prices as per their requirements.
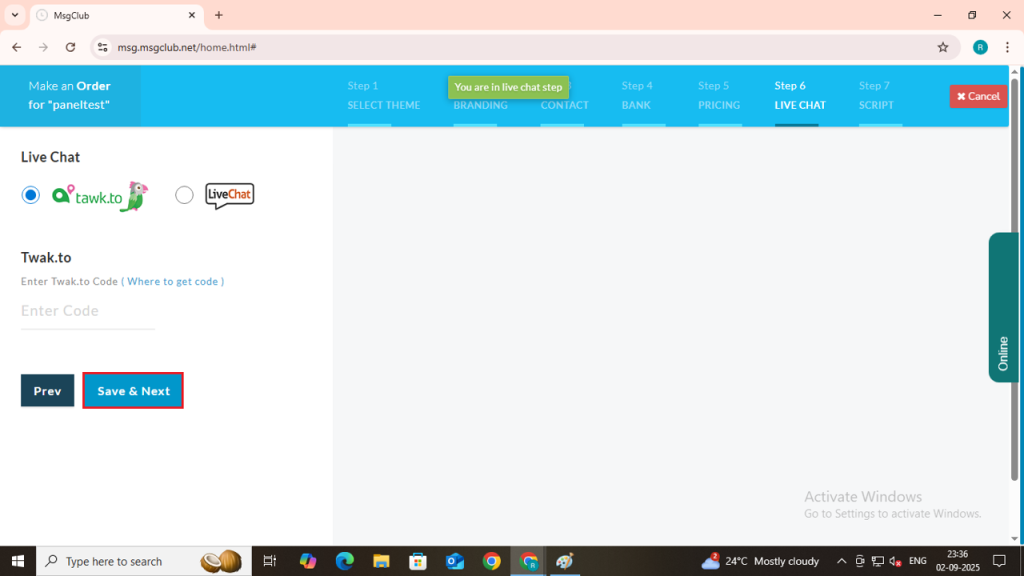
Step 18: After filling in all the details, click on the Save & Next button. You will then be redirected to the Live Chat page.
Step 19: On the Live Chat page, you will find two options to enable chat support on your website:
- Tawk.to – Paste your Tawk.to code here. (Note: You need a paid Tawk.to account to get this code and enable the live chat feature.)
- LiveChat – Paste your LiveChat code here. (Note: You need a paid LiveChat account to access this code and activate the feature.)
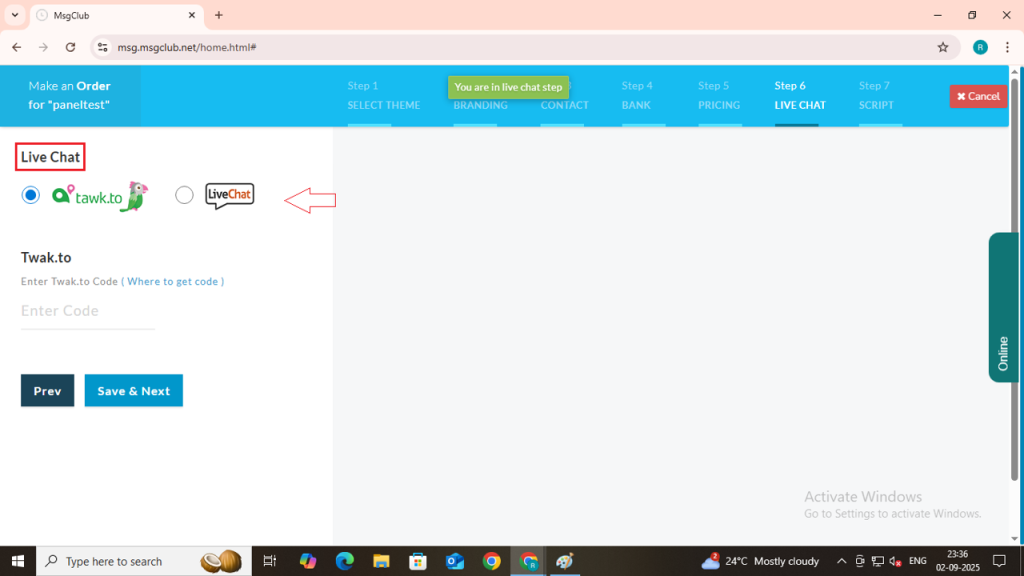
Step 20: Click on the Save & Next button and you will be redirected to the Script page.
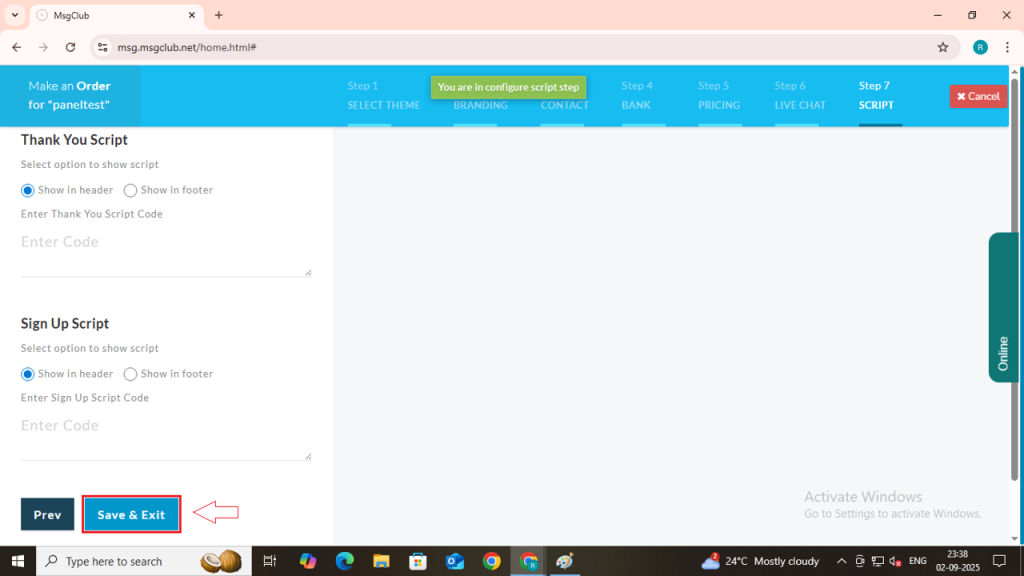
Step 21: On the Script page, you can add your custom codes, such as:
- Thank You Script – Add the script you want to run after form submissions or actions.
- Signup Script – Add the script you want to run after user signup.
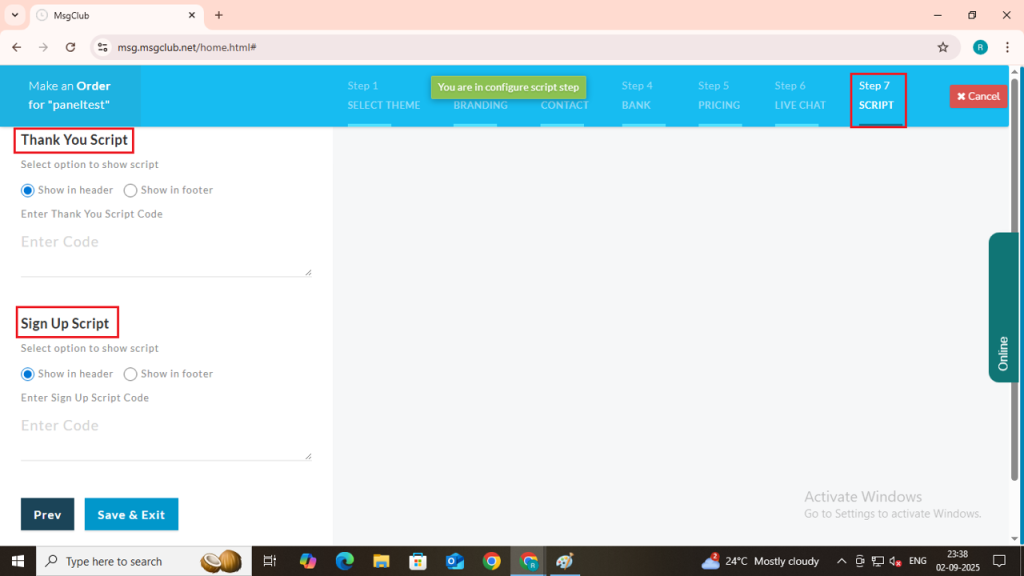
Step 22: Once you have entered your script codes, click on the Save & Exit button. Your website will now be created and listed under the Manage Website page.

FAQs
Q. What happens if a user logs in with another domain?
Ans. If any reseller has set their own domain, then all users under that reseller can only log in through that domain.
Example: Reseller R1 maintains 3 domains – D1, D2, D3.
If user U1 signs up with D1, then U1 can only log in using the D1 domain.
Q. Can I add more than one website and run it?
Ans. Yes, you can build more than one website. However, only one website can be applied per user at a time.
Q. What if I wants to delete a website?
Ans. If you wants to delete a website, you must either:
- Assign another active website, or
- Set the default website provided by the system.
Q. If a user has more than one website, what happens when the first website is deleted?
Ans. In this case, when the first website is deleted, all users attached to Website-1 will automatically be mapped and moved to Website-2 (or whichever site is set as active).