
“Send Email” is the page where you can send emails to your target audience through the MsgClub panel. Here you can send Emails to any email IDs.
Learn More
Process Video
Step by Step Guide
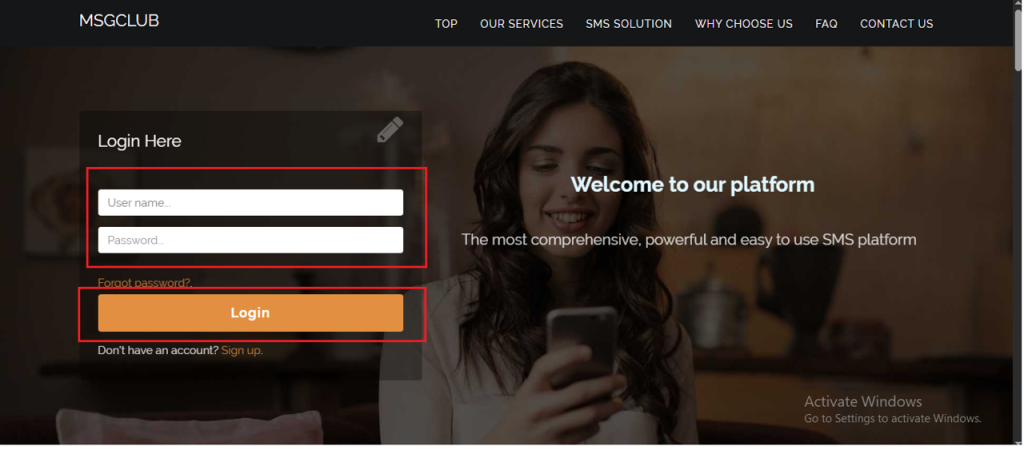
Step 1: Log in to MsgClub using your credentials.
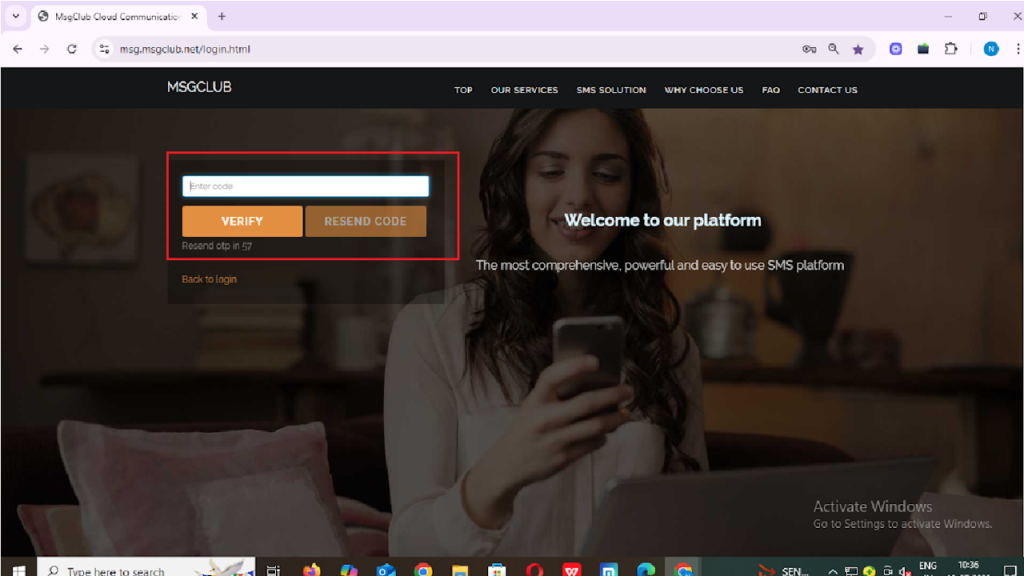
Step 2: You’ll receive an OTP on your registered mobile number. Enter the OTP and click Verify.
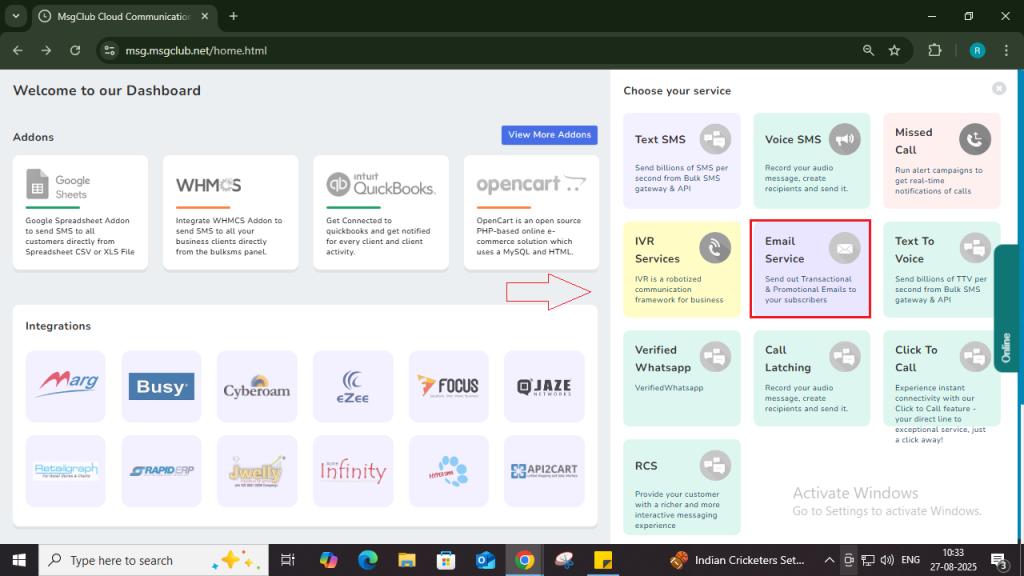
Step 3: Once OTP is verified, you’ll be redirected to the MsgClub dashboard, where you can select Email service.
Step 4: In the Email service, go to the left-hand panel and select the Send Email option.
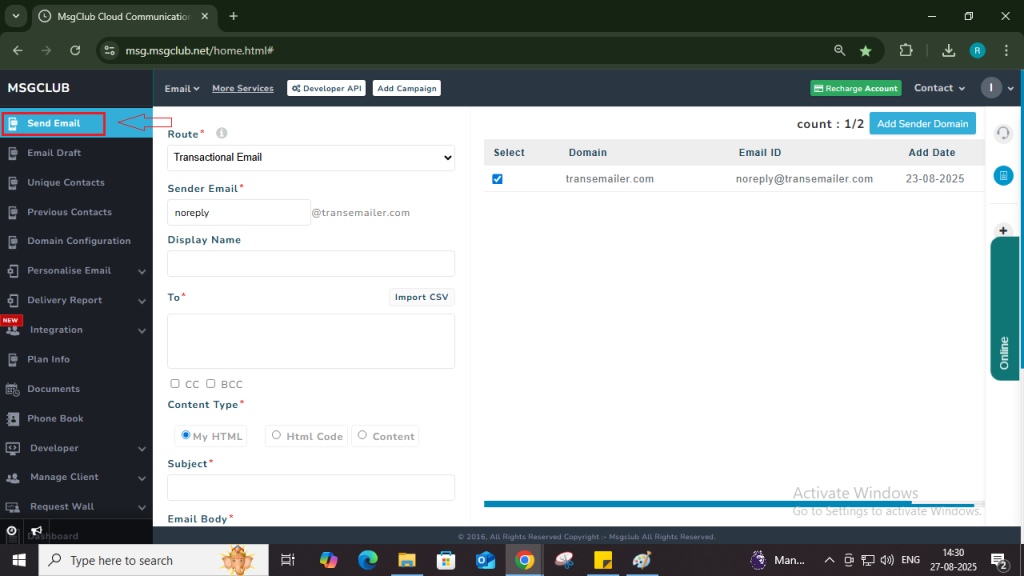
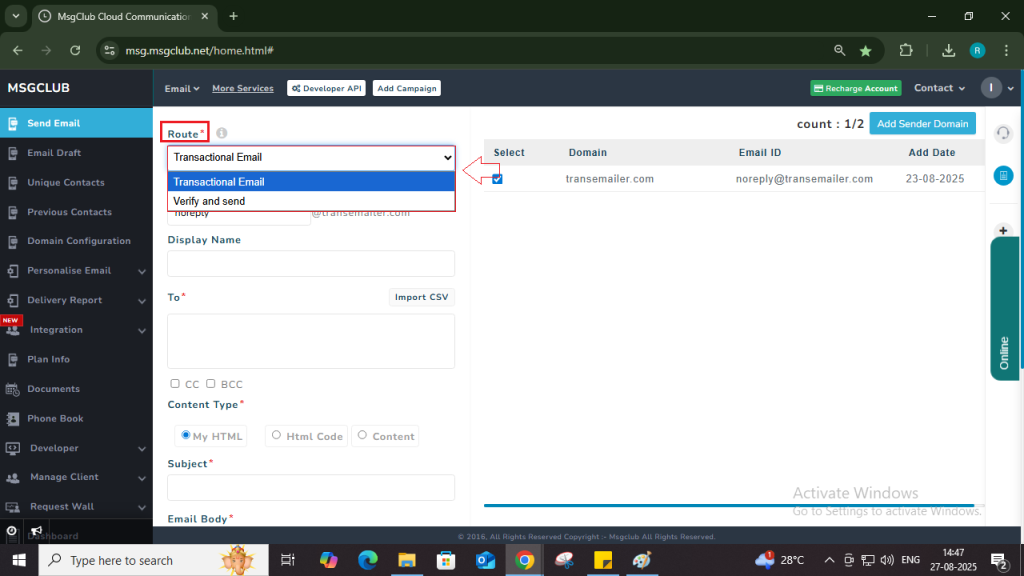
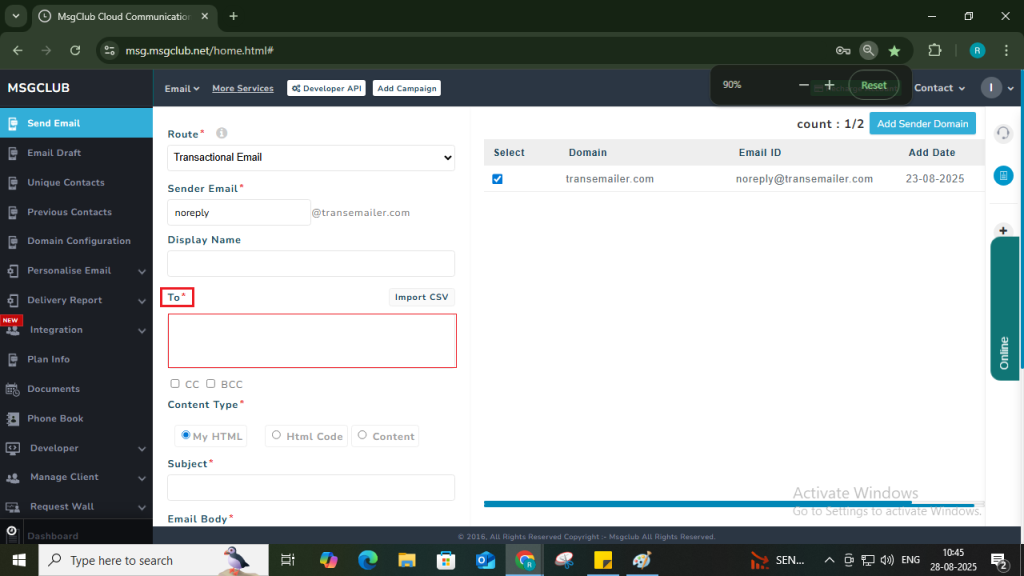
Step 5: On the Email Send screen, the first option you will see is Route, which determines how your email will be sent. You need to select the route you have purchased from the dropdown — either Transactional or Verify and Send (Promotional).
Transactional Route:
This route is used to send transactional emails, such as OTPs, login emails, or any other informational emails meant for a specific person. In this route, you will use your verified email ID as the sender. MsgClub does not verify the recipient email addresses when using this route.
- Email Content Type: Informative content only
- Email Timing: 24/7 (Emails are sent instantly at any time)
- Note: Emails will be sent only to valid email IDs
Verify and Send Route (Promotional Route):
This route is used for sending promotional or bulk marketing emails. When this route is selected, MsgClub will first verify each recipient email address before sending the email. Only verified and valid email IDs will receive the message.
- Note: This process helps maintain high deliverability and protects your domain from being blocked due to invalid or spammy addresses.
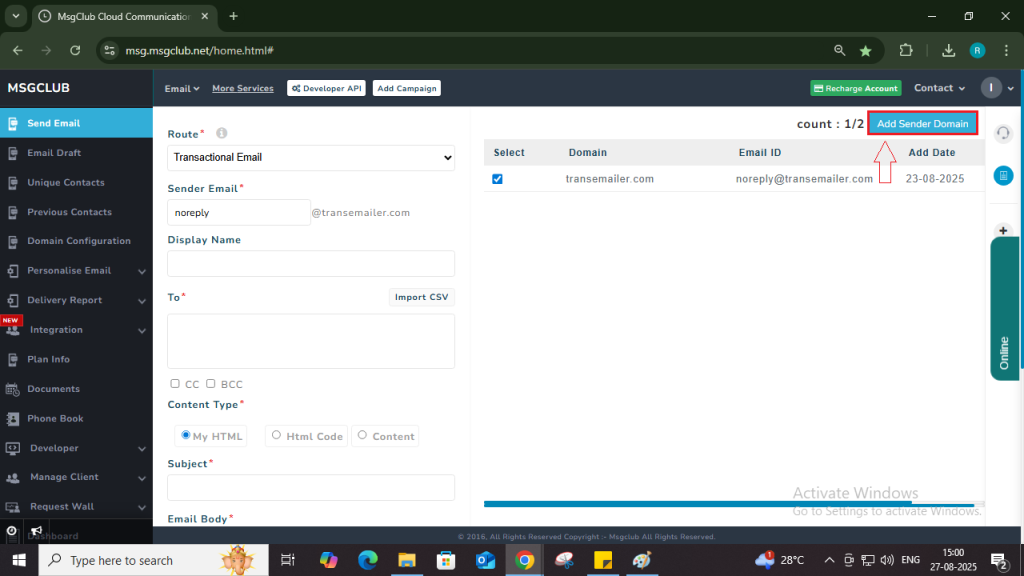
Step 6: When adding domain configuration in the panel to verify your account, you must add an email ID associated with your domain (e.g., sales@msgclub.co.in).
Once your domain is successfully verified, the associated email ID becomes active and can be used for sending emails through the selected route. You can map the verified domain and email ID in the panel to start using it for your email campaigns.
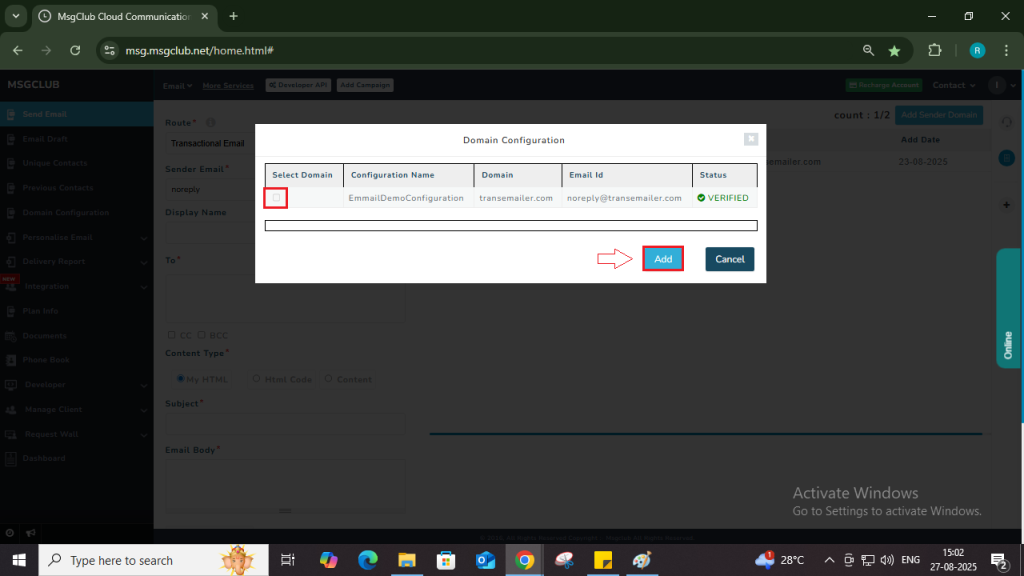
- When you click on the Add Sender Domain button, a popup will open
- In popup select the Domain and click on the Add button
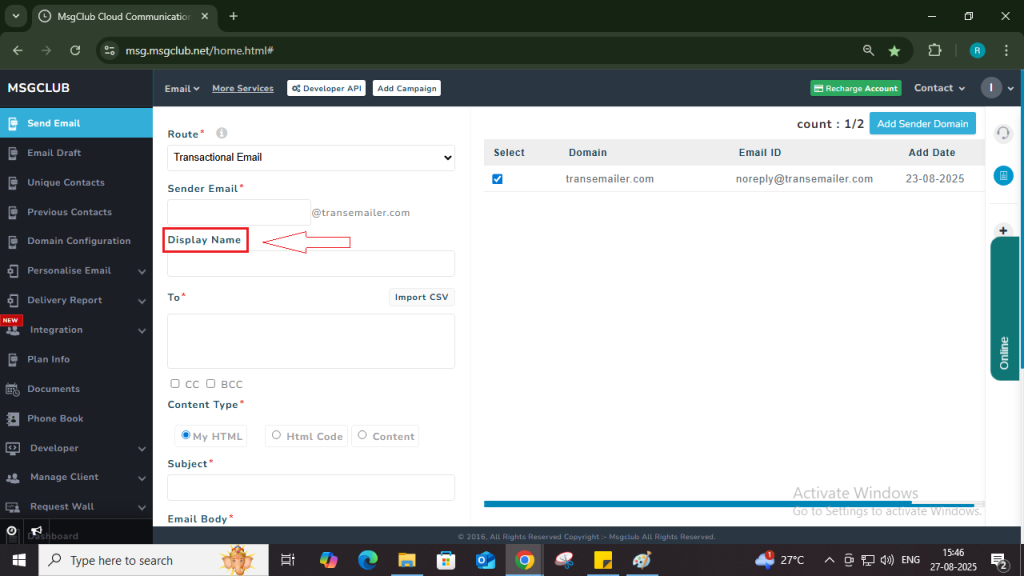
Step 7: Enter Display Name, which will be shown when customer receive your email.
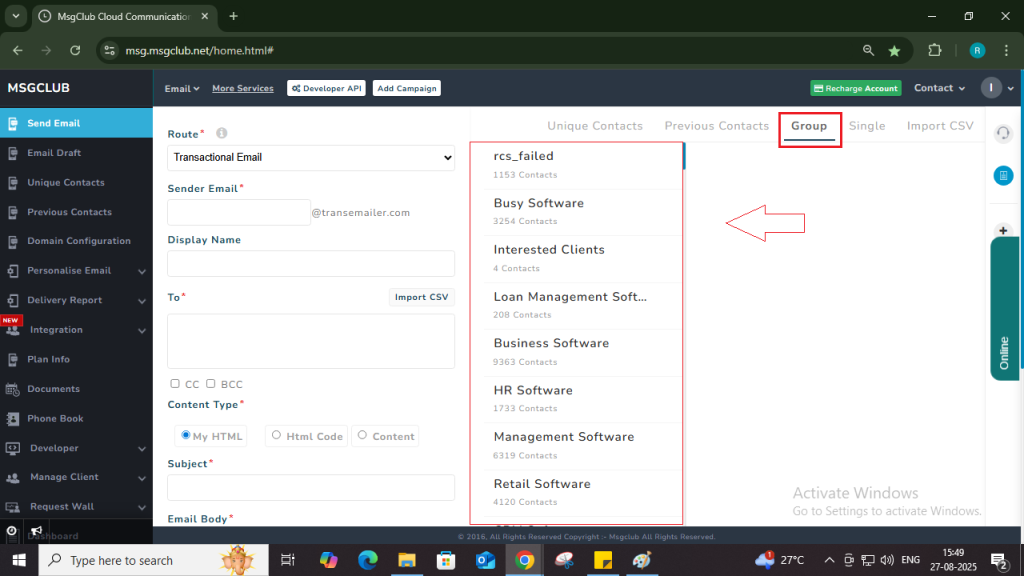
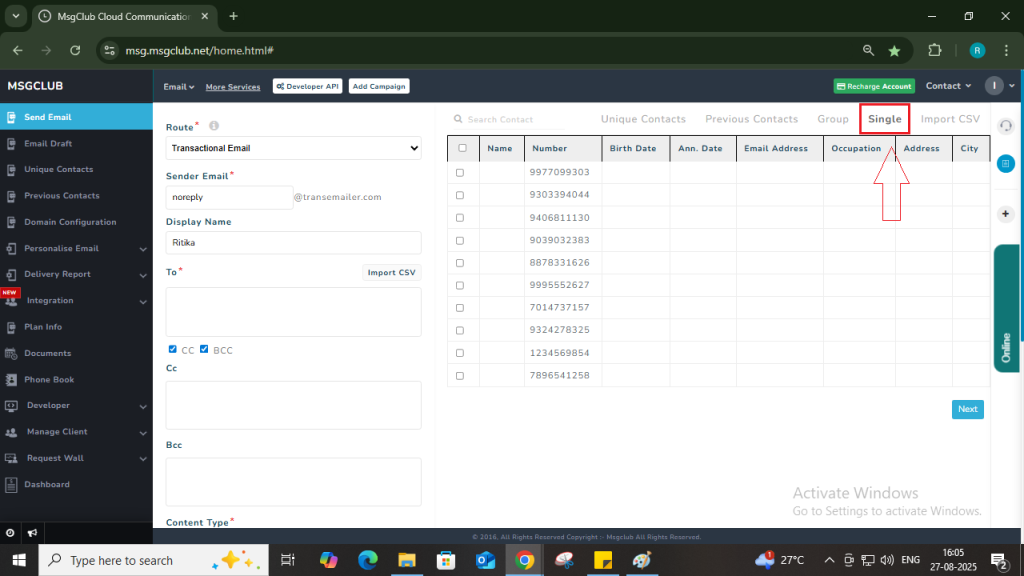
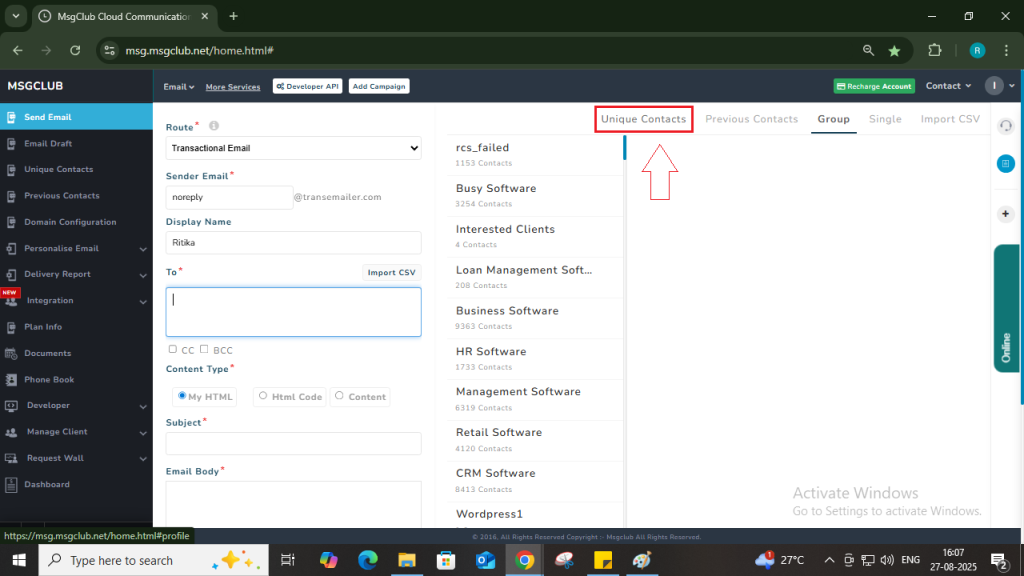
Step 8: Add your customers Email Id’s in To section. You can add the email address of your customers using any of the following three methods:
- Manual Entry – Type or copy paste the email Ids directly into the To box.
Note– When you manually insert the email address of the customers make sure it is separated by Coma (,) if the email address doesn’t separate by the (,) email will not be sent to the customers.
- Import CSV – Upload a CSV file with your contact list directly into the Msgclub panel.

- Phonebook Group – Click on the To section box. A list of your saved phonebook groups will appear on the right. Select the group you want to use — all contacts in that group will be automatically selected. You can also unselect any specific email id you don’t wish to include.
Note: You can create and manage phonebook groups in Msgclub by adding contacts manually or importing them in bulk. Create Phonebook Group
- Single – You can select the Single option to send emails to individual contacts saved in your phonebook. From here, you can manually choose specific contacts and send emails directly to them.
- Previous Contacts – This option allows you to send emails to contacts you have previously emailed. It helps you quickly reach out to your recent recipients without re-entering their email IDs.

- Unique Contacts – You can select Unique Contact option if you have previously send emails to unique contacts then their email ids are saved in Unique Contact option.
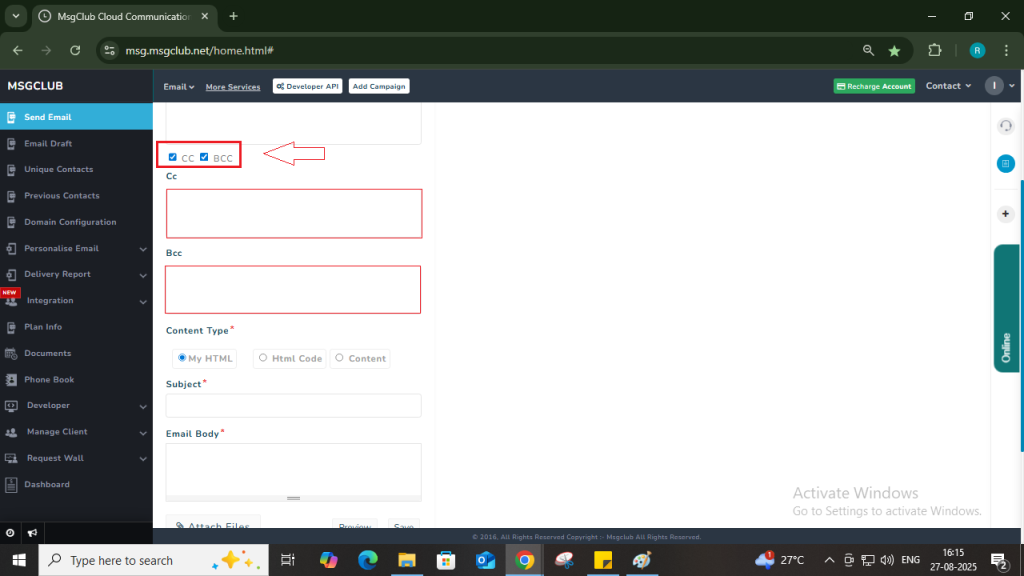
Step 9: To add CC (Carbon Copy) or BCC (Blind Carbon Copy) to your email, click on the CC or BCC option while composing your message. When you click on either option, an input field will appear. Enter the email addresses you wish to include in CC or BCC.
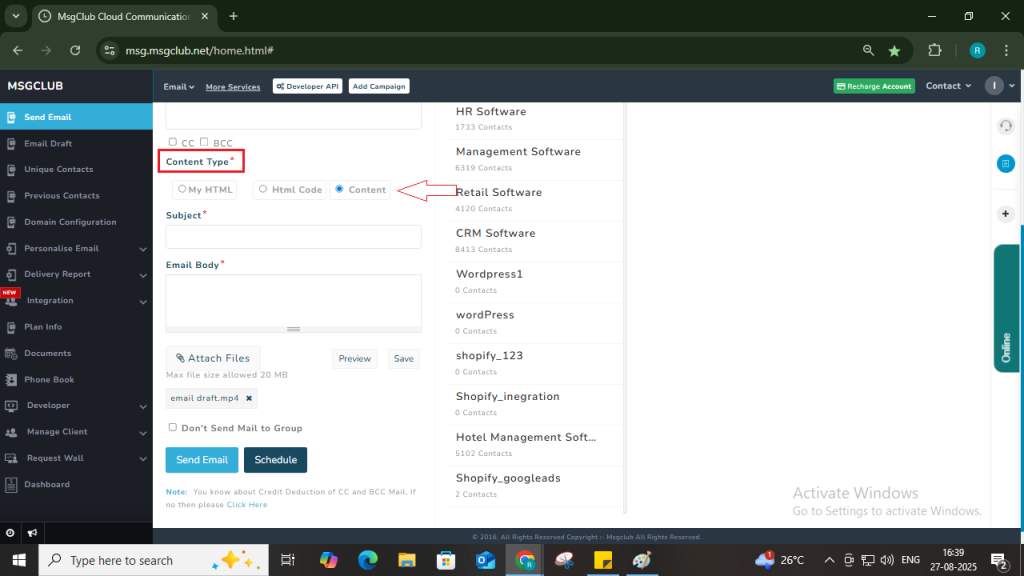
Step 10: Select the Content Type for your email. You can choose from the following options:
- My HTML – Use this if you have a complete HTML email to paste.
- HTML Code – Use this if you have raw HTML code with inline CSS.
- Content – Use this for writing simple text-based emails.
Step 11: In the Subject field, enter the subject line for your email. This is the first thing your recipients will see, so make sure it’s clear, concise, and relevant.

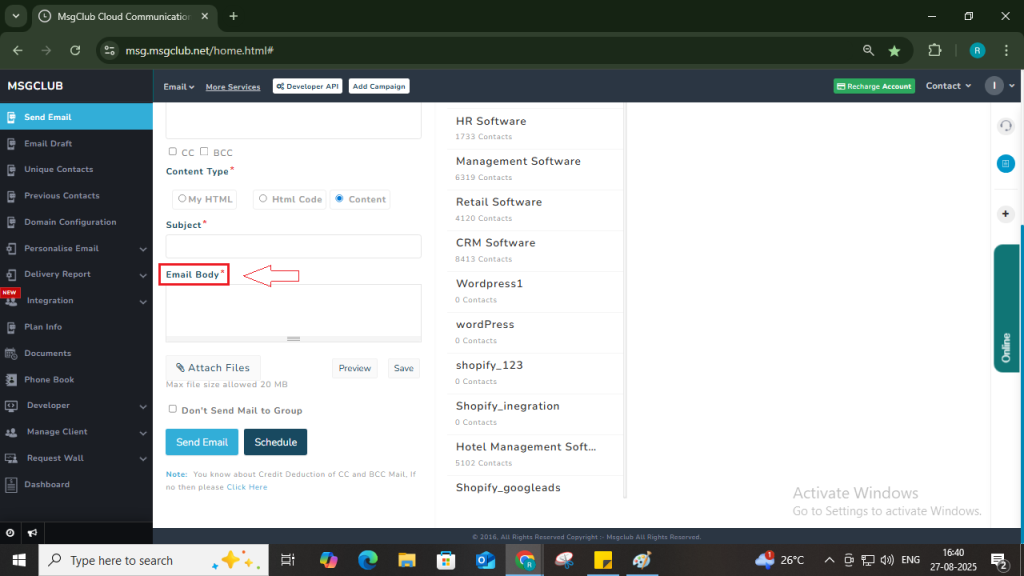
Step 12: In the Email Body section, write or paste your email content based on the selected content type.
Note: You can preview your email using the Preview button. To reuse the email later, click the Save button to save it as a draft.

Step 13: If you want to attach a file to your email, click the Attach File button and upload your file.

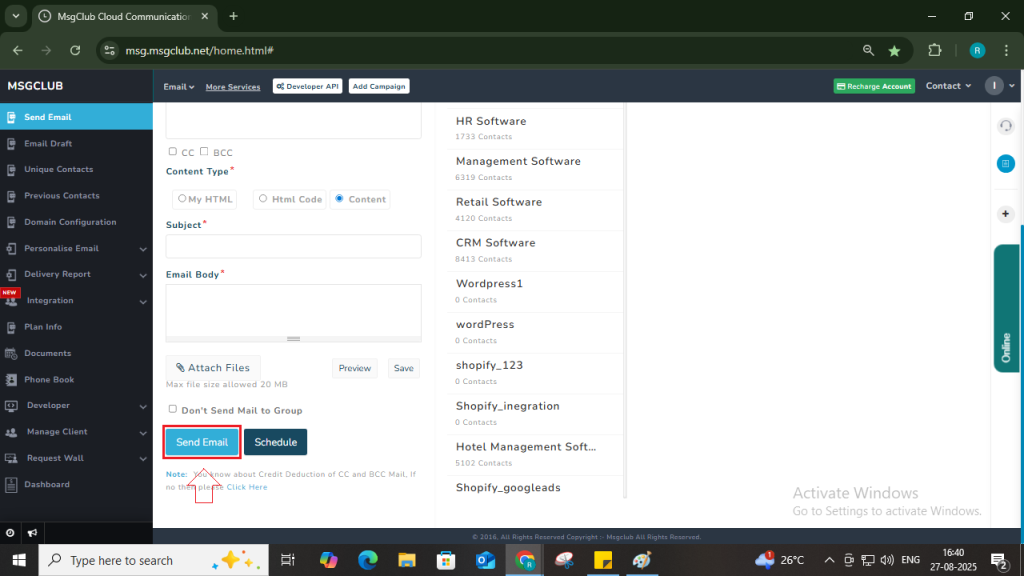
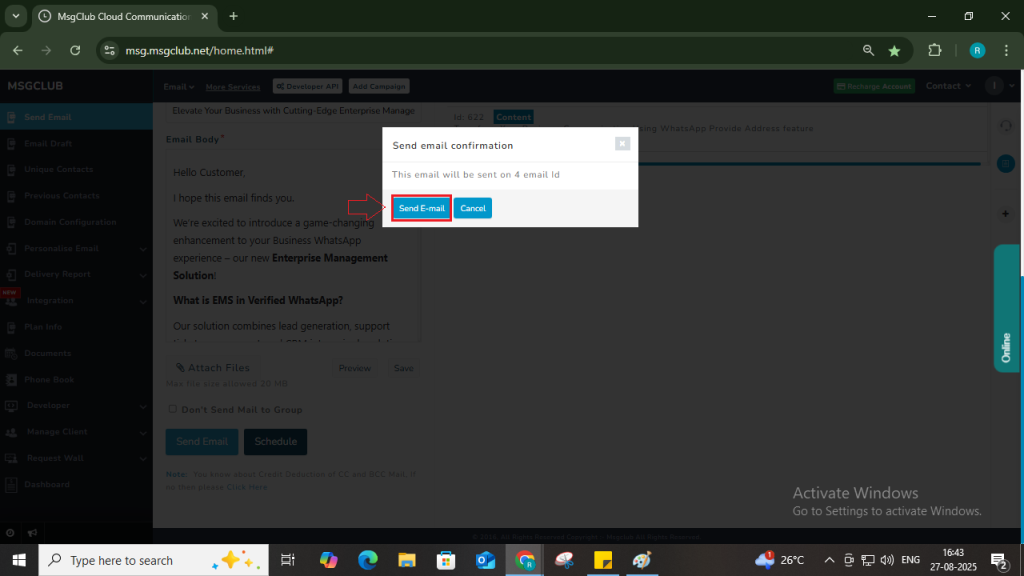
Step 14: After filling in all the required fields, click on the Send Email button, then a confirmation popup will open click on Send Email. Your email will be sent to the selected recipients immediately.
FAQs
Q. How to send email from MsgClub?
Ans. To send an email from MsgClub, follow the above steps on this blog.
Q. How many emails can I send from MsgClub Email service?
Ans. The number of emails you can send depends on your available credits and the type of email plan that you’ve purchased. Each recipient uses 1 credit (or more if CC/BCC is added).
Q. Can I add CC and BCC in Email when I am using MsgClub Email service?
Ans. Yes, you can add both CC and BCC while sending emails. Just click on the CC or BCC option and enter the email addresses you want to include.