
Capturing leads from your Meta (Facebook & Instagram) Lead Forms and storing them in a Google Sheet helps streamline your lead management process. Instead of manually downloading leads, this integration ensures that every new lead is automatically captured and stored in real-time, making it easier for your team to track, follow up, and manage data efficiently.
Learn More
Process Video
Step-by-Step Guide
Step 1: Open Meta Business Suite.
From the left-hand menu, click on All Tools, and then select Instant Forms.
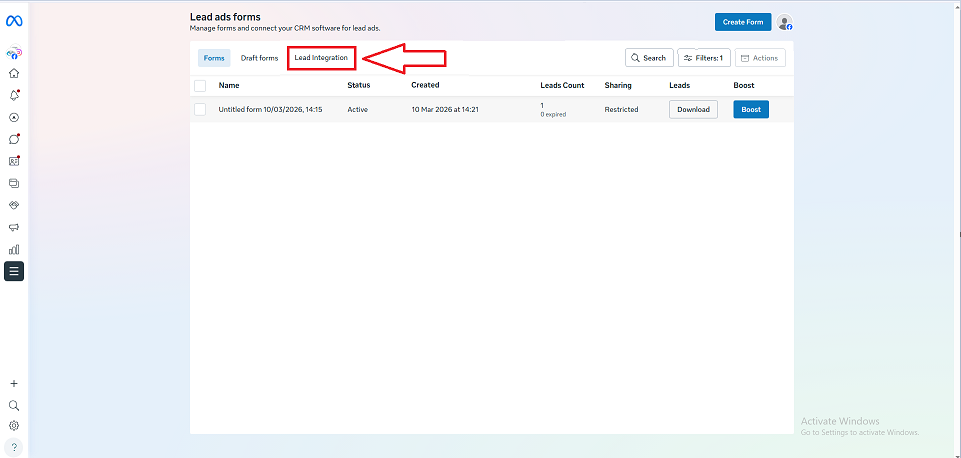
Now, click on the Lead Integration option.
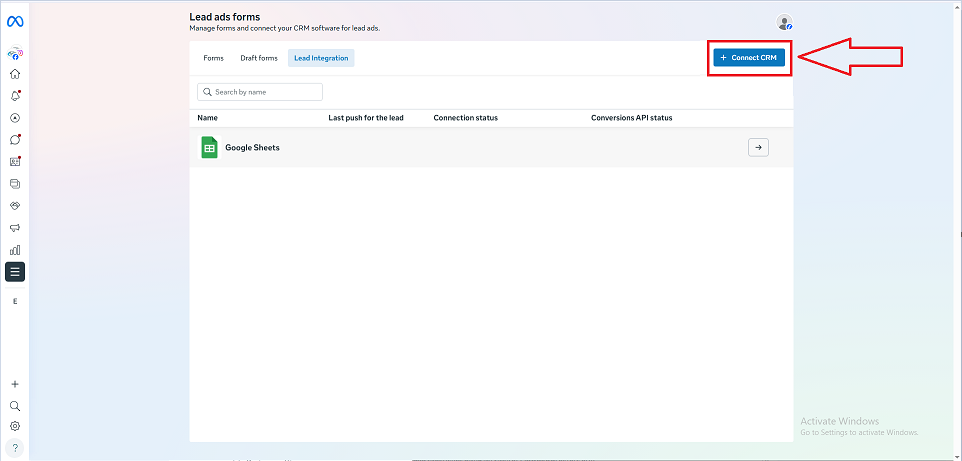
Step 2: Click on + Connect CRM.
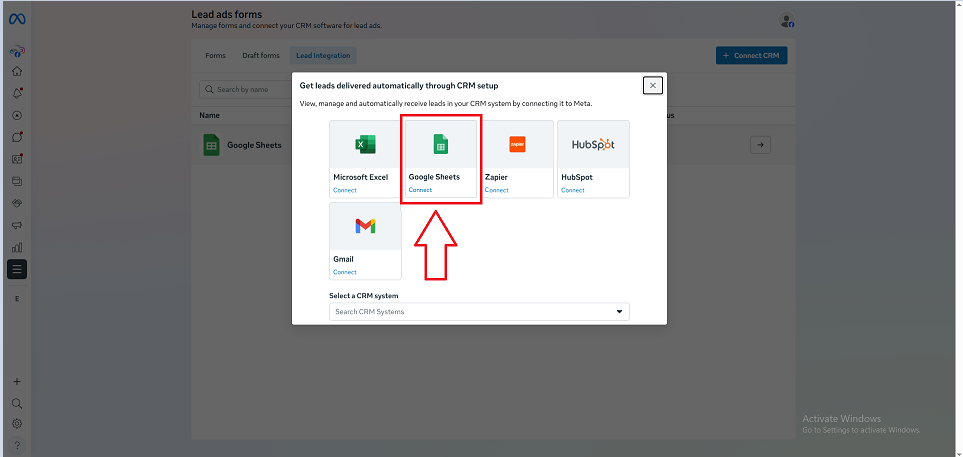
From the available options, select Google Sheets as your CRM.
Step 3: Click on Sign in with Google and log in using the Google account where your spreadsheet is stored.
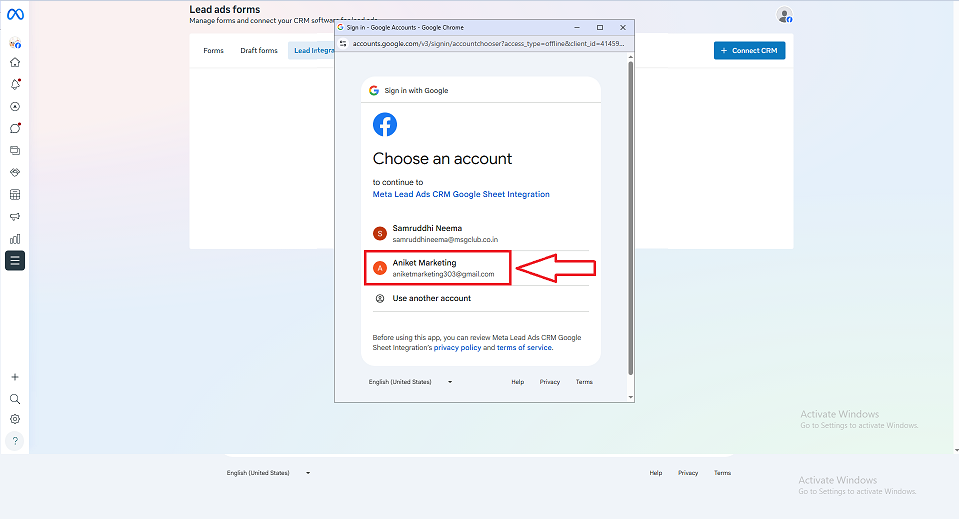
Grant the necessary permissions to allow Meta to access your Google Sheets.
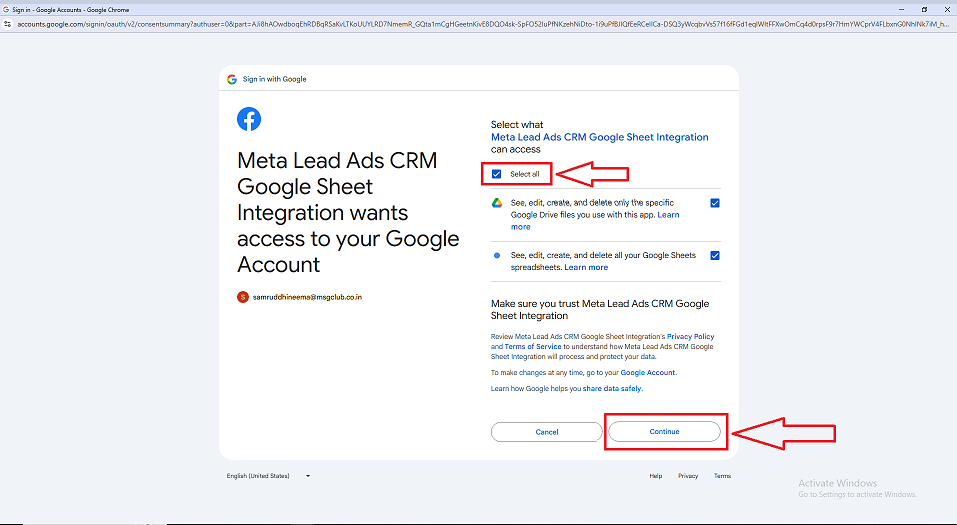
Note: If your Google account is already connected, you can skip this step.
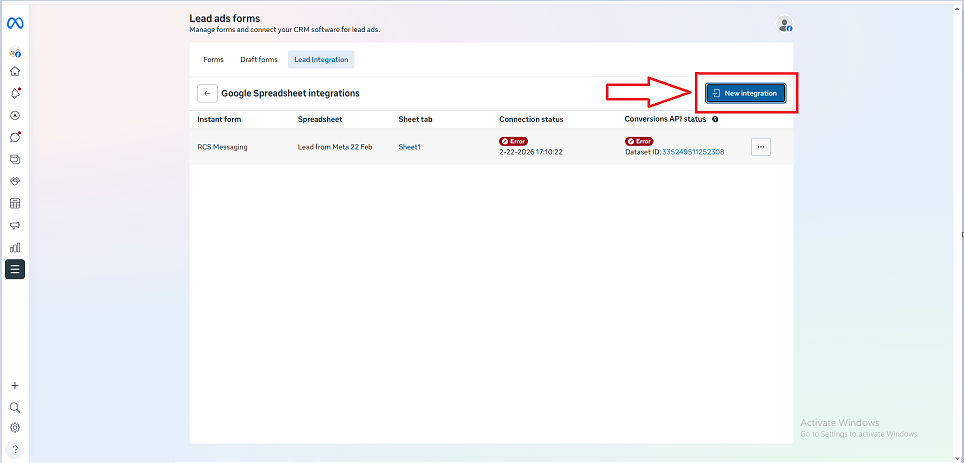
Step 4: Under the Google Spreadsheet Integrations section, click on New Integration to begin the setup process.
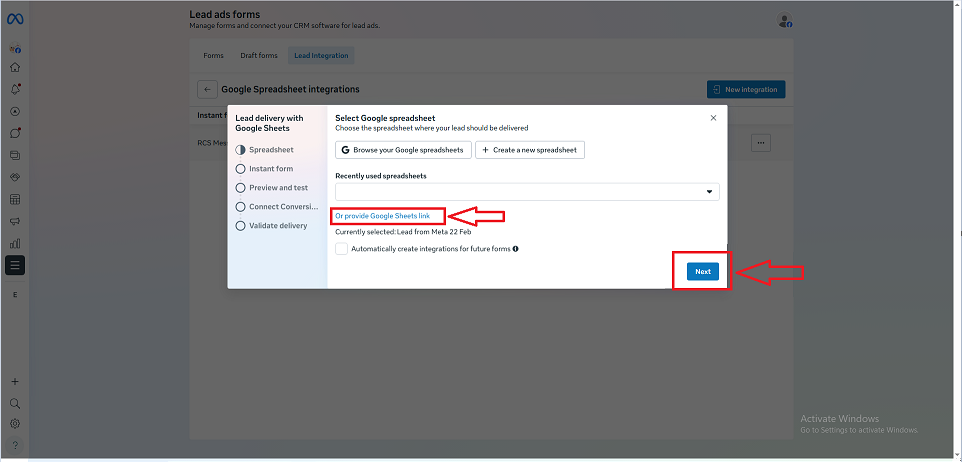
Step 5: Choose the spreadsheet where you want your leads to be stored. You can:
- Select an existing file from Google Drive
- Create a new spreadsheet
- Paste the link of an existing Google Sheet
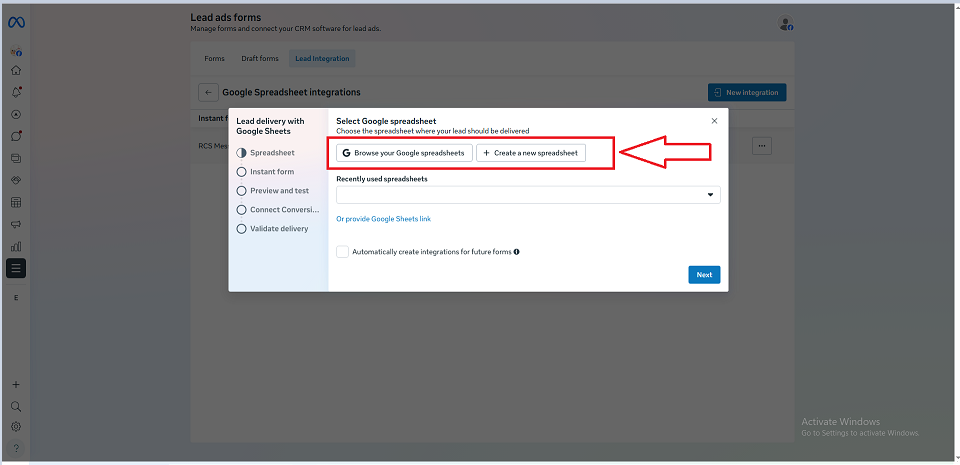
Once selected, click Next.
Step 6: Choose the specific worksheet (tab) within the spreadsheet.
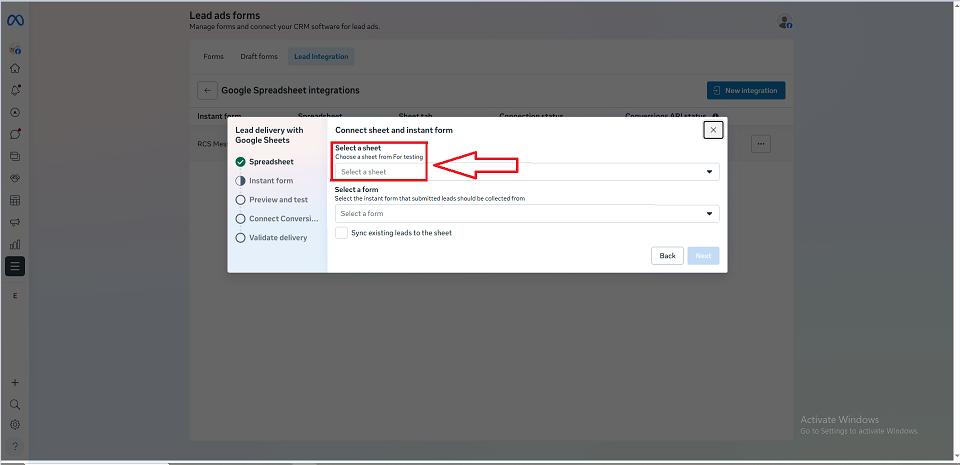
Then select the lead form you want to connect.
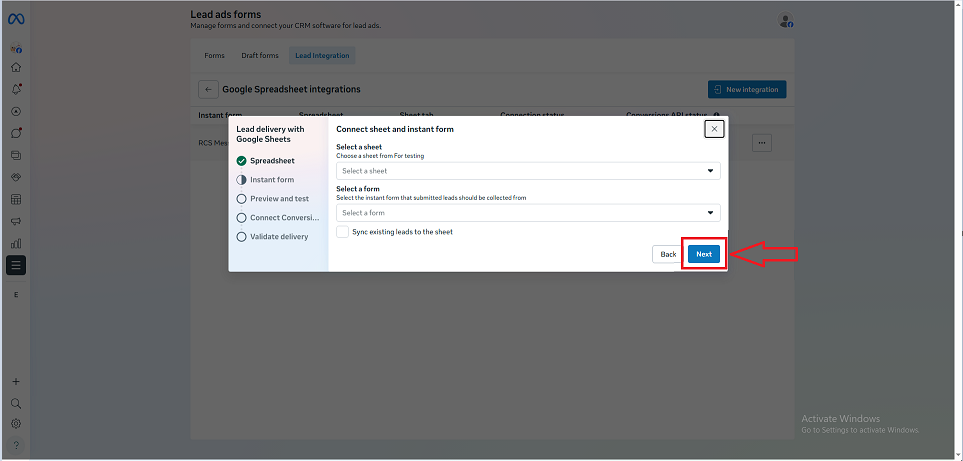
If you want to import previously collected leads, enable Sync existing leads.
Click Next to proceed.
Step 7: Review all the selected details carefully.

You can preview the form if needed.
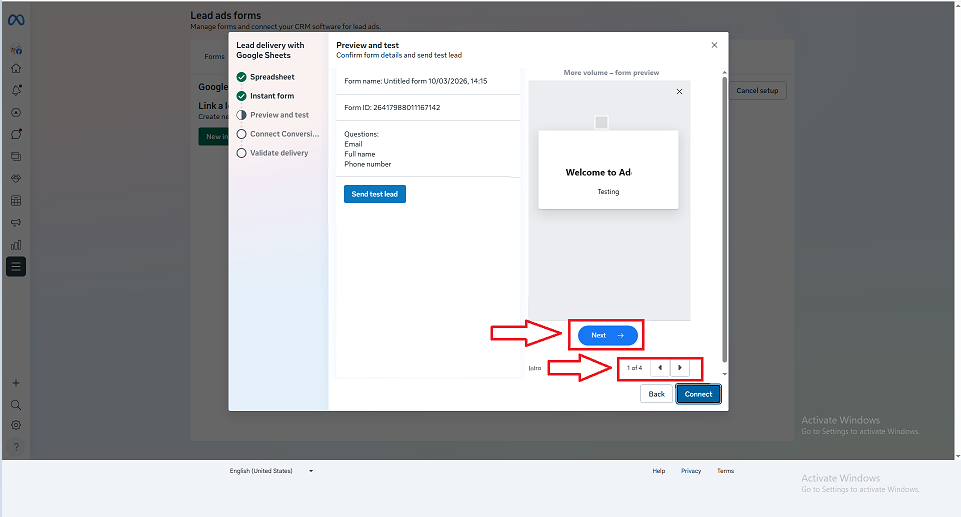
Once confirmed, click Connect.

Step 8: Choose the correct Business Portfolio ID and Dataset ID associated with your account.
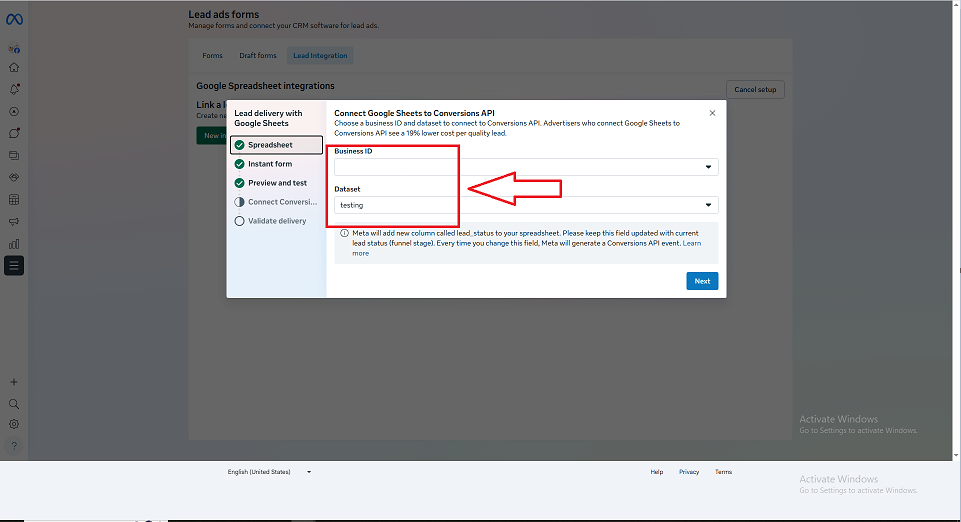
Click Next to continue.
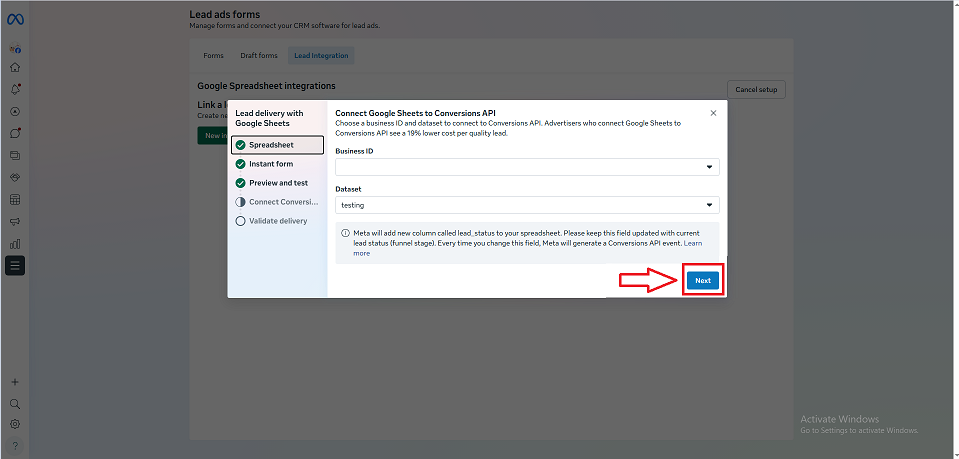
Note: If you see an error, please verify that the selected IDs are correct.
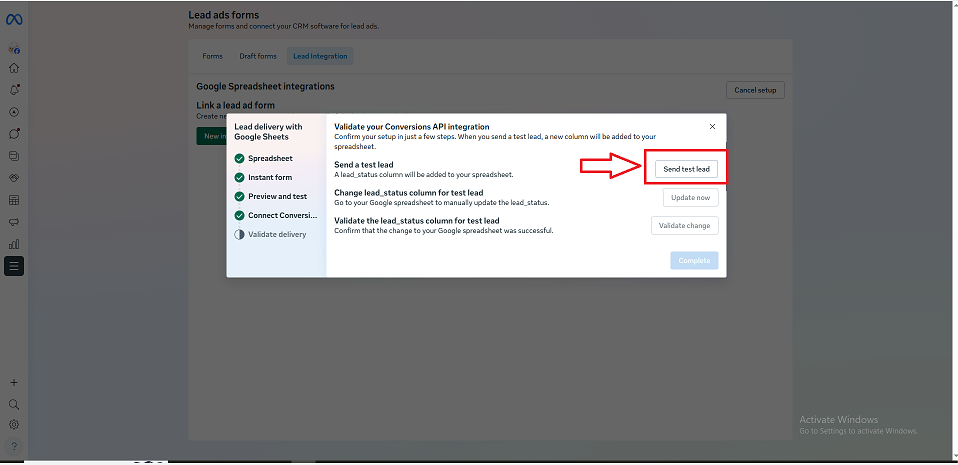
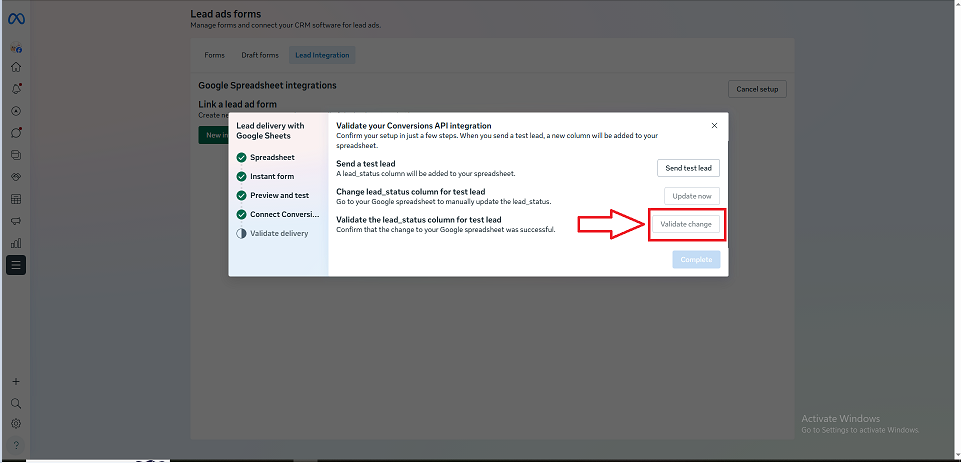
Step 9: Click on Send Test Lead to check if the integration is working properly.
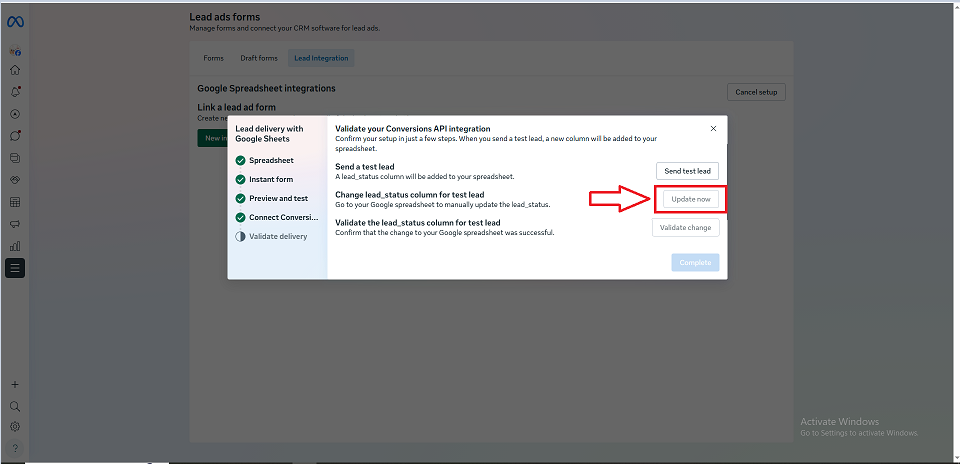
Now, click on Update now to open your Google Sheet for checking the test leads.
Check the sample lead in the spreadsheet & update as per the instructions.
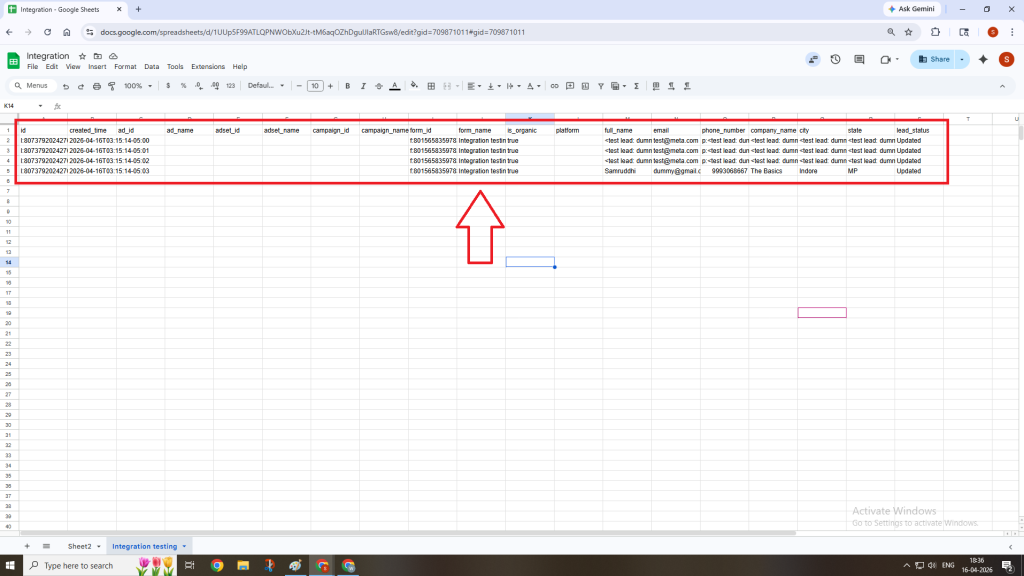
Once verified & updated, click on Validate Change.
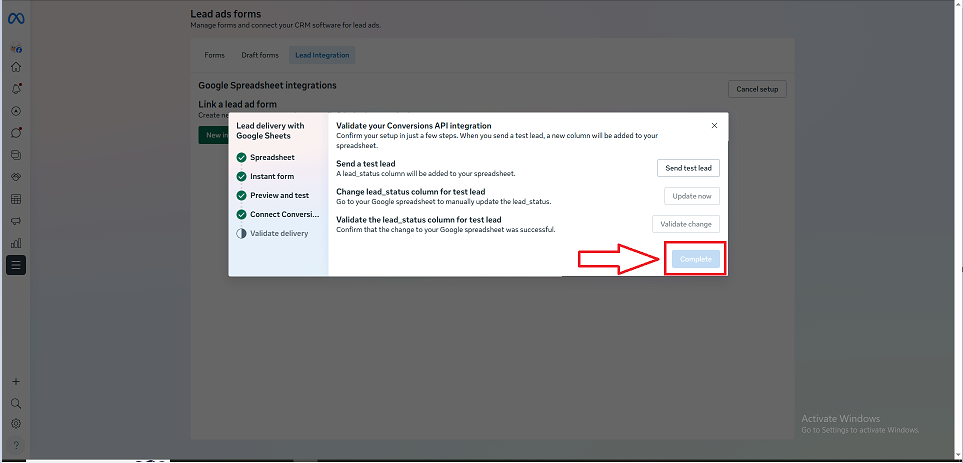
Step 10: Once your changes are validated, click on Complete to finish the setup.
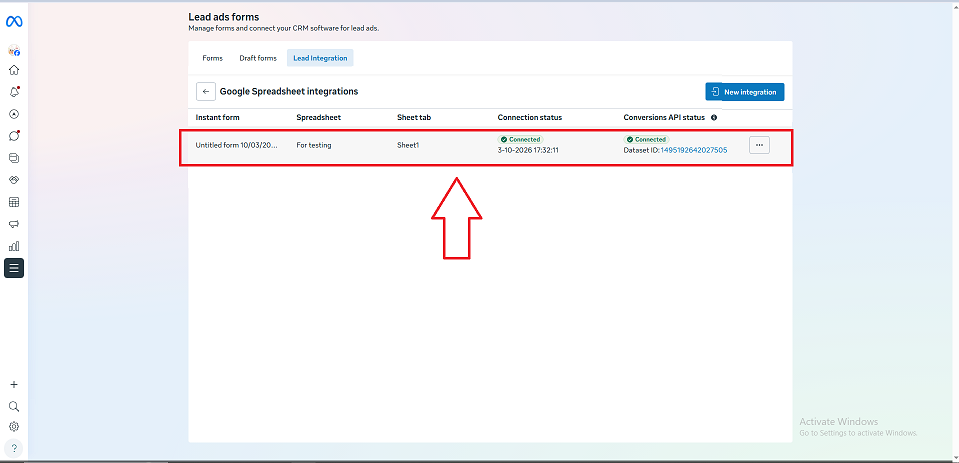
Your integration will now appear in the Google Spreadsheet Integrations list. From this point onward, every new lead will be automatically added to your selected Google Sheet.
FAQs
Q. What is the benefit of this integration?
Ans. It eliminates manual work and ensures that leads are captured instantly in a structured format.
Q. Can I connect multiple lead forms to one Google Sheet?
Ans. Yes, you can connect multiple forms, but it is recommended to manage them properly using separate sheets or columns.
Q. Will old leads be added automatically?
Ans. Only if you enable the “Sync existing leads” option during setup.
Q. What should I do if the test lead does not appear?
Ans. You need to check the following:
- Google account permissions
- Selected spreadsheet and worksheet
- Business and Dataset IDs
Q. Can I edit or disconnect the integration later?
Ans. Yes, you can manage or remove the integration anytime from the Lead Integration section.