
The first step in the DLT process is registering your business on the operator’s DLT portal. After completing the registration, your business will undergo verification. Once approved, you will receive an Entity ID, which is essential for all subsequent steps in the DLT process, such as template registration, header mapping, and sender ID creation.
These are the documents required for the DLT registration process along with LOA letter- CLICK HERE
Learn More
Process Video
Step By Step Guide
Step 1. – Open this Videocon link in your browser
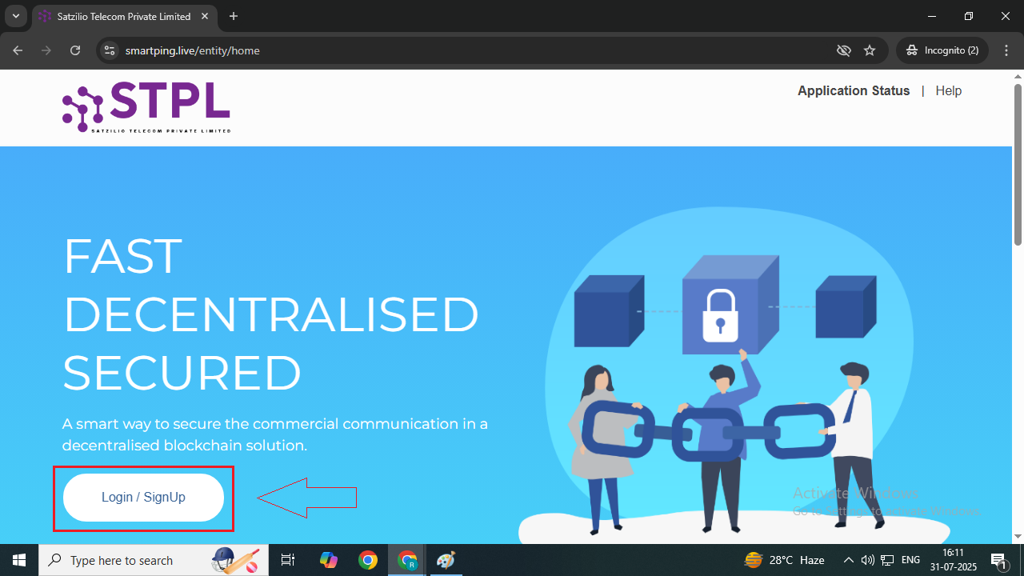
Step 2. – On the home page, click the Login/Signup button.
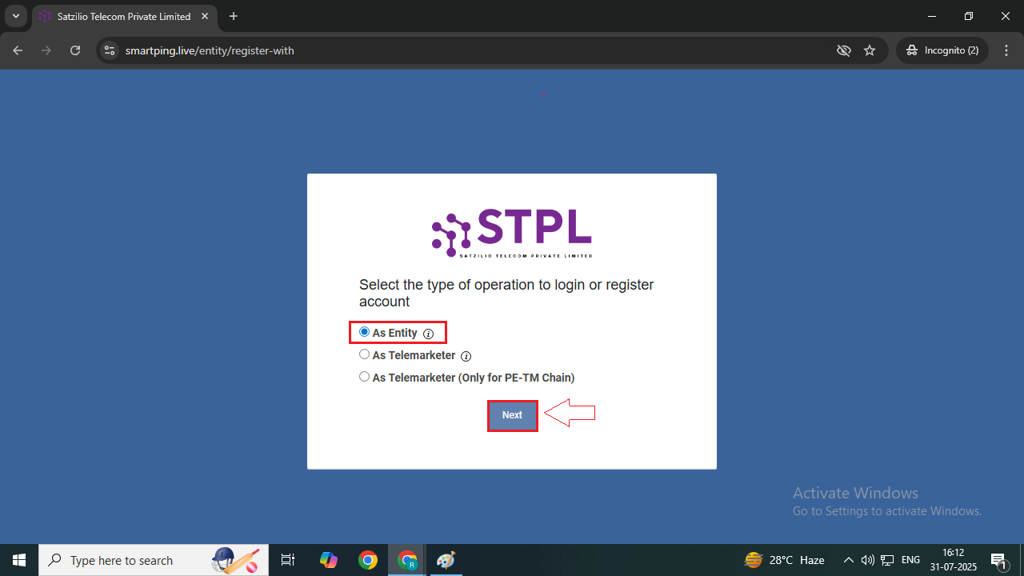
Step 3. – On the signup page, select the “As Entity” option and click the Next button.
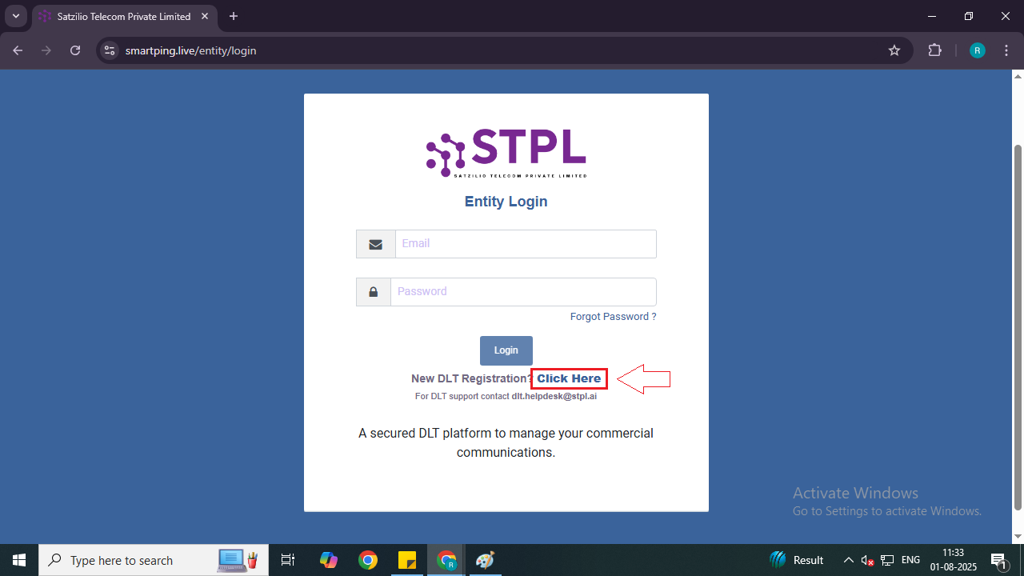
Step 4: After clicking Next, you will be redirected to the Login page. Next to “New DLT Registration?”, click on “Click Here” to proceed to the DLT form-filling page.
Note: If you are already registered, you may skip the steps below.
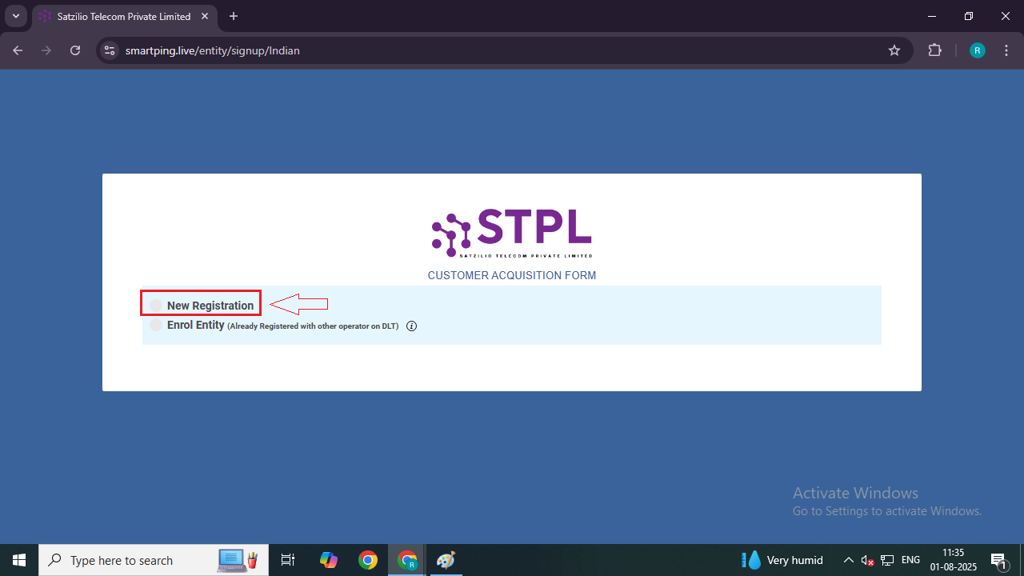
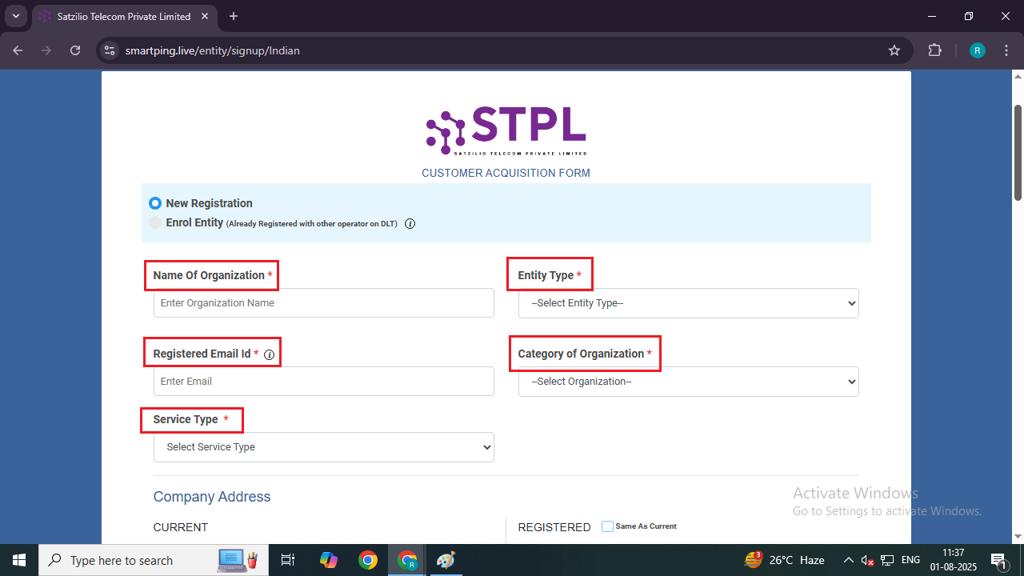
Step 5: On the next page, click on the New Registration option. A registration form will then open.
Note: If you are already registered with another operator, select the Enroll Entity option.
Step 6: Once the form opens, fill in your business details as required.
Part 1 –
- Name of Organisation – Enter your company name.
- Entity Type – Select the type of your firm (e.g., PVT. LTD, Proprietor, LLP, etc.).
- Registered Email ID – Enter the email ID for registration.
- Category of Organisation – Choose the category that best represents your company.
- Service Type – Select SMS option in dropdown.
Note – Check all details properly before proceeding.
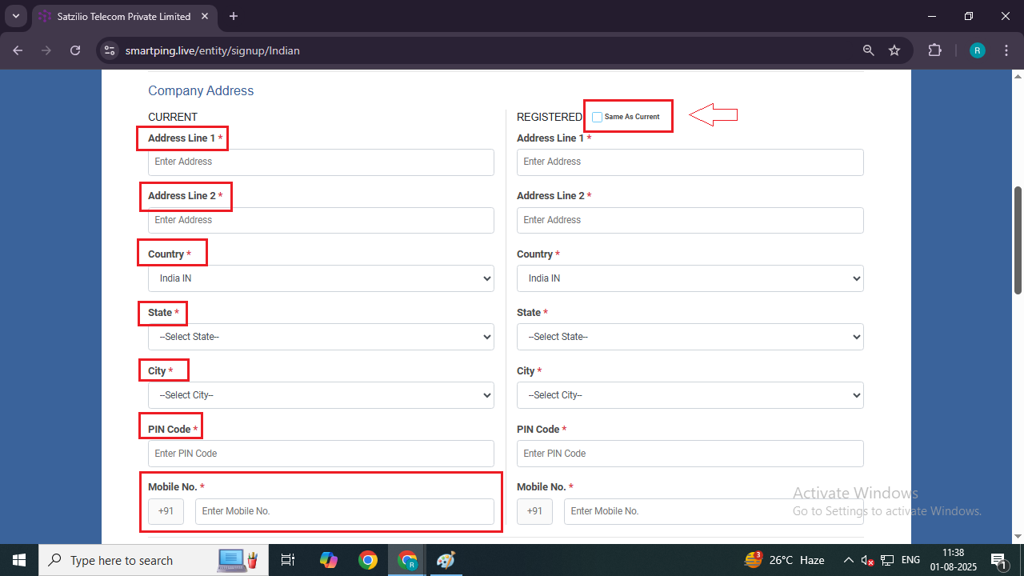
Part 2 – Company Address
Fill in the Company Address as per the document you will attach. Ensure that the address in the document matches the form.
In Current –
- Address Line 1: Enter your company address exactly as it appears on your submitted documents.
- Address Line 2: Enter your company address exactly as it appears on your submitted documents.
- Country: Select your country
- State: Select your state
- City: Select your city
- PIN Code: Enter your pincode
- Mobile No.: Enter your mobile number
If your Registered Address is the same as the Current Address, click on “Same as Current” checkbox in the Registered section on the right side.
Part 3 – Authorized Person Information
- Name – Enter the same name as in the LOA letter.
- Designation – Specify the designation of the authorised person.
- Authorisation Document – Attach the LOA Letter.
- Email – Use the email address mentioned in the LOA letter.
- Mobile Number – Enter the same mobile number as in the LOA letter and Click Verify to confirm the mobile number.
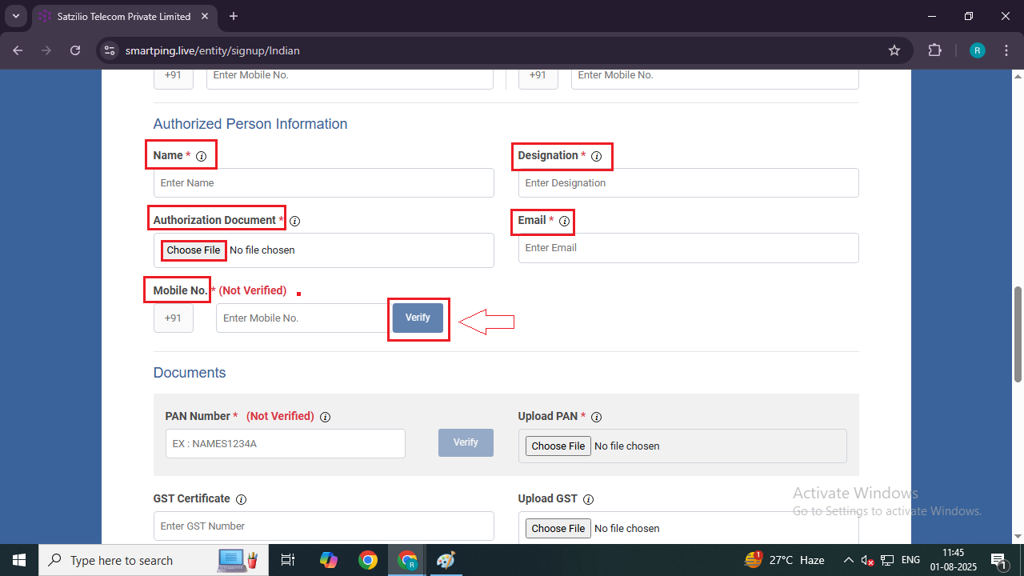
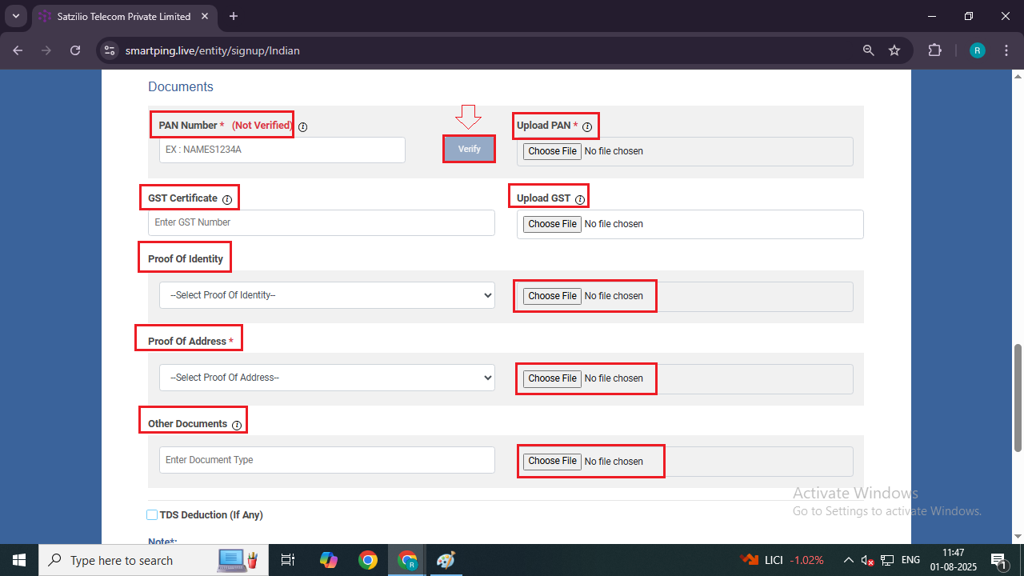
Part 4 – Document Upload
- PAN Number – Upload the PAN card of the entity or the owner’s PAN card for Sole Proprietors. and click on the Verify button.
- GST Certificate (Optional) – Upload if applicable.
- Proof of Identity (Optional) – Upload an identity document.
- Proof of Address – Upload an address proof document.
- Other Documents (Optional) – Upload Partnership Deed, ID cards, etc.
- File Size Restrictions:
- JPG images must be under 100 KB.
- PDF documents must be under 2 MB.
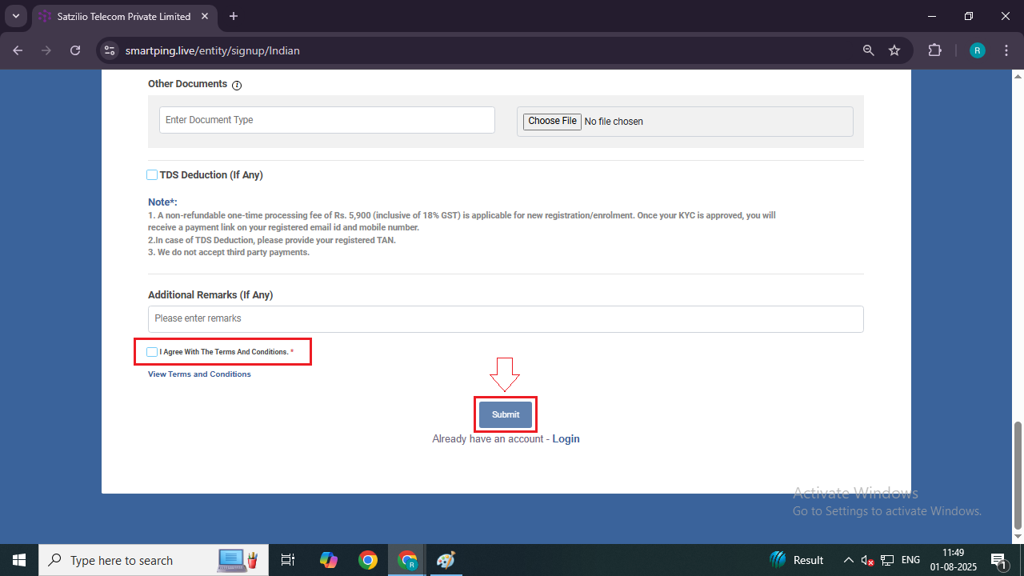
- TDS Deduction – Leave this option as is.
Step 7: After filling in all the required details, enter any Additional Remarks if applicable. Then, check the box for “I agree with the Terms and Conditions.”
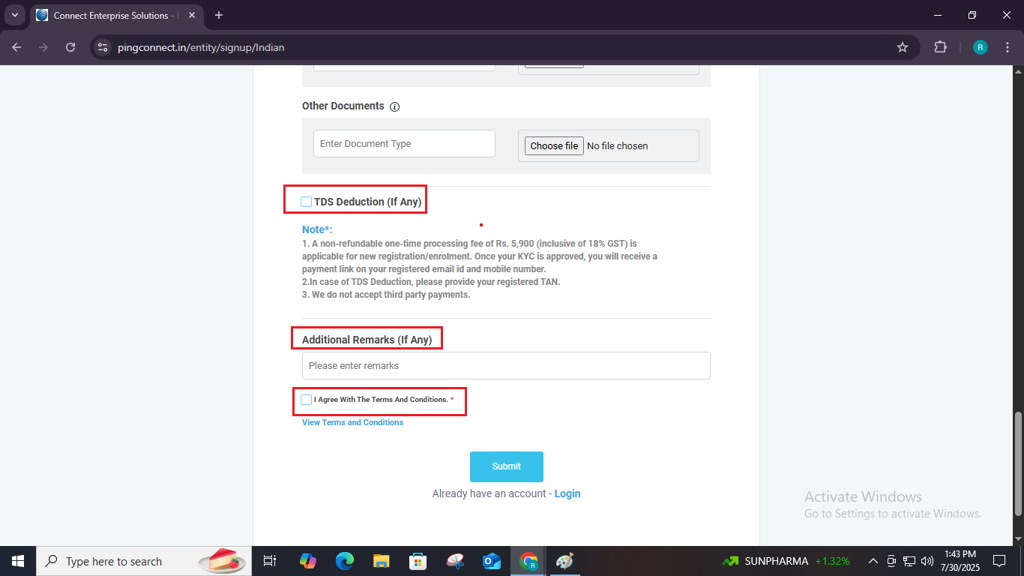
Step 8: Review all the entered information carefully, then click the Submit button to complete the registration.
Note: Please ensure all details are accurate before submitting the form to avoid any delays or rejections.
Step 9: A verification email will be sent to the email ID you provided in the form. You must verify it within 24 hours to complete the registration process.
Note – After you verified it, your application will be send to the operator for KYC Approval.
Step 11: Once verification is done, a payment link will be sent to you. Complete the payment within 4 hours to proceed with the final approval.
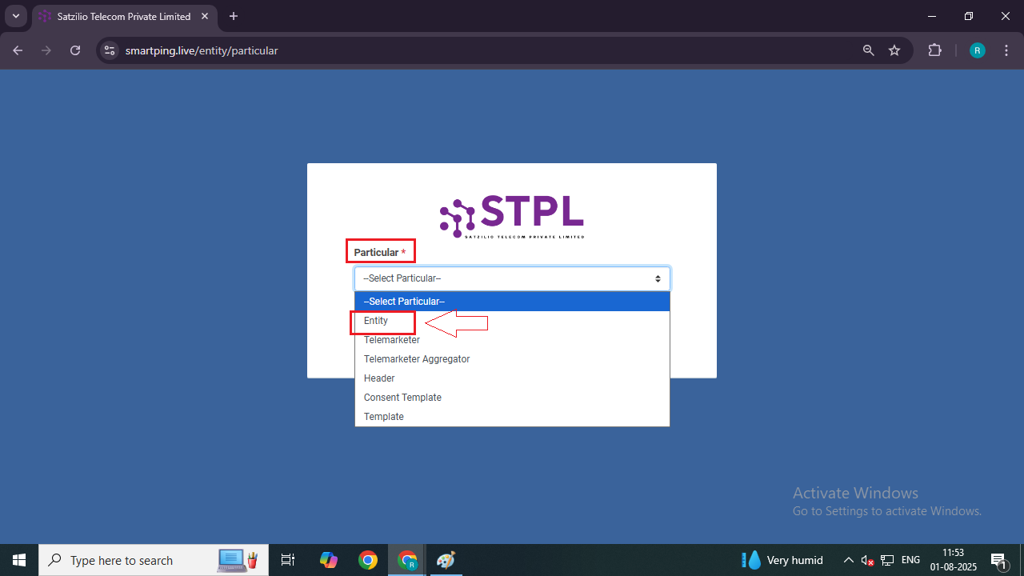
Step 12: Once all the above steps are completed, you can check your application status on the Home page by clicking Application Status located at the top right corner.

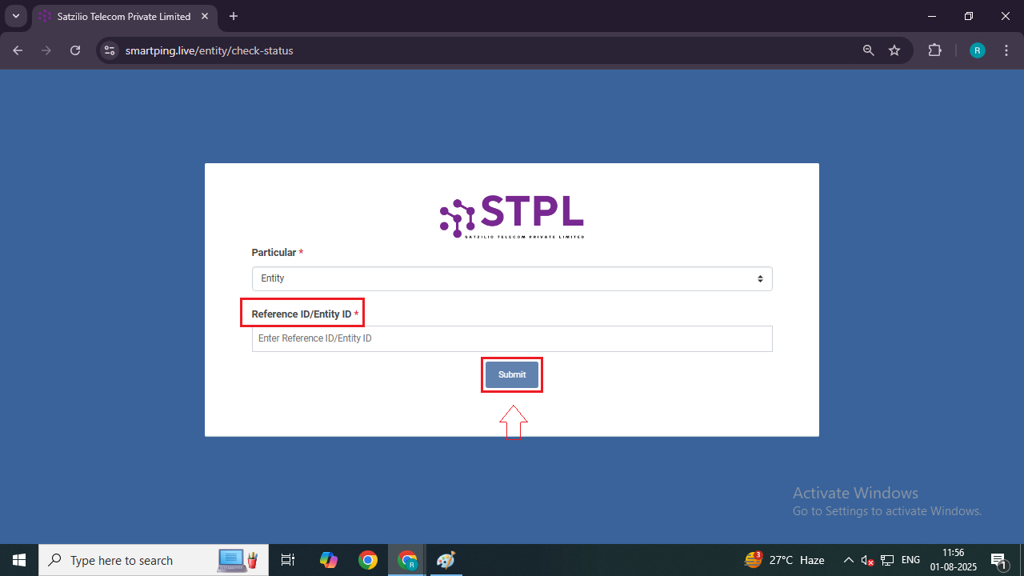
Step 13: On the next page, in the Particular, select Entity from the dropdown.
Step 14: Enter your Reference ID that you received in your email and click the Submit button to view your application status.
Once your application is approved, your login credentials will be sent to your registered email. You can then log in to your account and check your Entity ID.
Once this process is complete, you can proceed to the next step – Header Approval Process
FAQs
Q. What is the DLT Process?
Ans. DLT (Distributed Ledger Technology) is a blockchain-based registration system mandated by TRAI (Telecom Regulatory Authority of India) for businesses that want to send SMS to customers. It ensures transparency, prevents spam, and helps track promotional and transactional messages.
Q. Why is the DLT process important?
Ans. The DLT process is important because it is legally required by TRAI to send SMS through telecom operators in India. It helps prevent SMS fraud and ensures only verified businesses can send messages to users.
Q. What is an Entity?
Ans. An Entity in DLT refers to a business, organisation, or enterprise that wants to send SMS to customers. As part of the DLT process, every business must register as an entity on the DLT platform.
Q. What is an Entity ID?
Ans. An Entity ID is a unique identification number assigned to your business once it is successfully registered on the DLT platform.
Q. Can I send SMS without completing the DLT process?
Ans. No. As per TRAI guidelines, SMS cannot be sent through operators without completing the DLT registration. Messages from unregistered entities will be blocked by telecom operators.
Q. What will happen if my DLT application is rejected?
Ans. If your DLT registration is rejected, you will not be able to send SMS messages through telecom operators. You will need to review the reason for rejection, correct any errors, and then reapply.
To resubmit your form:
- Go to the Application Status section.
- Enter your Application Reference ID ( You will receive it on your registered email id ) and click on Submit button.
- On the next page, you’ll see the Resubmit option.
- Click on it, enter the OTP, and you’ll be able to fill out and resubmit your form.
Q. Is the DLT process required before creating an account on MsgClub?
Ans. No, you can create an account on MsgClub before completing the DLT process. However, to send SMS using MsgClub’s platform, your DLT registration must be completed and approved.
1 comment
Comments are closed.