
Once you’ve successfully completed Header Mapping, the next step in the DLT process is Template Mapping. This step ensures that your message templates are compliant with telecom regulations and are correctly mapped to your registered Sender ID.
In this blog, we’ll guide you through each step required to map your templates on MsgClub. Following these steps will allow you to send both Promotional and Transactional messages without any interruptions.
Learn More
Process Video
Step by Step Guide
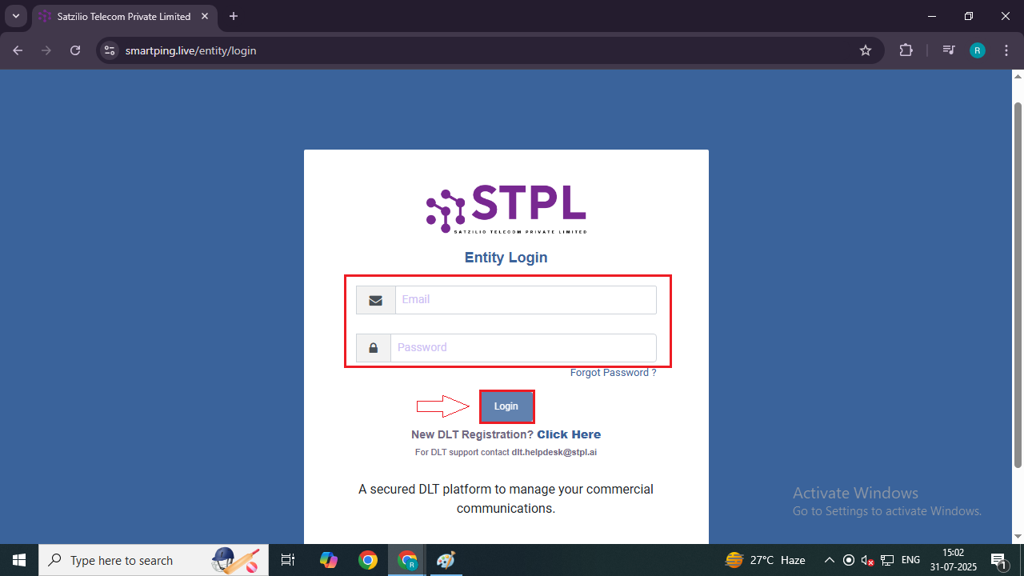
Step 1: Log in to your DLT Panel.
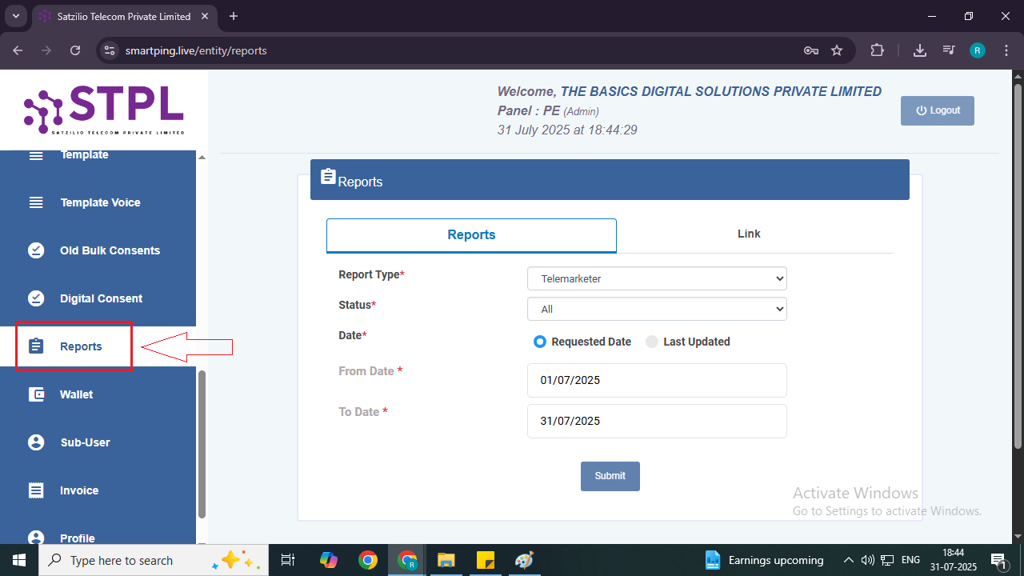
Step 2: Navigate to the ‘Reports’ section by selecting the “Report” option from the left-side panel.
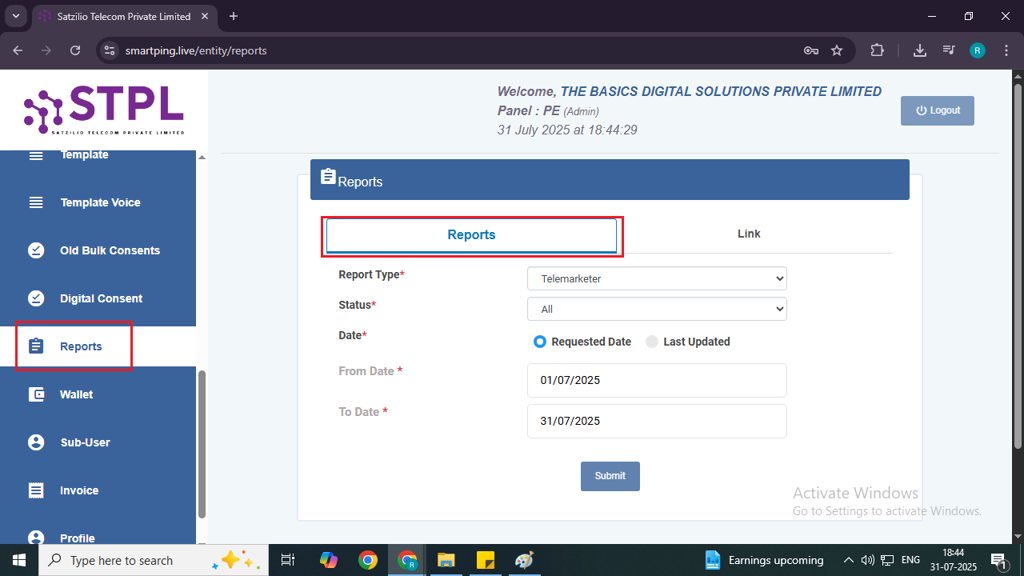
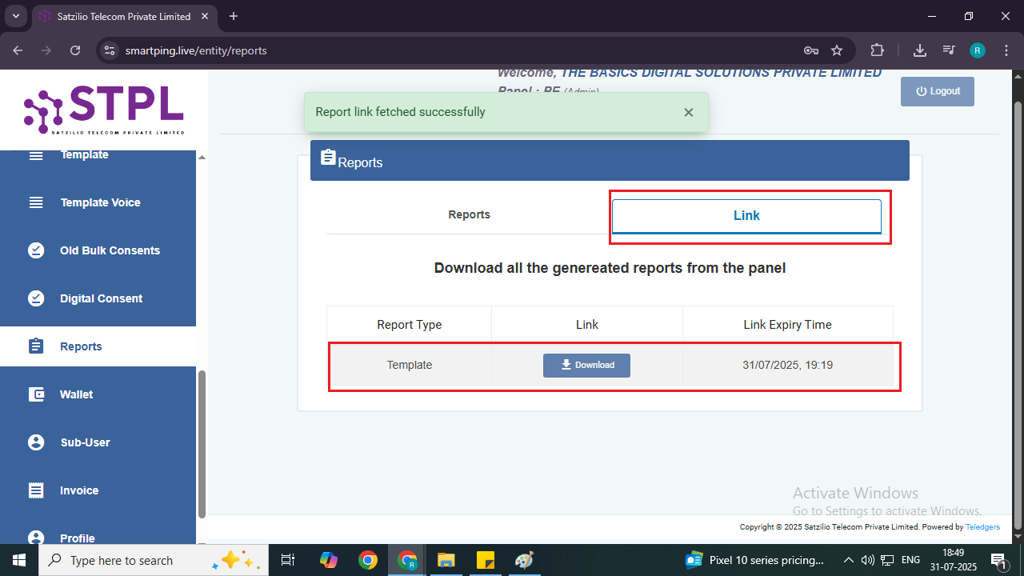
Step 3: In the Report page, select the “Report” tab. From the available options, choose the Template in report type.

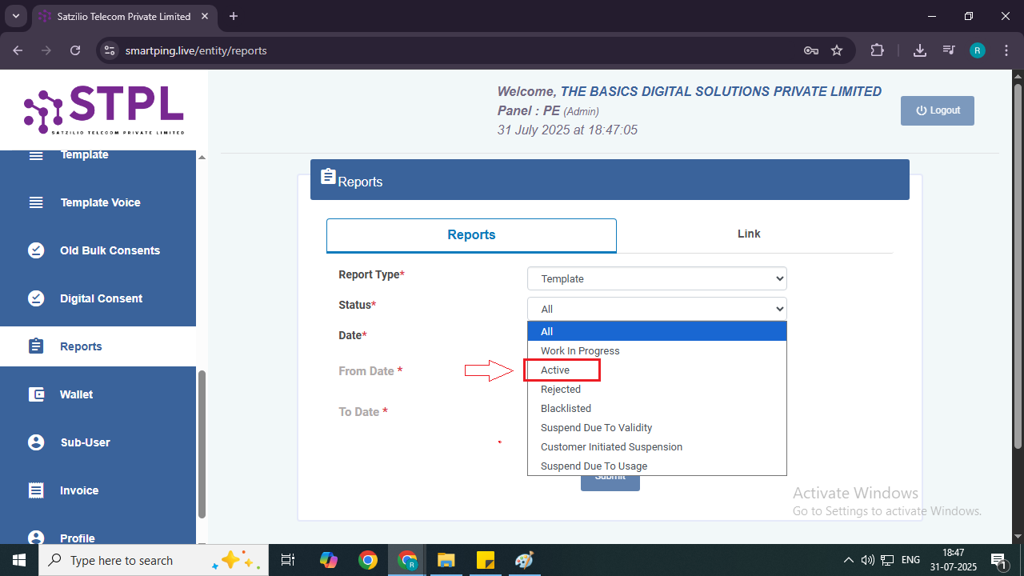
Step 4: In the Status dropdown, select Active.
Step 5: In the Date section, choose the date when you initiated the template process.

Step 6: Click on the Submit button.

Step 7: After submitting, go to the Link tab in the Report page, and your URL will appear there.
Step 8: In the Link column, click on the Download button. The file will begin downloading to your system.
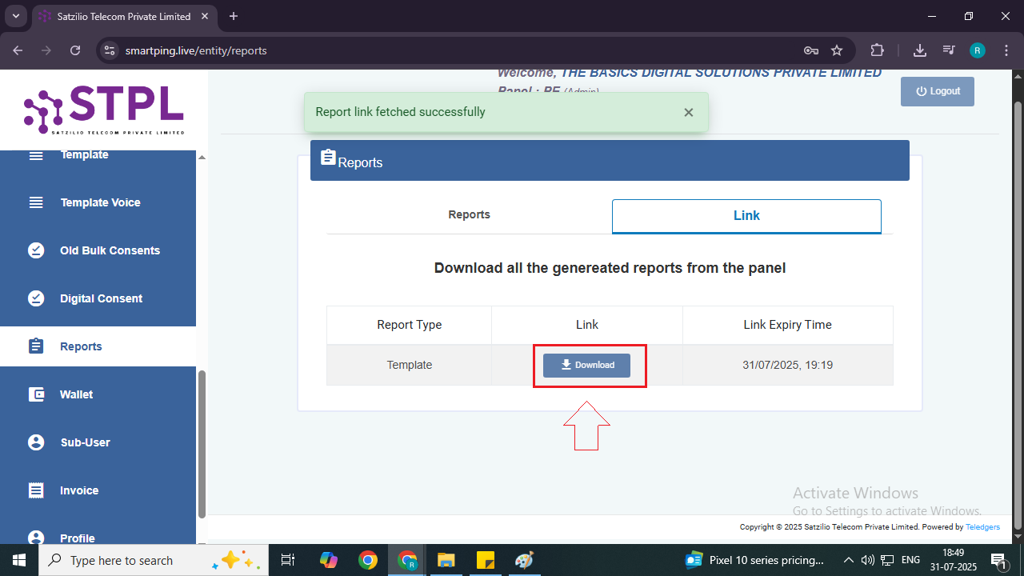
Important Note: Do not open the downloaded file. Simply upload it as is, without making any changes.
Upload File on MsgClub
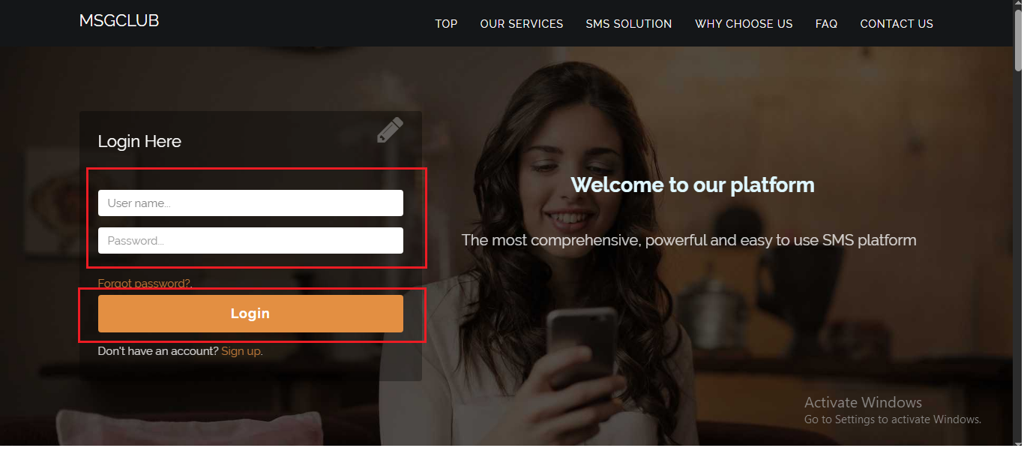
Step 1: Go to MsgClub Cloud Communication Platform Log in using your credentials.
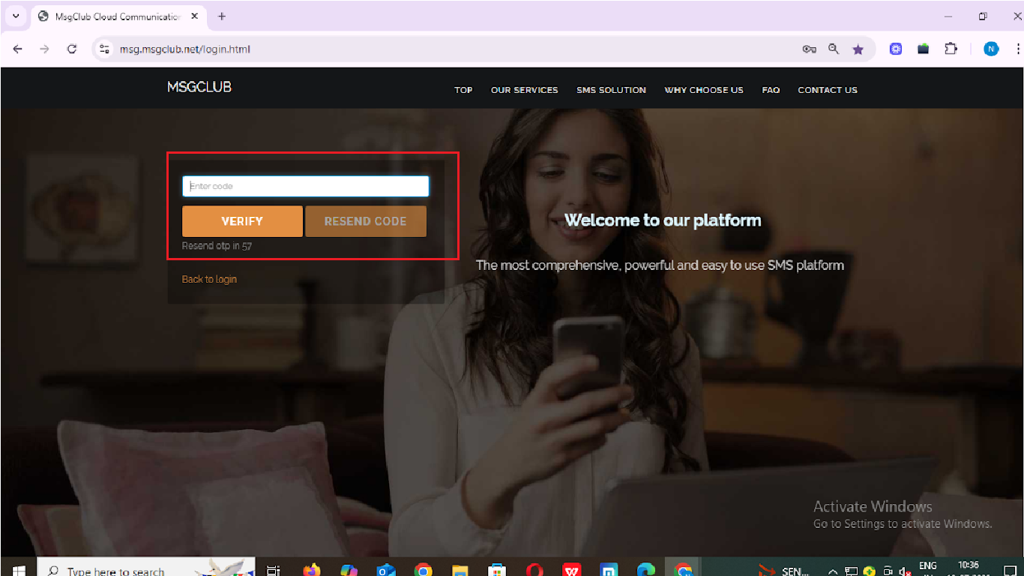
Step 2: You’ll receive an OTP on your registered mobile number. Enter the OTP and click Verify.
Step 3: Once verified, you’ll be redirected to the MsgClub dashboard, where you can select the Text Service.
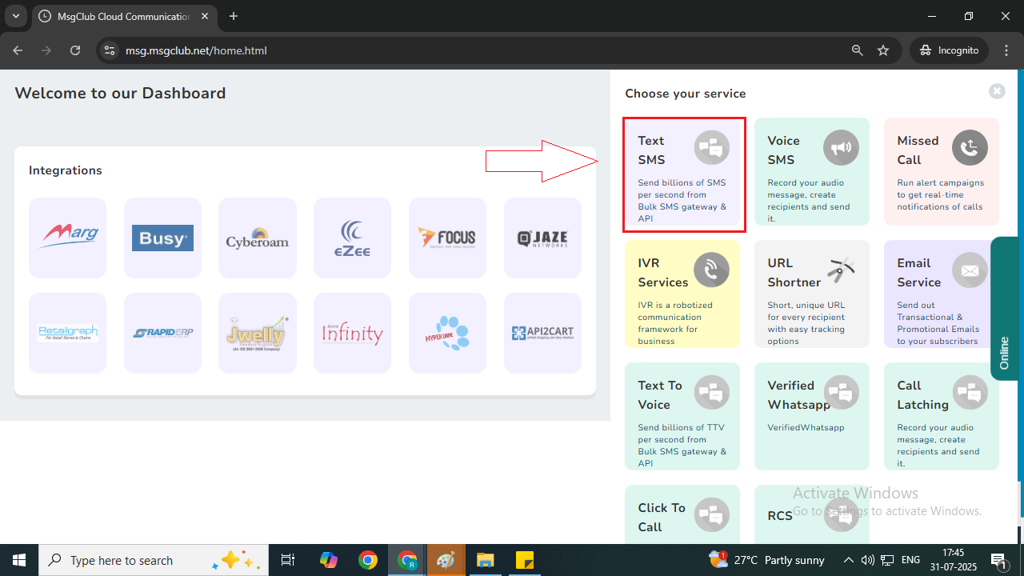
Step 4: On the left side of the screen, find and click on the “DLT” option to proceed.
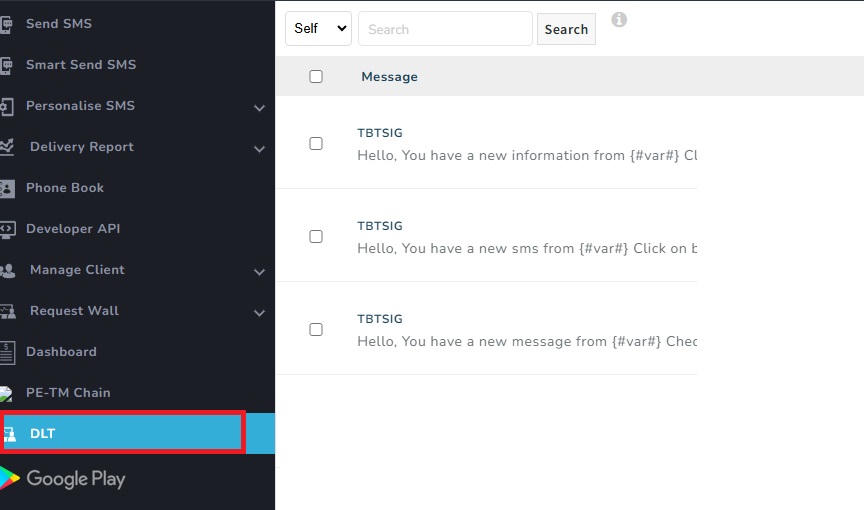
Step 5: In DLT page click on the Upload Operator DLT File button from upper right corner

Step 6: On clicking Upload Operator DLT File button a popup will appear , Here you can insert the template file.
- Select Provider– Here select your Provider from this list.
- Select Entity ID/ registration ID– Select the entity the one in which you want to map your file
- Choose file– Click on “Choose File” and select the Provider File from your device without opening it and click on “Upload” to proceed.
Note– SMS Panel Only supported CSV and XLSX format files.

Step 7: Once uploaded successfully, your template will appear in the panel.
Once this process is complete, you can proceed to the next step – Send SMS
FAQs
Q. What is the Template Mapping process?
Ans. The Template Mapping process involves linking your pre-approved message templates to your registered Sender ID. This ensures that all messages sent from your business are compliant with DLT regulations, properly tracked, and authorized for delivery.
Q. What is a Template?
Ans. A Template is a pre-designed message format that you wish to send to your customers. Templates can be for different purposes, such as Promotional, Transactional, or Service messages. The template includes both the message content and any variable for dynamic information like names or order numbers.
Q. Do I need to create a template to send SMS?
Ans. Yes, you need to create a template before sending SMS messages through the DLT system. The template must be approved by the telecom operator before use, ensuring that your messages comply with TRAI regulations.
Q. Do I need to pre-approve my template?
Ans. Yes, you need to get your template pre-approved by the telecom operator before sending it out. Once approved, the template can be mapped to your Sender ID and used for sending messages in compliance with DLT regulations.
2 comments
Comments are closed.