
Upload CSV file with client information like name, number etc and use this information to send personalize message
Learn More
Process Video
Step by Step Guide
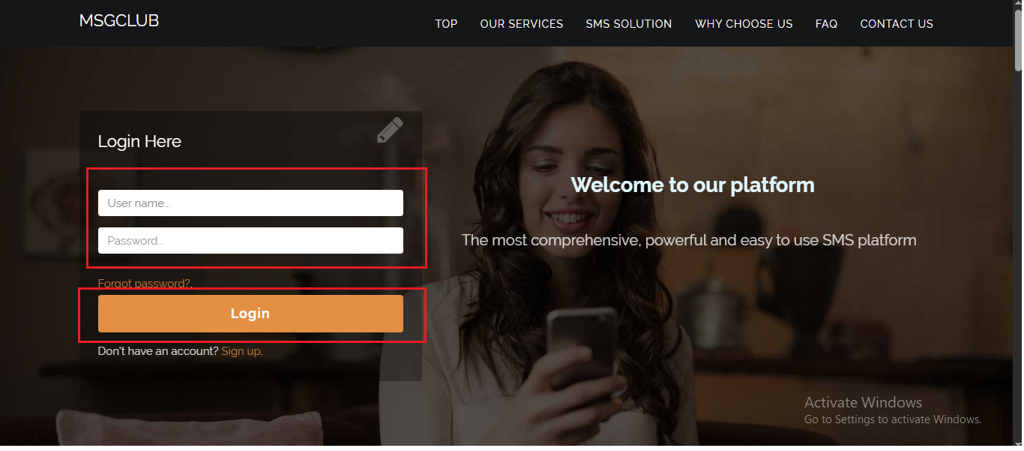
Step 1: Sign in to MsgClub using your Username and Password.
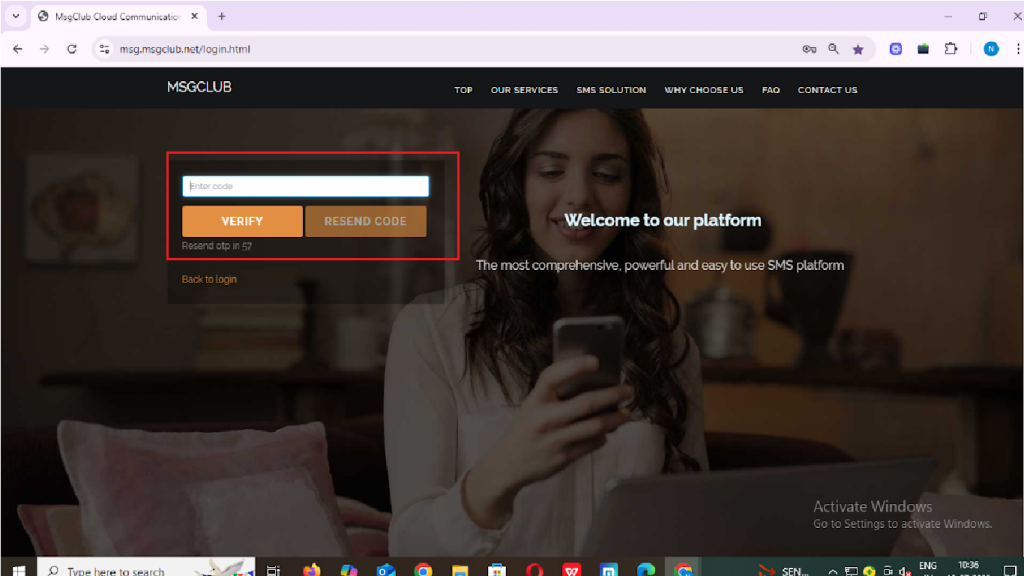
Step 2: You’ll receive an OTP on your registered mobile number. Enter the OTP and click Verify.
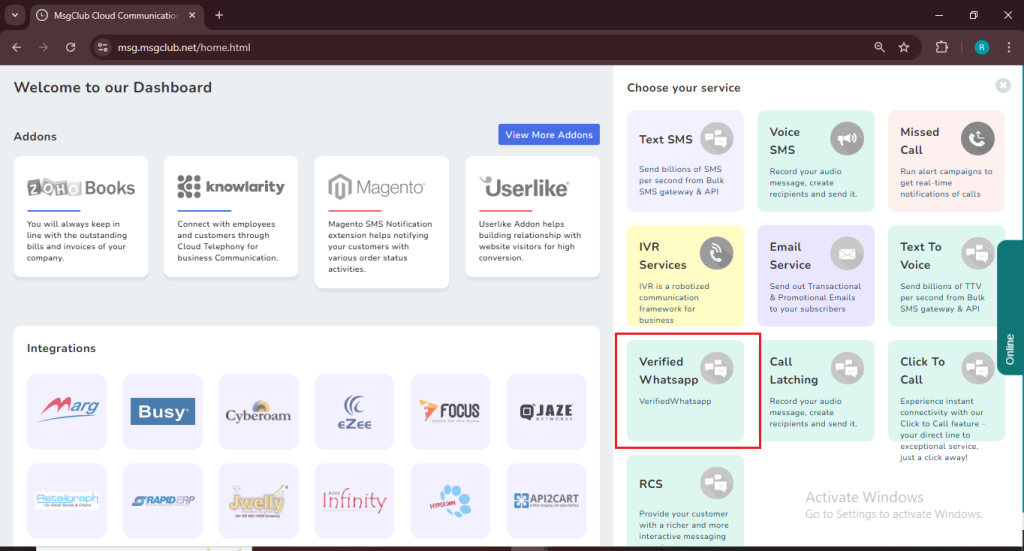
Step 3: From the Dashboard, select Verified WhatsApp Service.
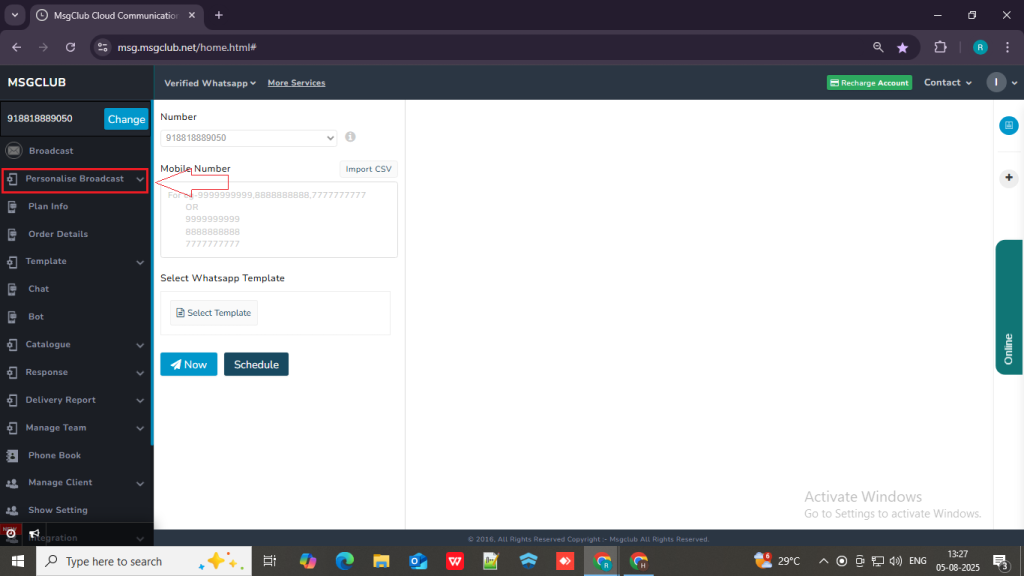
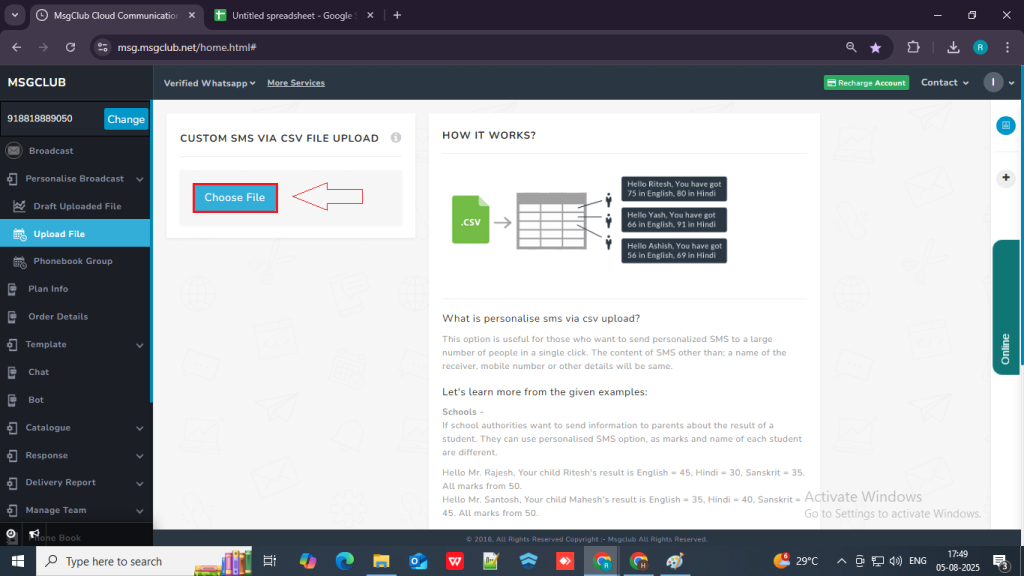
Step 4: In the left-hand panel, click on Personalize Broadcast option, then select Upload File.
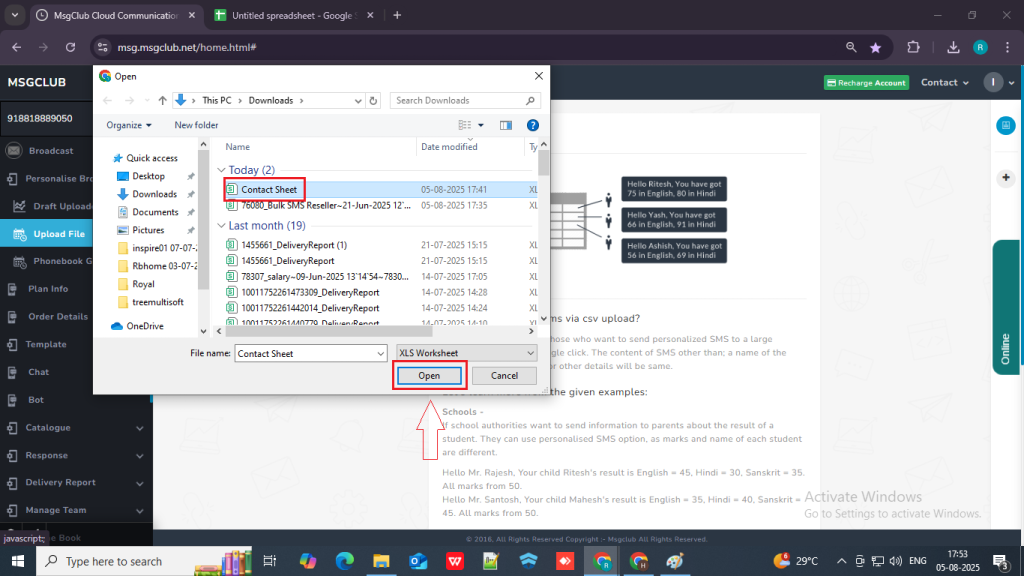
Step 5: On the Upload File page, click the Choose File button then a popup will open showing your system files, select the CSV file. and click on the open button
Note – Make sure to select the file that contains client contact numbers along with any personal information you want to use in your message.
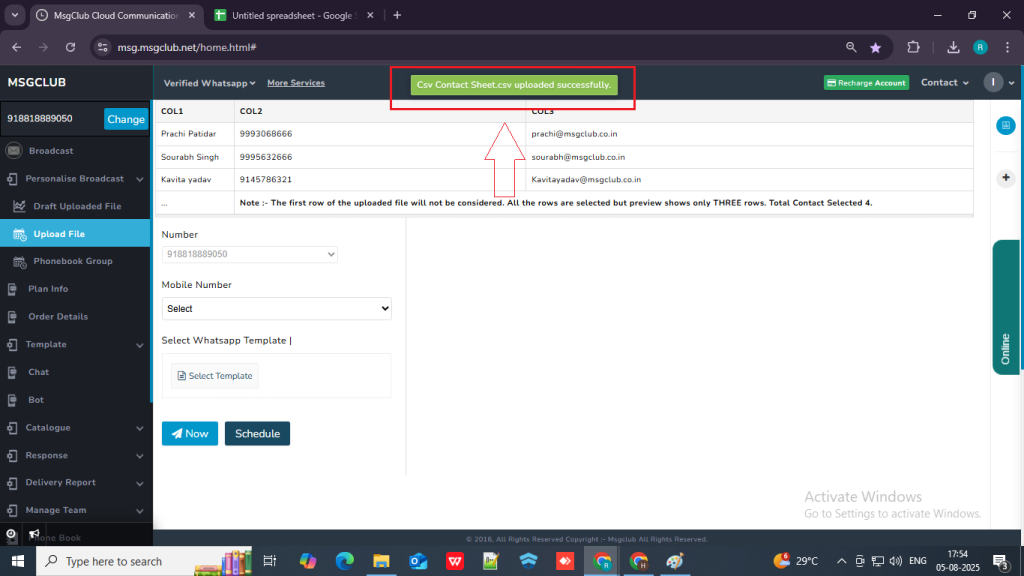
If your sheet is uploaded successfully you will get a message above “csv [file name] uploaded successfully“ and personalize send screen will open.
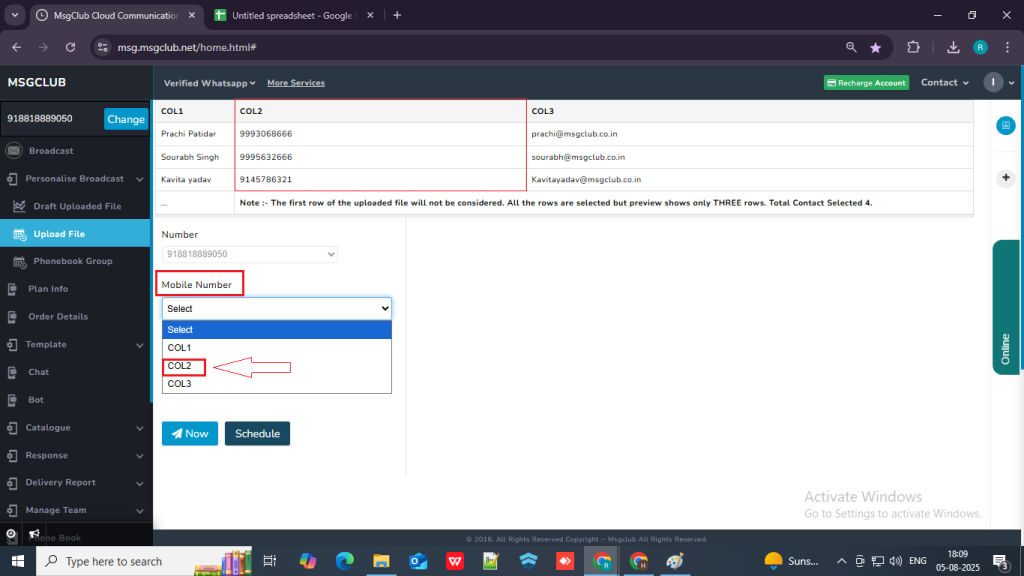
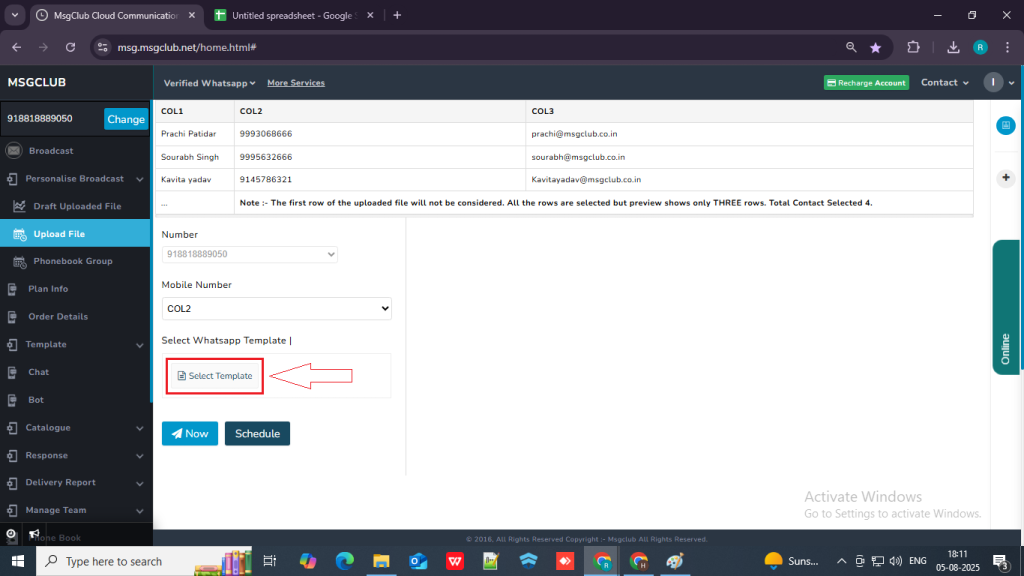
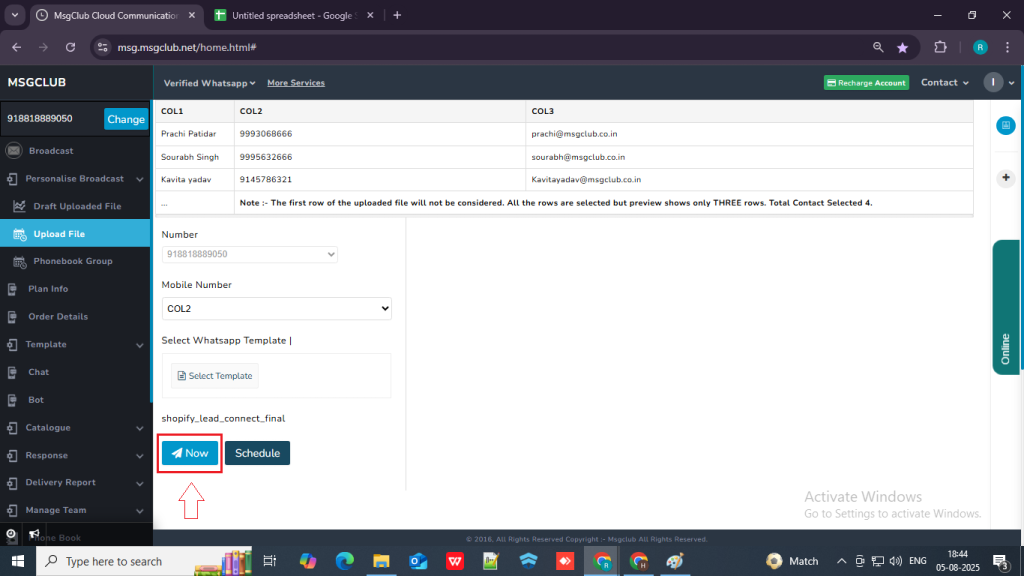
Step 6: On the Personalized Send screen, go to the Mobile Number dropdown and select the column from your sheet that contains the mobile numbers.
Step 7: Click on select template button, then a popup will open.
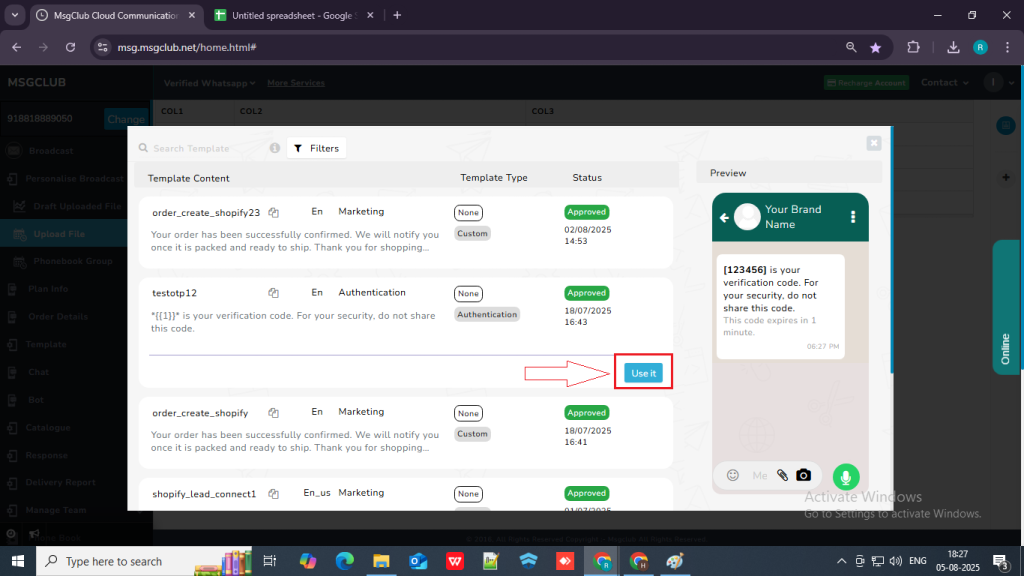
Step 8: In the popup, select the template you want to send to your customers. Once you click on the template, a “Use It” button will appear.
Note: Make sure to choose a template that contains variables, so you can insert personalized information from your uploaded sheet.
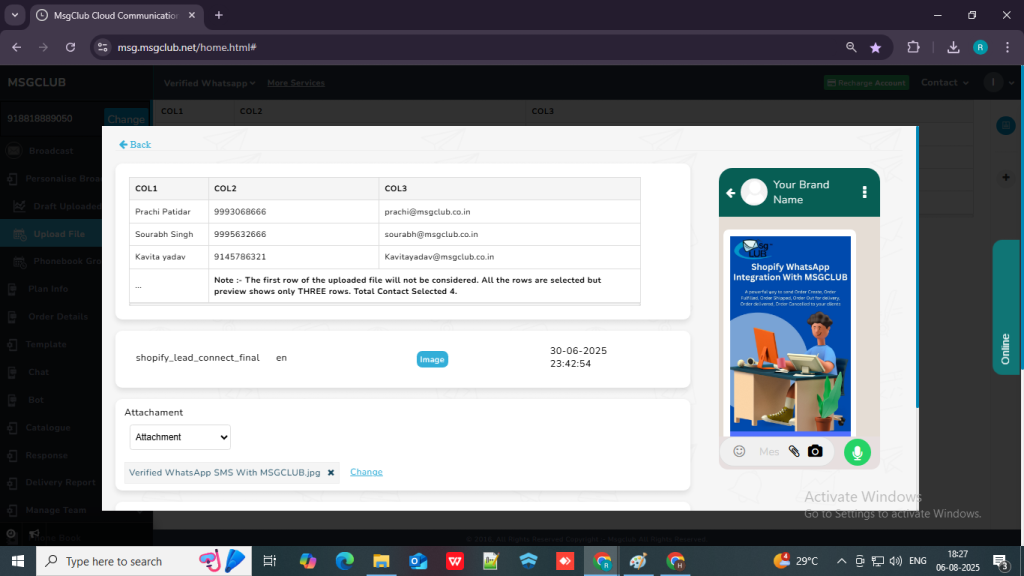
Step 9: Click the “Use It” button. You will be taken to the next page, where you can select which information from your file you want to include in your WhatsApp message.
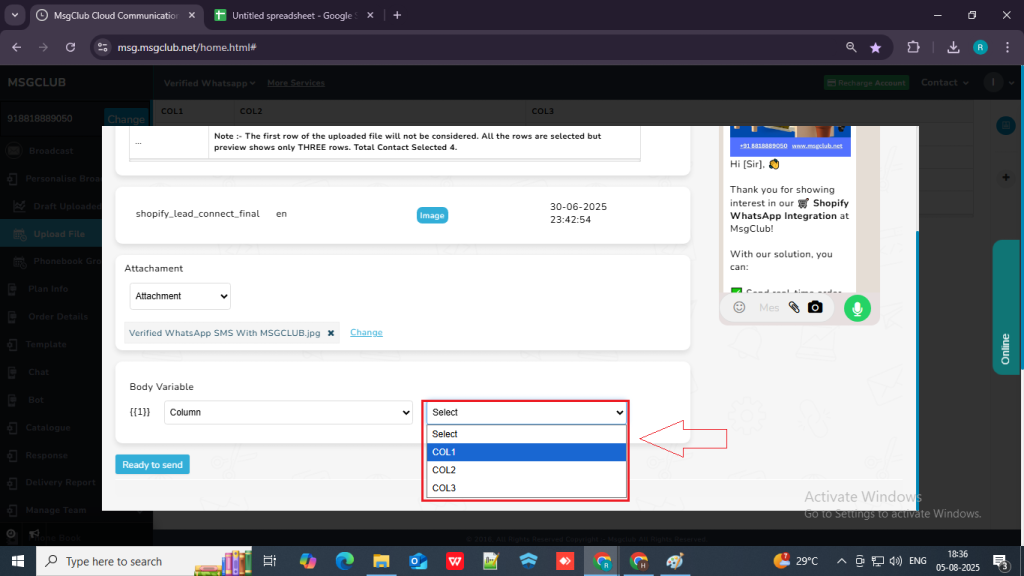
Step 10: In the Body Variable section, select Column option from the dropdown.
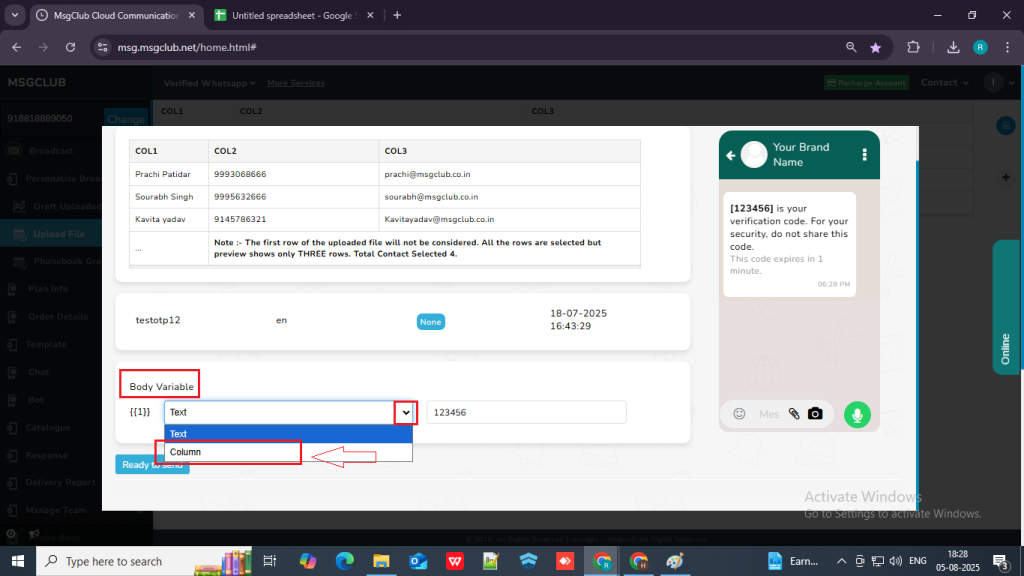
Step 11: A dropdown will appear next to it. From that dropdown, select the column containing the information you want to include in the WhatsApp message.
Step 12: Once you’ve selected the column for the variable, click the “Ready to Send” button.

Step 13: After clicking the “Ready to Send” button, you will be redirected back to the Send screen. Click the “Now” button to send the message and it will be send immediately.
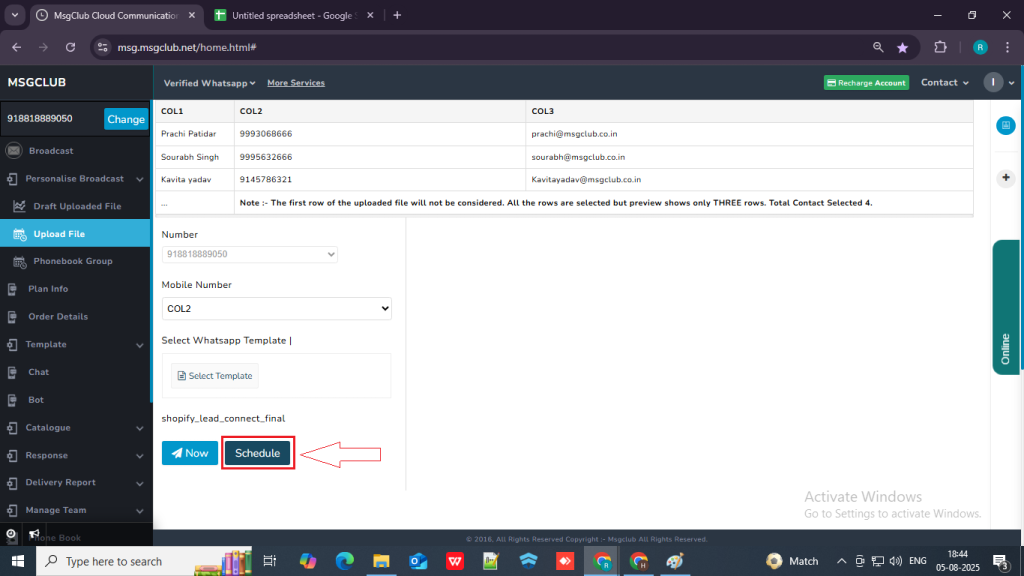
Schedule Option – If you want to send the message at a later time, click the “Schedule” button.
- A popup will appear where you need to select the date and time for when you want the message to be sent.

- If you want to multi-schedule the message (i.e., schedule it to be sent at more than one time), click the “+” button next to the scheduled date.
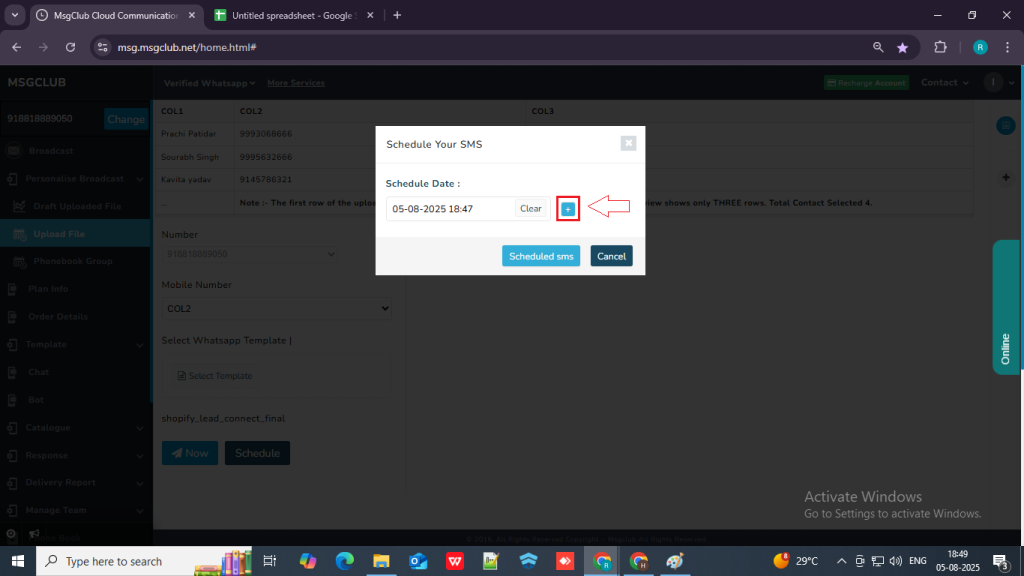
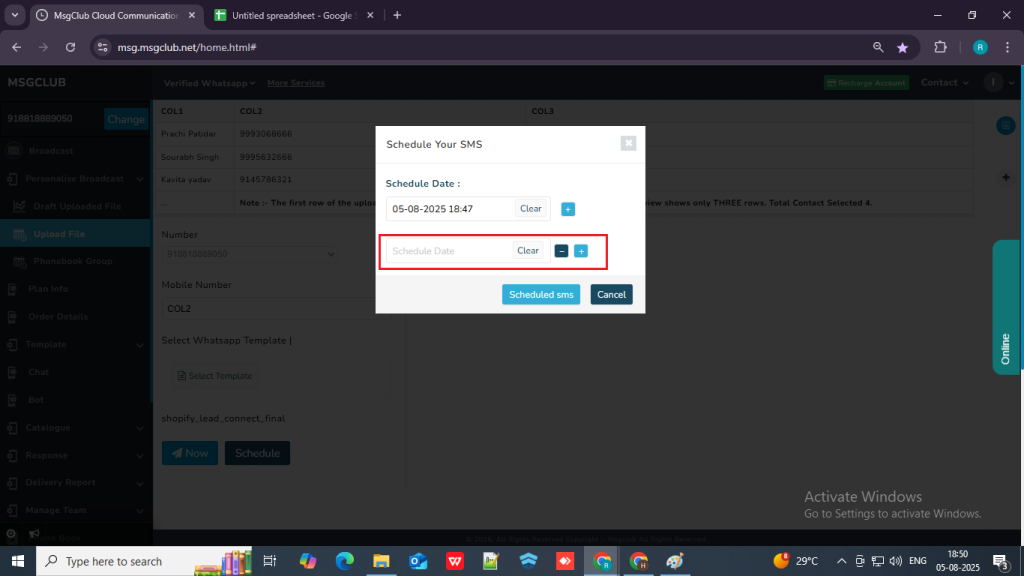
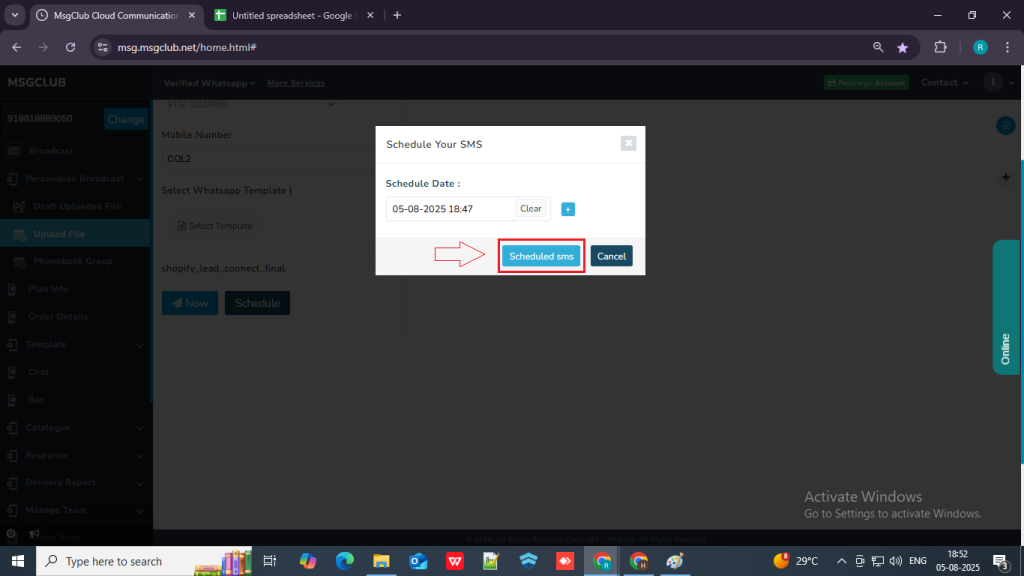
- Once you’ve selected the scheduled time, click the “Schedule SMS” button. Your message will then be scheduled to be sent at the selected time.
Learn How to Use Other Personalise Broadcast Options Like:
FAQs
Q. What is the “Upload File” option?
Ans. The “Upload File” option allows you to upload a file (in CSV format only) containing customer data such as names, phone numbers, and other details. This file is used to send bulk SMS messages with personalized content to each customer.
Q. I have a file with customer information and I want to use this information in the message that I am sending to the client ?
Ans. Yes, you can use customer information to personalize each message. You can upload the file, the MsgClub reads the data (e.g., name, city, order ID) and allows you to insert those fields into your message using variable.
Q. Can I send personalized messages to my customers with their name in the message?
Ans. Yes, absolutely! With the personalize broadcast feature, you can include customer-specific details such as their name, email id, mobile number, order Id in each message. For example:
“Hello [Name], your order #[OrderID] has been shipped!”
Each message will be tailored to the individual customer using the data from your file.
Q. Which format can I upload on MsgClub Verified WhatsApp?
Ans. Your file needs to be in csv format and only then it will be uploaded in our interface.
3 comments
Comments are closed.