
To start the WhatsApp Business API, the user needs to add their card on their meta business accounts.
You can pay for messaging with a credit card via Visa or Mastercard. The meta currently doesn’t accept American Express or digital payments such as PayPal.
Note: When you set up the payment method, you may be required to provide your tax information as part of your business information.
Learn More
Process Video
Step by Step Guide
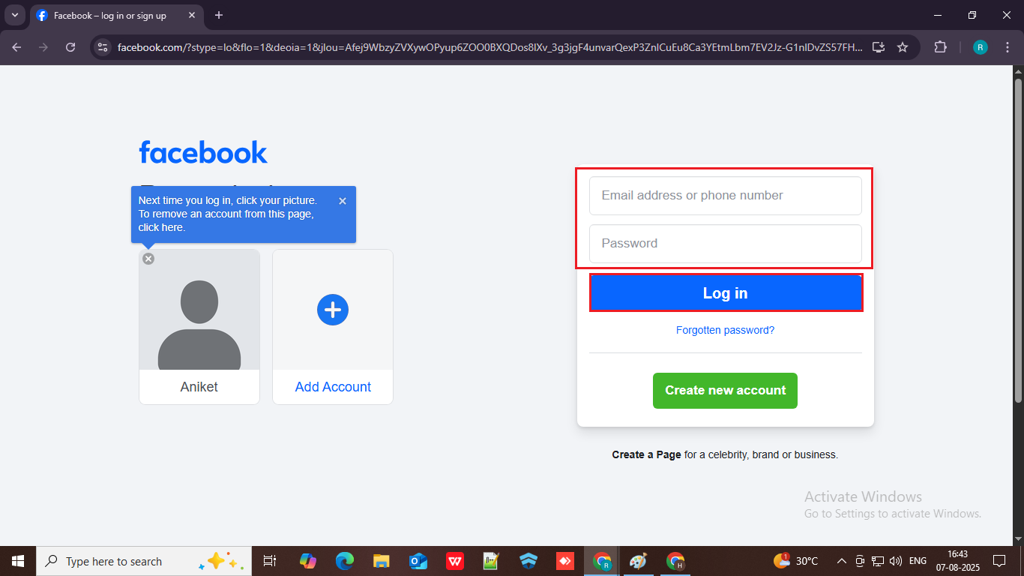
Step 1: Login to your Business Facebook Account.
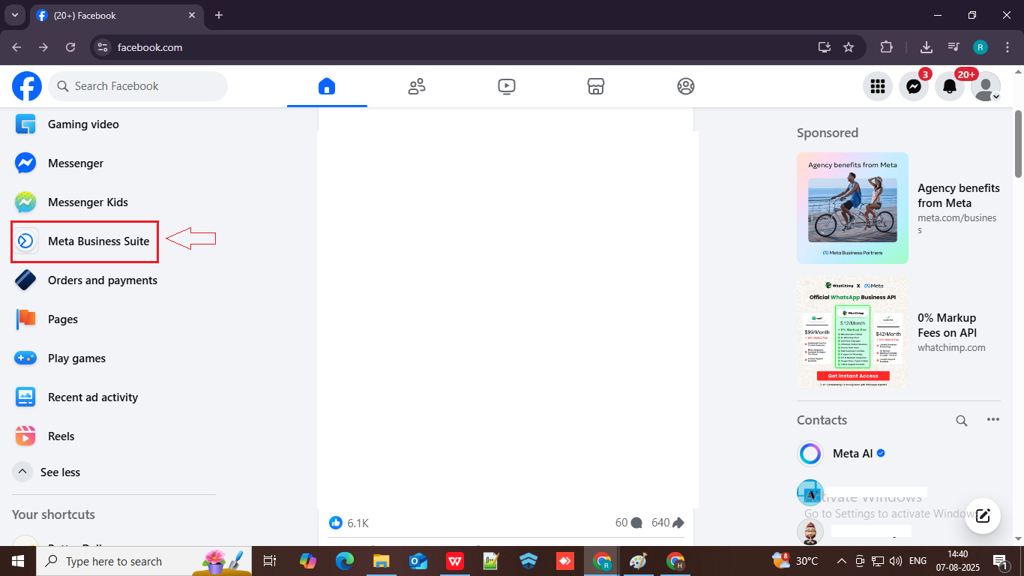
Step 2: Select Meta Business Suite from the left panel.
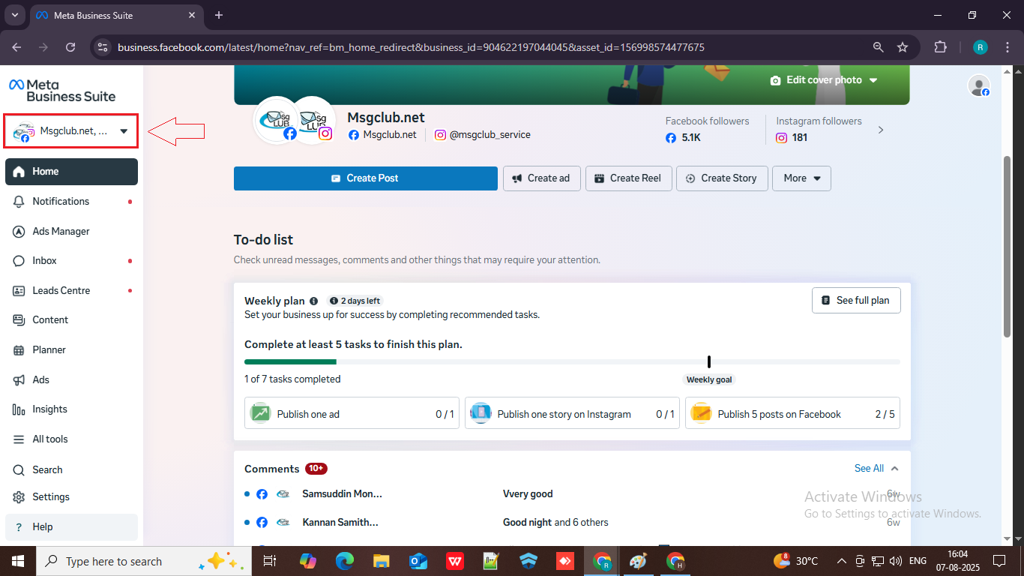
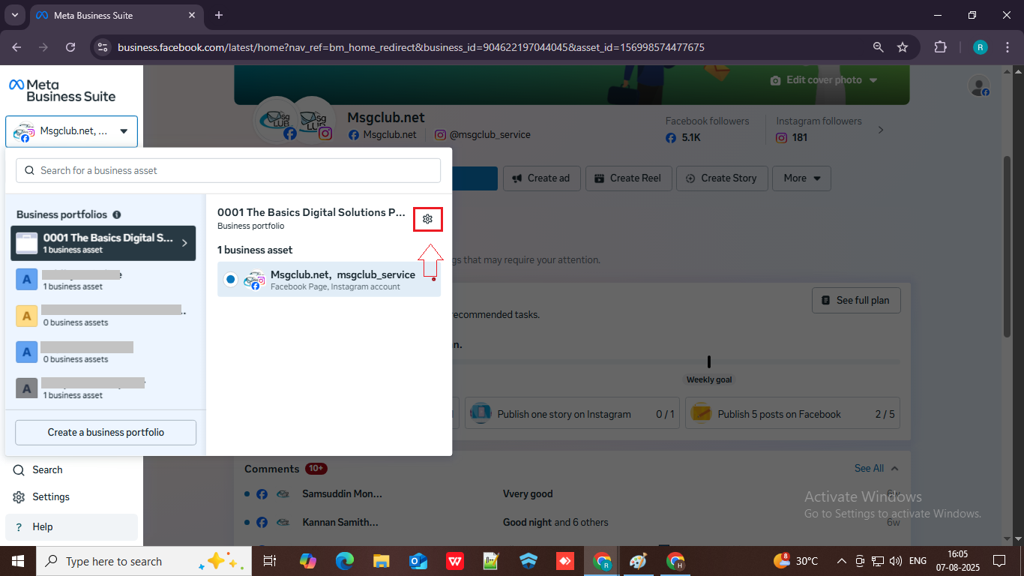
Step 3: Click the drop-down button in your profile in the upper left side of the screen and then click on the Settings icon of the business portfolio in which your WABA account is created.
Step 4: In the Business setting page go to the left side options and click on WhatsApp Account under “Accounts” section.
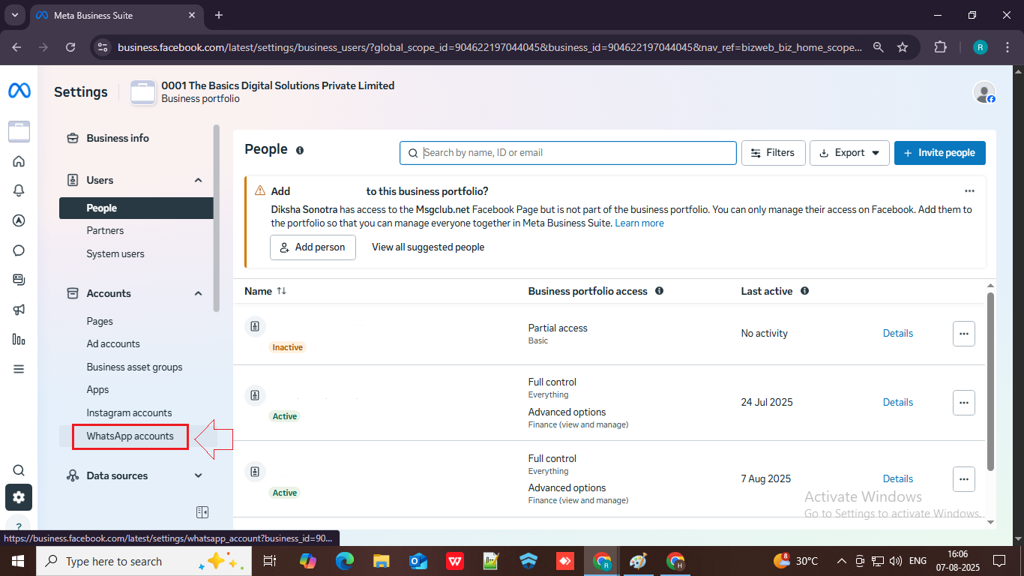
Step 5: In your WhatsApp Account, select your account name. Then, navigate to the Summary tab. As shown in the image below, click on the three-dot menu (…) in the top-right corner.
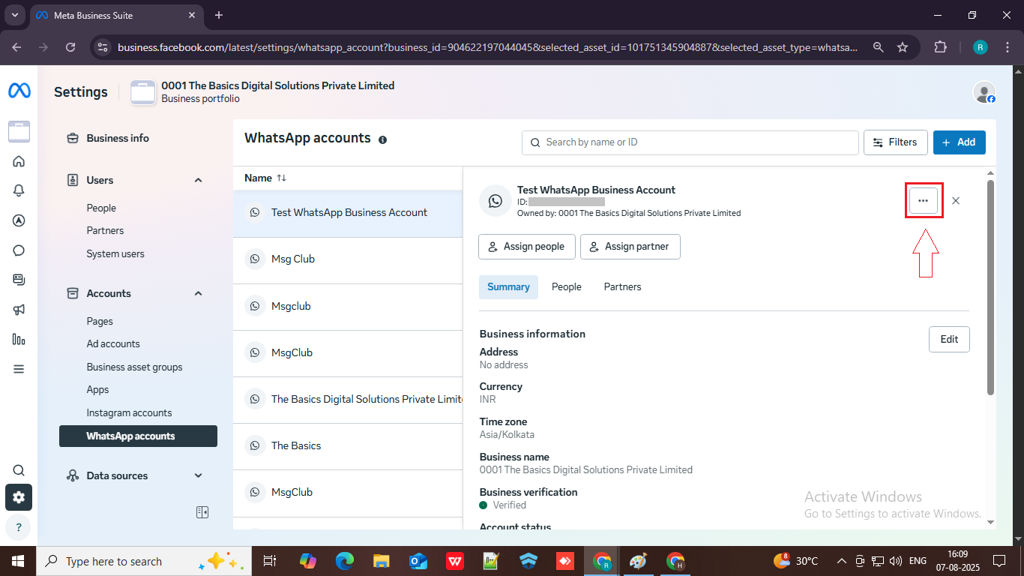
Step 6: From the three-dot menu, select the Payment Settings option. Click on it to proceed.

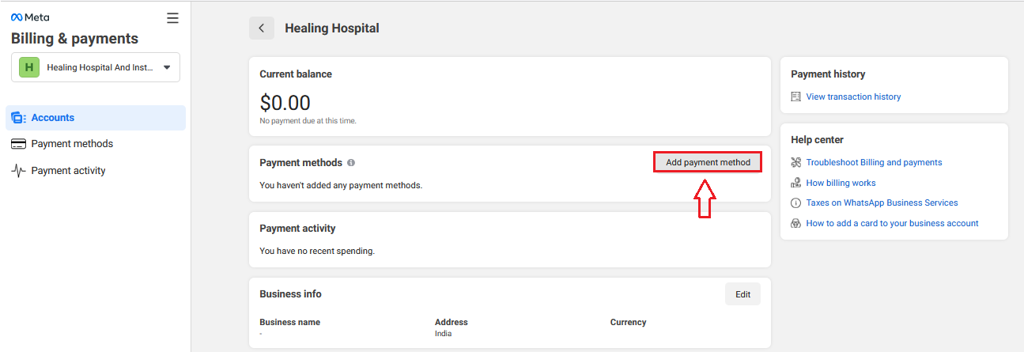
Step 7: In the Payment settings page of Billing & payments, click Add payment method.
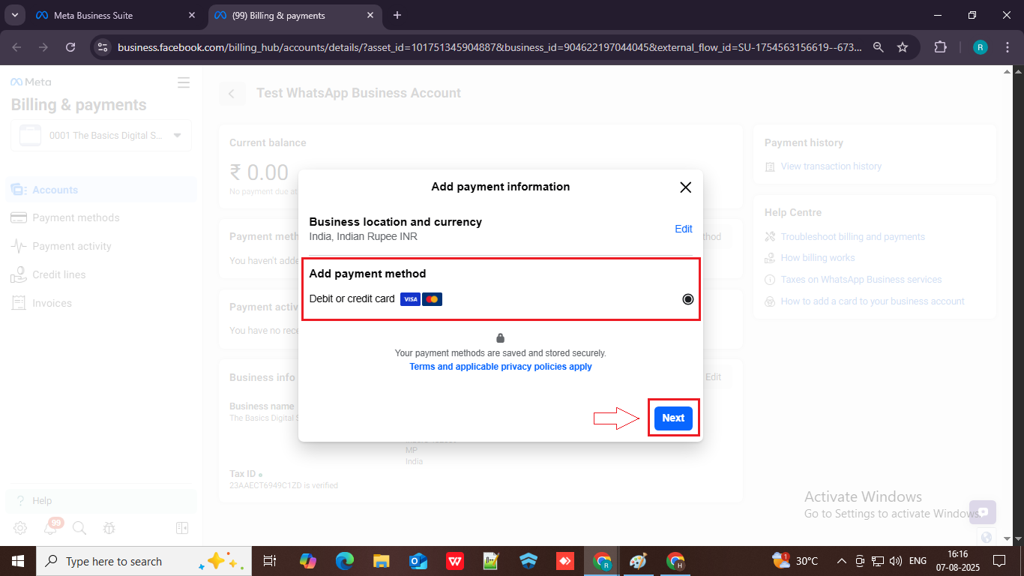
Step 8: In the Add Payment pop-up, select Debit or Credit Card as your payment method, then click the Next button to continue.
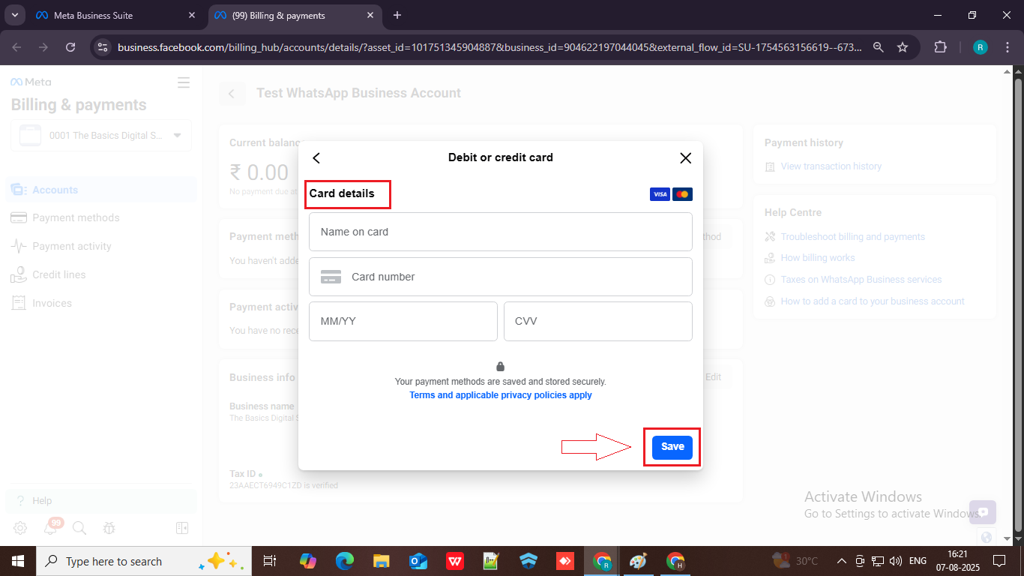
Step 9: Fill in your Debit or Credit card details and click on Save Button
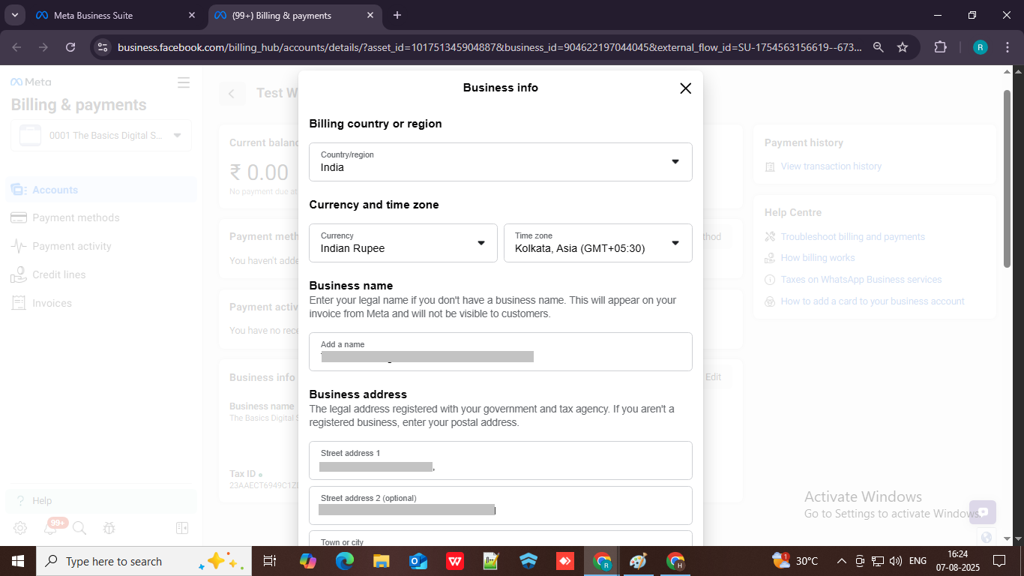
Step 10: Add your business details with GST by clicking on the Edit button in the “Business Info” section.

Step 11: Fill in the required details:
- Billing Country or Region – Select your country.
- Currency and Time Zone – Choose your country’s currency and time zone.
- Business Name – Enter your business name.
- Business Address – Provide your complete business address.
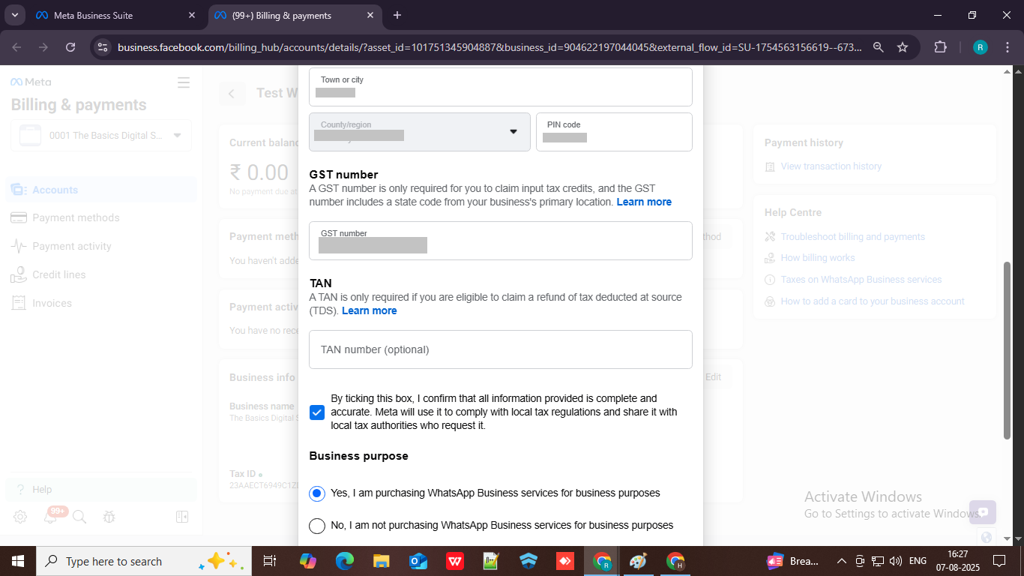
- GST Number – Enter your GST number.
- Tick the checkbox to agree to the terms and conditions.
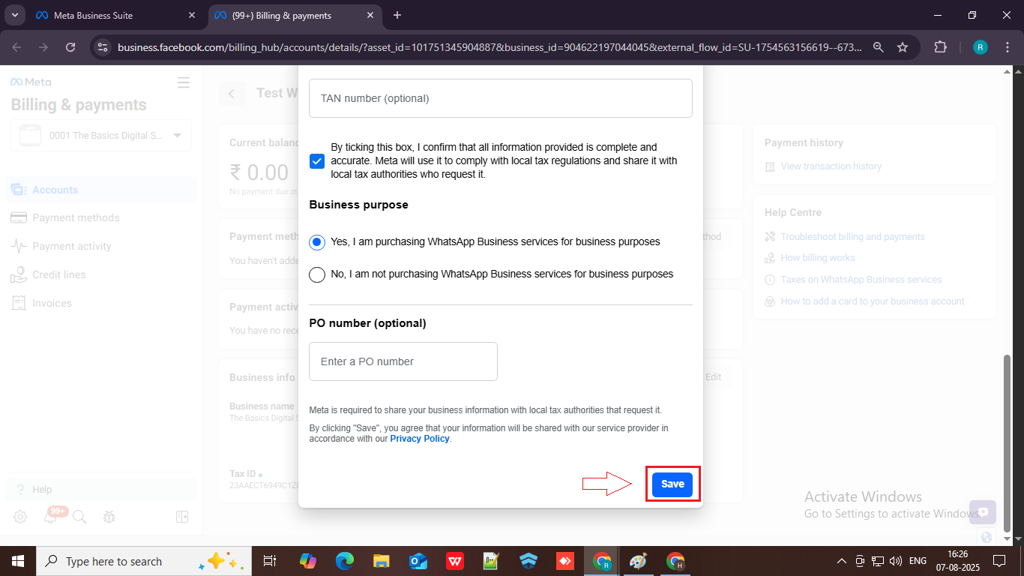
- Business Purpose – Select the purpose of using the WhatsApp Business account.
After filling in all the details, click the Save button to proceed.
Note: If you do not have a GST number, you can still proceed by entering your business details in the GST section. Alternatively, you may use the GST number of another registered firm.
The credit card is added to your WhatsApp Business platform account. You can view the added credit card in the Settings tab.
Next Step:
Once you’ve completed these steps, you can move on to the Create WhatsApp Template
FAQs
Q. What is the card adding process in Meta?
Ans. The card adding process in Meta involves entering your debit or credit card details to set up a payment method for your WhatsApp Business Account.
Q. Is it necessary to add my card in Meta to use Verified WhatsApp?
And. Yes, if you plan to send messages (also known as template messages) via the WhatsApp Business API, adding a valid payment method is mandatory.
Q. Do I need a GST number during the card adding process?
Ans. Adding a GST number is optional, but recommended for businesses in India. If provided, GST invoices will be generated under your company’s GST ID, which can help with tax input credits. If you don’t enter it, Meta will still charge you, but the invoice won’t include your GST details.
Q. Can I start sending WhatsApp messages after adding my card in Meta?
Ans. Yes, once your payment method is successfully added and your WhatsApp Business account is approved and verified, you can start sending messages—especially template messages (like alerts, OTPs, etc.). However, if your number is still in review or the templates are not yet approved, you’ll need to complete those steps first.
3 comments
Comments are closed.